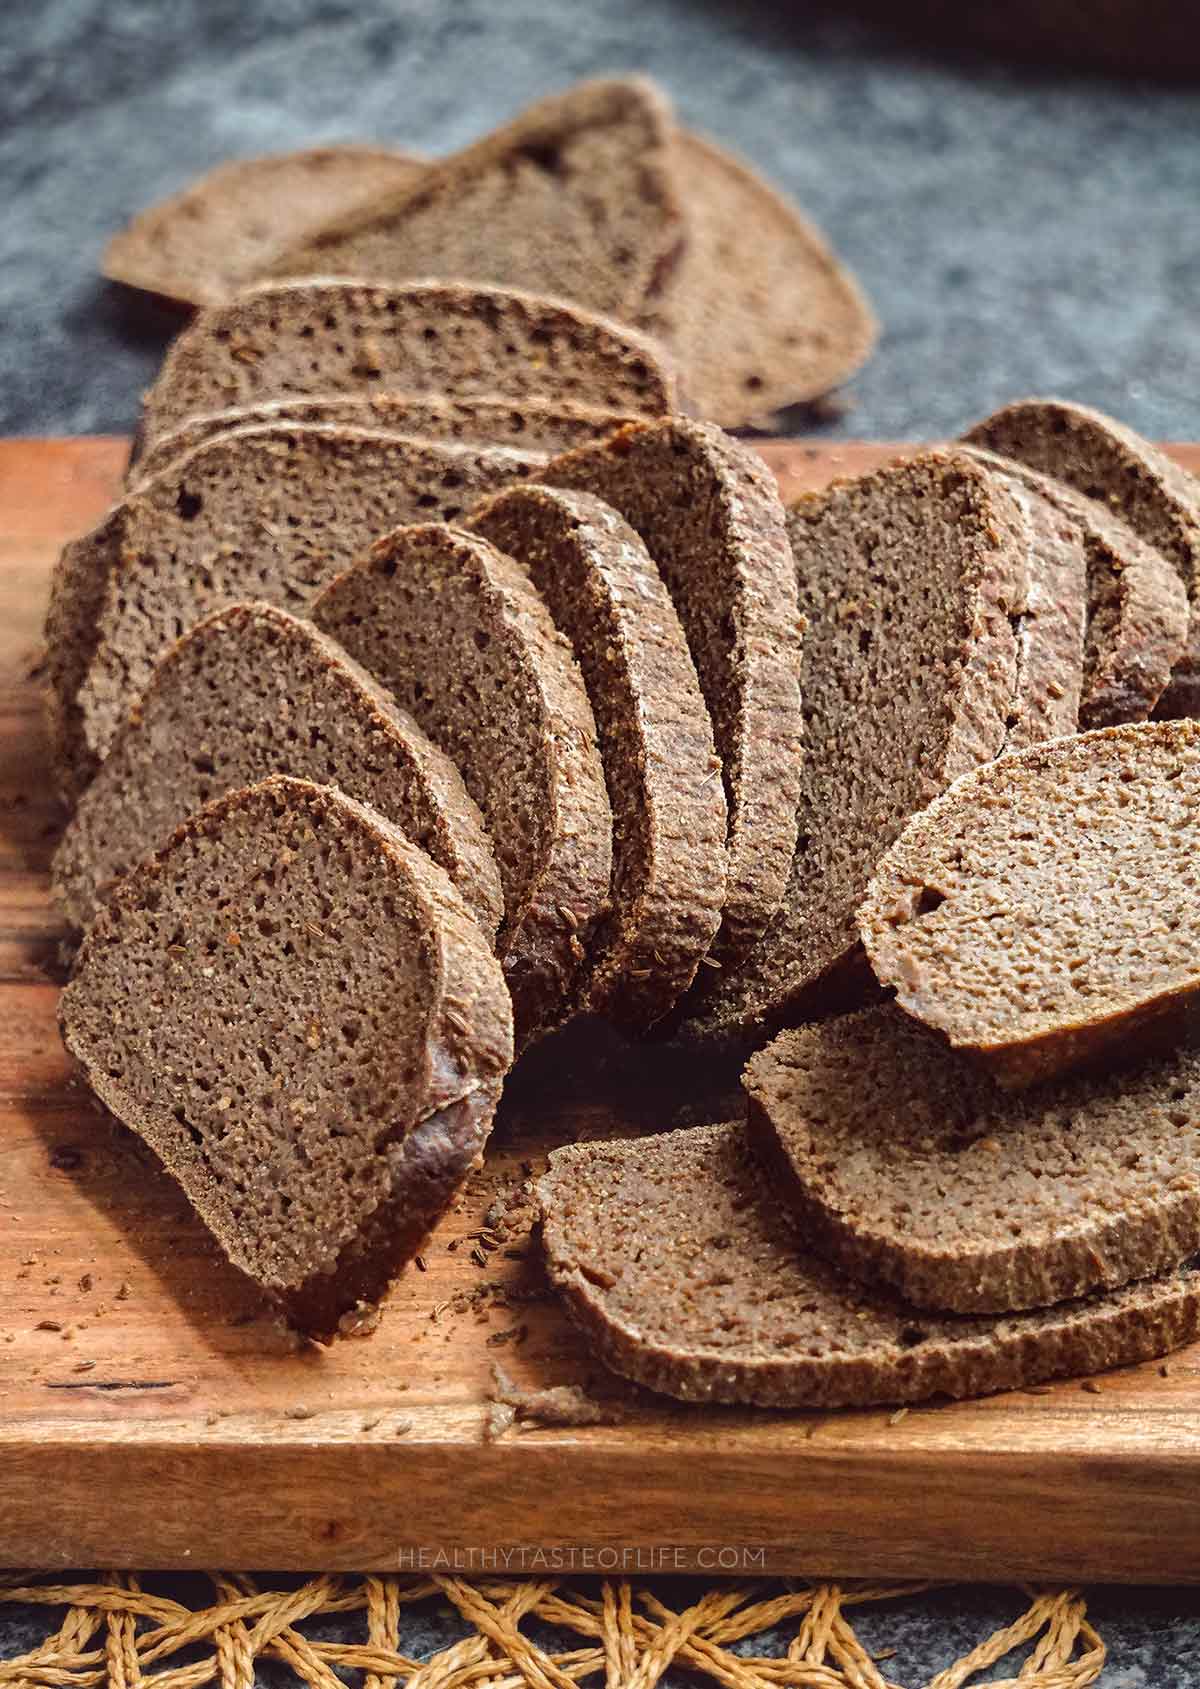
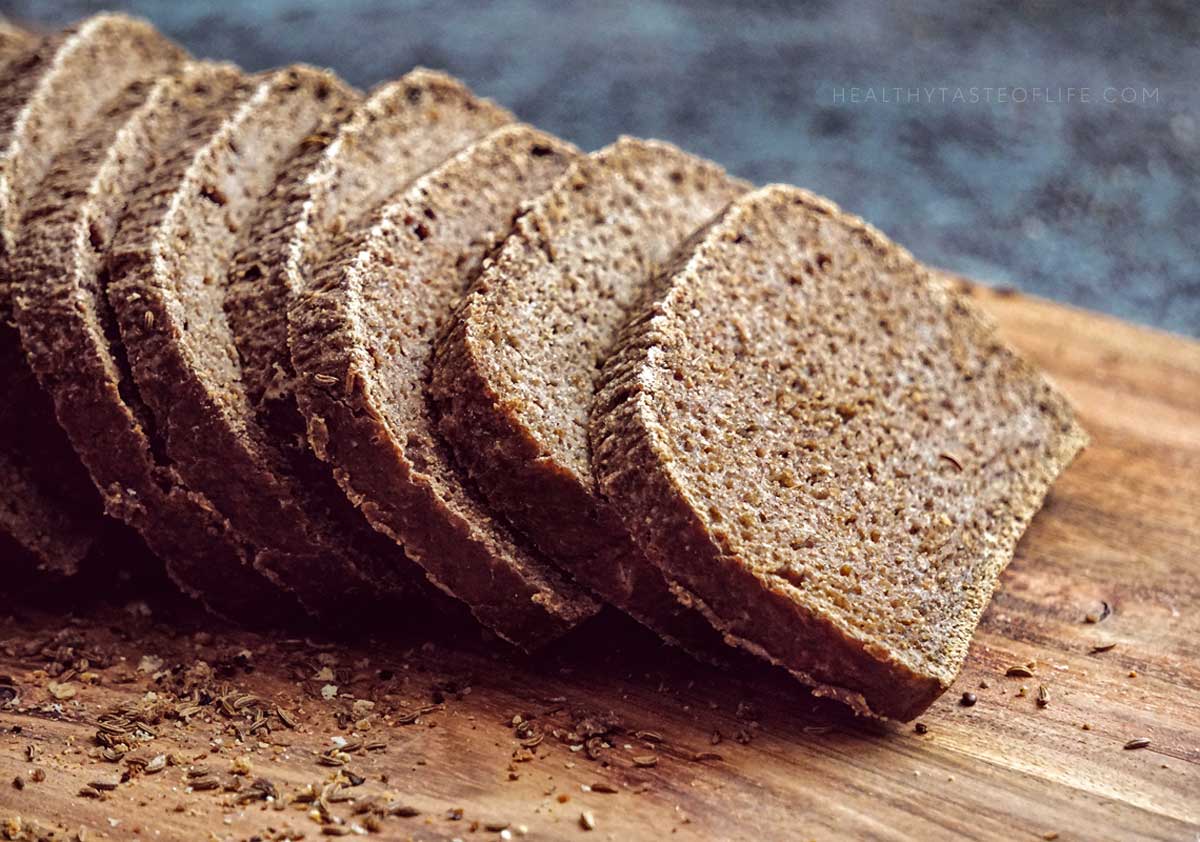
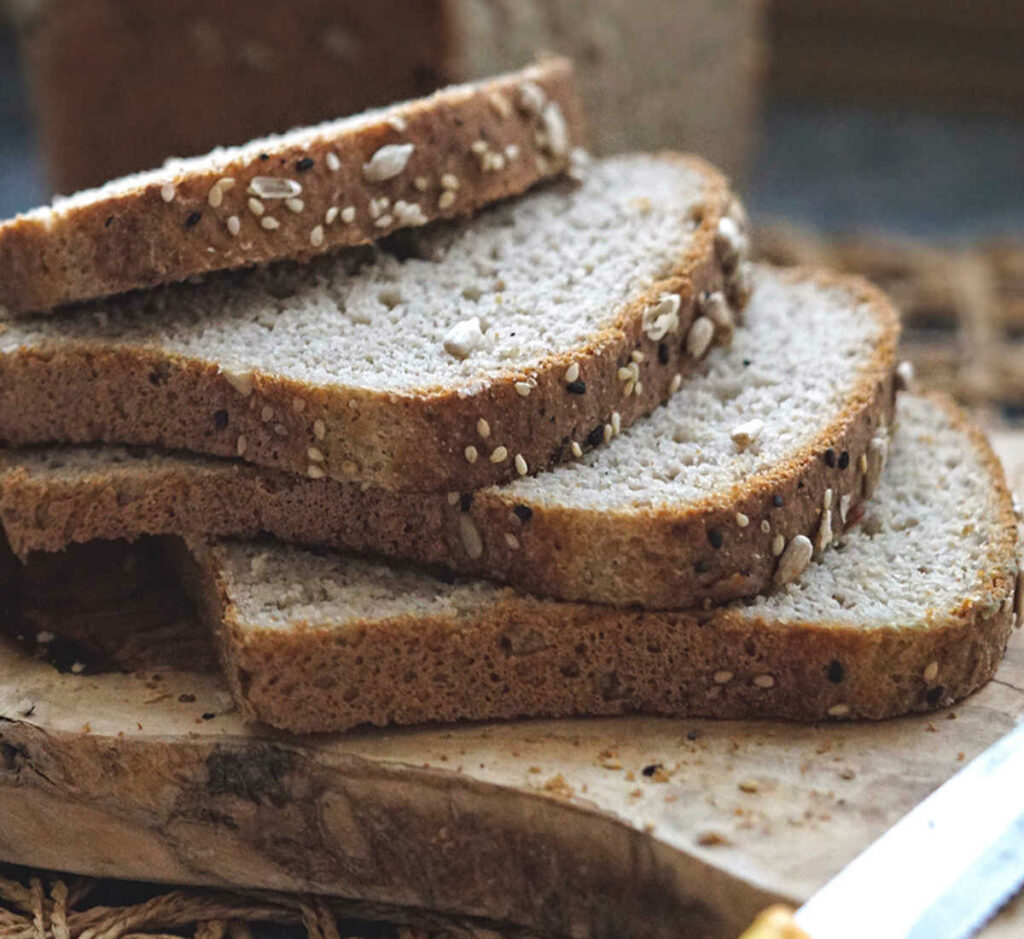
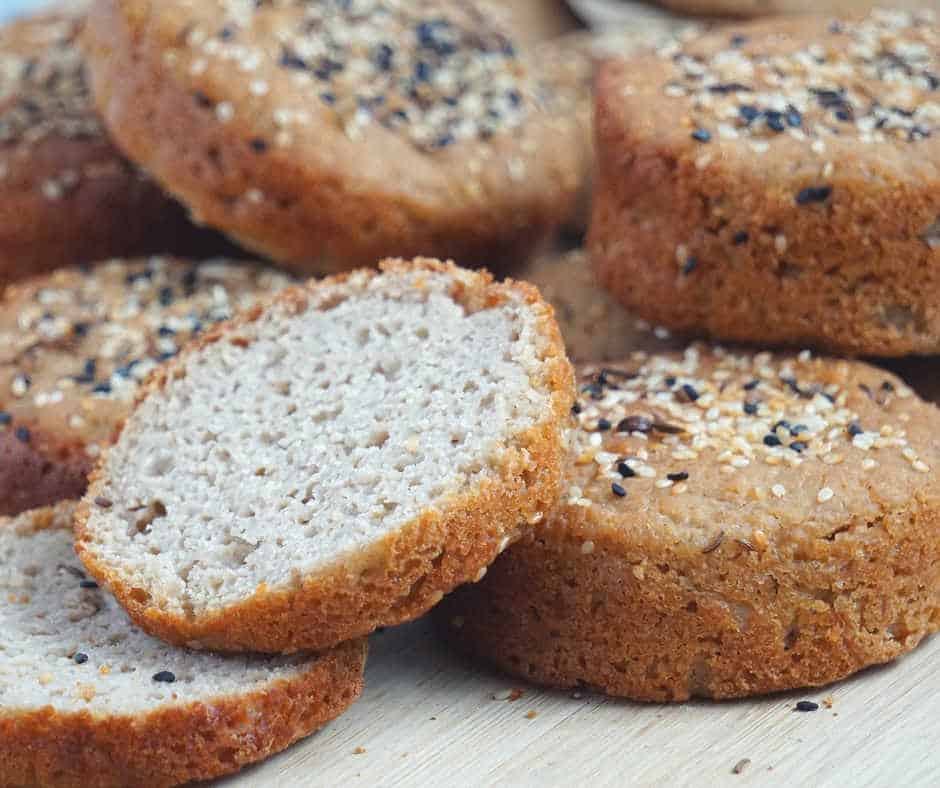
Teff & Buckwheat Sourdough Bread (GF Pumpernickel-Style)
If you love the deep, slightly sweet, coffee-chocolate notes of pumpernickel but need a gluten free sourdough bread, this teff & buckwheat sourdough is your answer. It bakes up into a hearty, sliceable sandwich loaf, its vegan, gum-free, and yeast-free with that classic pumpernickel-style flavor from teff, buckwheat, caraway & coriander.
You’ll find a step-by-step sourdough method (no kneading), exact proofing/baking steps, storage tips, and recipe variations. Make it with a brown rice based GF starter and whole food ingredients, no starch blends, so the texture stays moist yet sturdy enough for sandwiches.
I started working on this loaf because I missed the deep, malty bite of pumpernickel, but every gluten-free version I found leaned on refined starches, gums, cocoa “color,” and commercial yeast. In my kitchen that combo felt heavy and not particularly nourishing.
So in 2019 I went back to basics: whole-grain teff for that dark, chocolate-coffee note, buckwheat for earthy structure, and a slow gluten-free sourdough fermentation to build flavor naturally (no gums, no refined starch blends, no added oils or commercial yeast). I layered in caraway and coriander for the classic aroma and used psyllium + flax and a handful of ground seeds to create a sliceable textured crumb. The result is the bread I wanted all along: a nutrient-dense, higher-fiber, whole-food loaf that’s deeply flavored, satisfying, and, judging by how it digests for many of us, simply gentler than the usual GF sandwich breads.
Why This Tastes Like Pumpernickel (Gluten-Free)
Teff + Buckwheat = Rye-like flavor
Whole-grain teff and buckwheat bring earthy, malty depth that mimics rye’s character, but without gluten. Using both adds flavor complexity and a sturdier crumb than either flour alone.
Caraway, Coriander & Optional Cocoa/Carob
Caraway and coriander deliver that unmistakable “pumpernickel” aroma. For a deeper color and chocolatey note, add cocoa (or carob if you prefer caffeine-free).
Ingredients & Substitutions (GF, Vegan, Gum-Free)
- Teff flour (⅔ cup | ~80 g): Key for color and malty depth.
Swap (flavor change): Sorghum flour 1:1 + 1 tsp unsulphured molasses for color; check batter (sorghum can be slightly thirstier, add 1–2 tsp water if batter gets too stiff). - Buckwheat flour (1½ cups | ~180 g): Structure + classic “rye-ish” flavor.
Partial swap: Replace up to ½ cup with millet flour for a lighter crumb (if batter loosens, add ½-1 tsp extra psyllium). - Flax meal (½ cup | ~55 g): Moisture binding + fiber.
- Whole psyllium husk (2 tbsp | ~10 g, not powder): Elasticity & sliceable structure.
- Ground seeds (2 tbsp each | 16–18 g each): Sunflower + pumpkin for nutrition and texture (optional but nice).
- Spices: Caraway (2 tbsp | ~12 g) + coriander (1 tbsp | ~6 g) provides that signature pumpernickel flavor.
- Maple sugar (2 tbsp | ~26 g): Gentle sweetness; coconut sugar works too.
- Salt: 1½ tsp fine sea salt (~9 g). If using coarse Himalayan crystals, use up to 1 tbsp loosely packed (similar salinity).
- Cocoa or carob (2 tbsp | ~12 g, optional): Extra dark color & flavor.
- Water: 2½ cups (590–600 ml) + 2–3 tbsp as needed to reach a “thick oatmeal” batter.
Starter (activation):
- Gluten-free sourdough starter (100% hydration), 1 cup | ~240 g
- Brown rice flour ⅓ cup | ~40 g + water ¼ cup | 60 ml (adjust if your starter is thin)
Note: This recipe is naturally yeast-free, gum-free, oil-free, egg-free, dairy-free, and fully whole-grain.
See all measurements in the recipe card:
What You’ll Need (Equipment)
- Adjustable loaf frame or high-wall non-stick loaf pan (parchment recommended unless non-stick is excellent);
- Large mixing bowl, spatula, sieve (for flours);
- Instant-read thermometer (optional but helpful);
- Serrated bread knife for neat slicing;
How to Make Teff & Buckwheat Sourdough Bread (Step-by-Step)
The recipe requires a gluten free sourdough starter, if you already have one, great! You’re almost set to bake. If you don’t, you can learn how to make a gluten free sourdough starter very easily.
I keep mine refrigerated and I take the amount I need (to activate) a couple of hours before baking. The rest I feed it and place it back in the fridge.
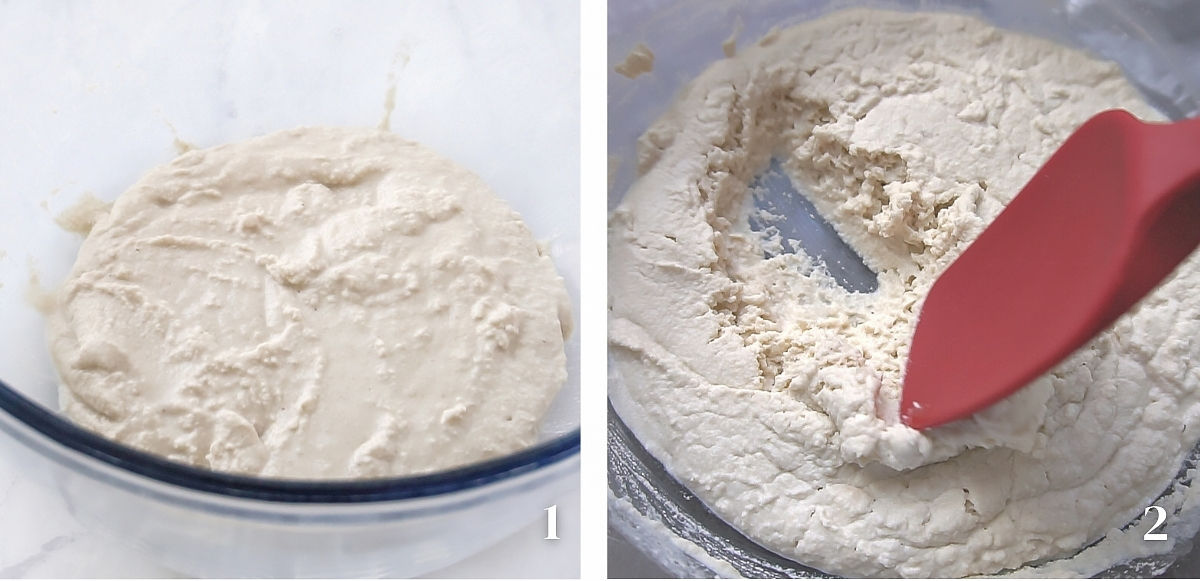
1) Activate the GF Sourdough Starter (3–6 hours)
- Take 1 cup (~240 g) of your refrigerated GF starter and transfer in a large bowl.
- Stir in ½ cup (~80 g) brown rice flour + ½ cup (118 ml) water (adjust of needed, you don’t have to be exact). Mix and look for a “pancake-batter” thickness dough.
- Cover loosely and let sit warm (75–85°F / 24-29°C) until light, domed, airy, and bubbly – about 3-4 hours (cooler kitchens may need 5-6 hours).
Note: Do not switch back and forth between brands when you first activate your starter. It’s too confusing and you won’t know where you went wrong. Also try to feed your starter with the same flour from which it’s made of.
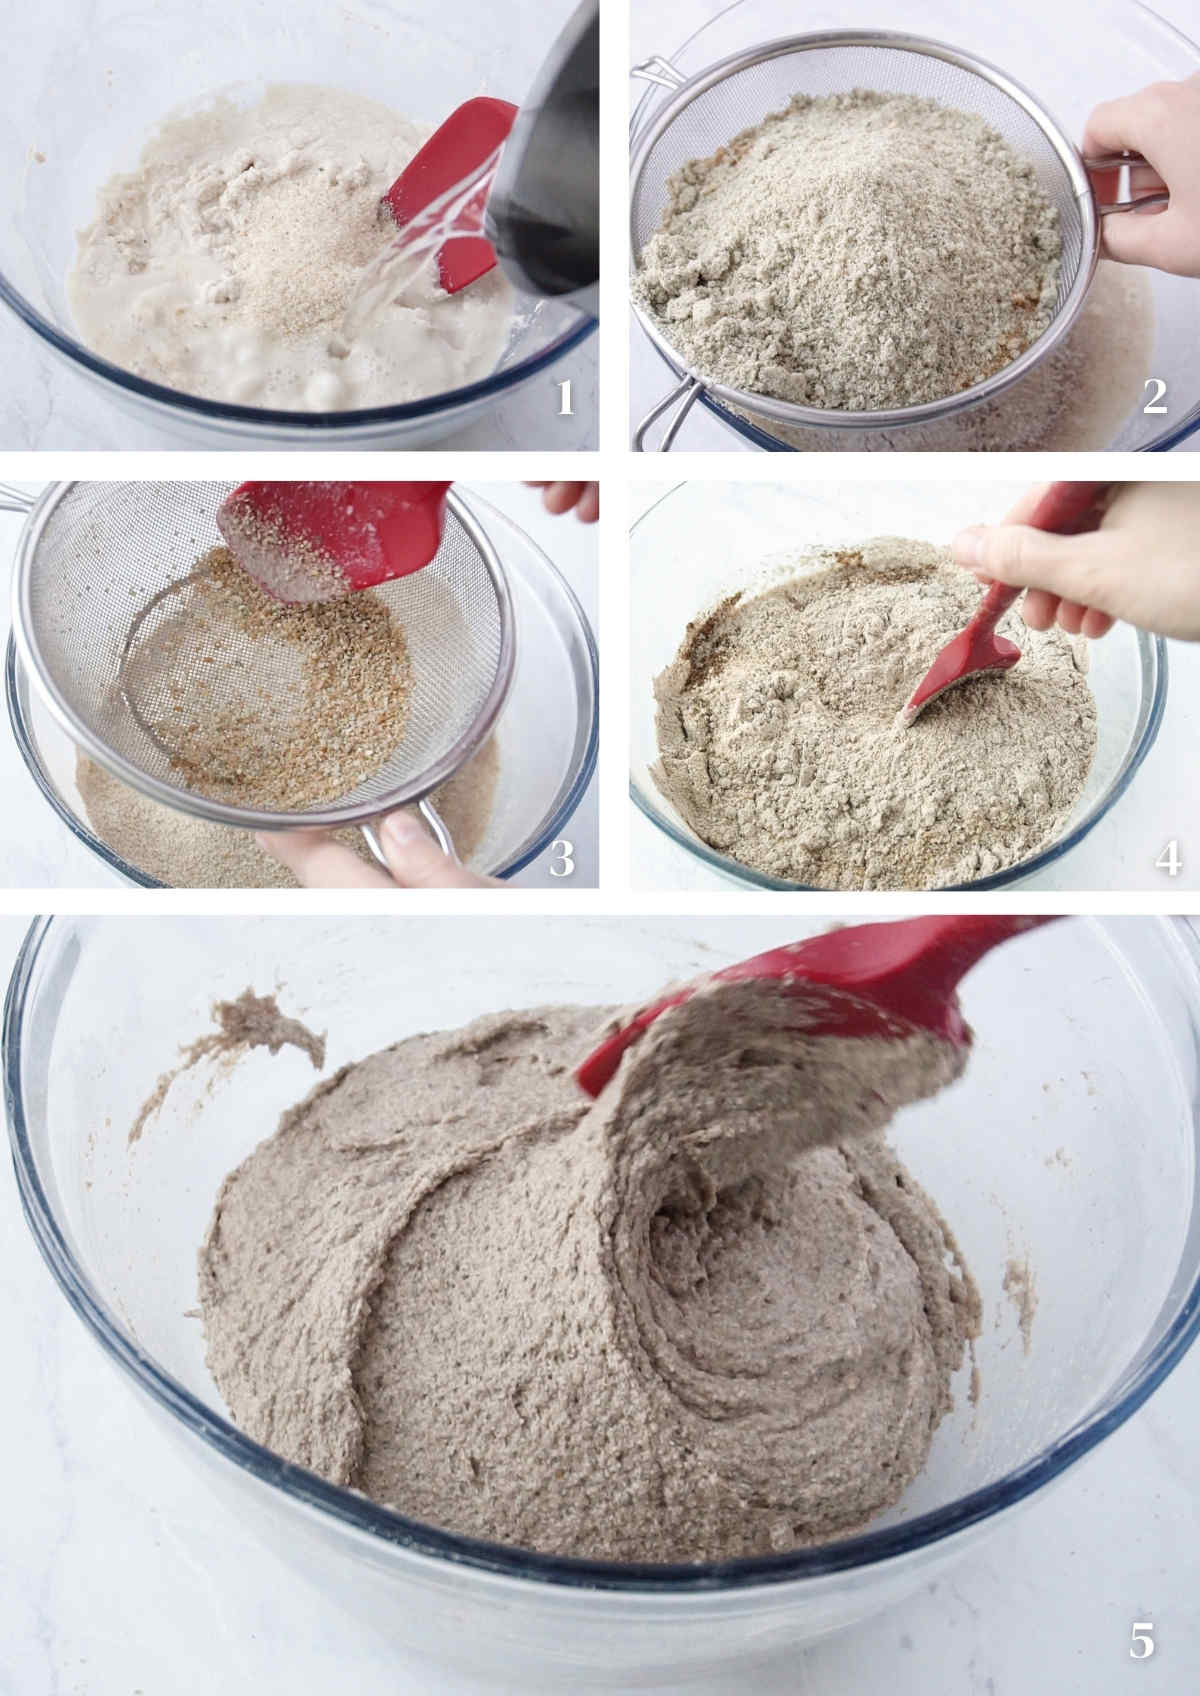
2) Mix the Dough (5 minutes)
- To the activated starter, in the same bowl add 2½ cups (590–600 ml) water and 2 tbsp (10 g) whole psyllium husk. Mix well; let sit 1–2 minutes. The psyllium will expand in the water, while you prepare the rest of flours.
- Measure & grind the seeds: Measure 2 tbsp sunflower seeds, 2 tbsp pumpkin seeds, 2 tbsp caraway seeds, and 1 tbsp coriander seeds. Using a coffee/spice grinder, pulse each to a fine meal/flour (don’t overheat). If starting with whole flax, grind ½ cup to a fine meal now as well.
- Sift in the bowl buckwheat and teff flours, then add flax meal, ground sunflower & pumpkin seeds, caraway, coriander, maple sugar, salt, and cocoa/carob (optional).
- Mix until evenly combined. The texture should be like thick oatmeal or very thick brownie batter – it should mound, not pour. If it’s stiffer than that, whisk in 1–3 tbsp more water.
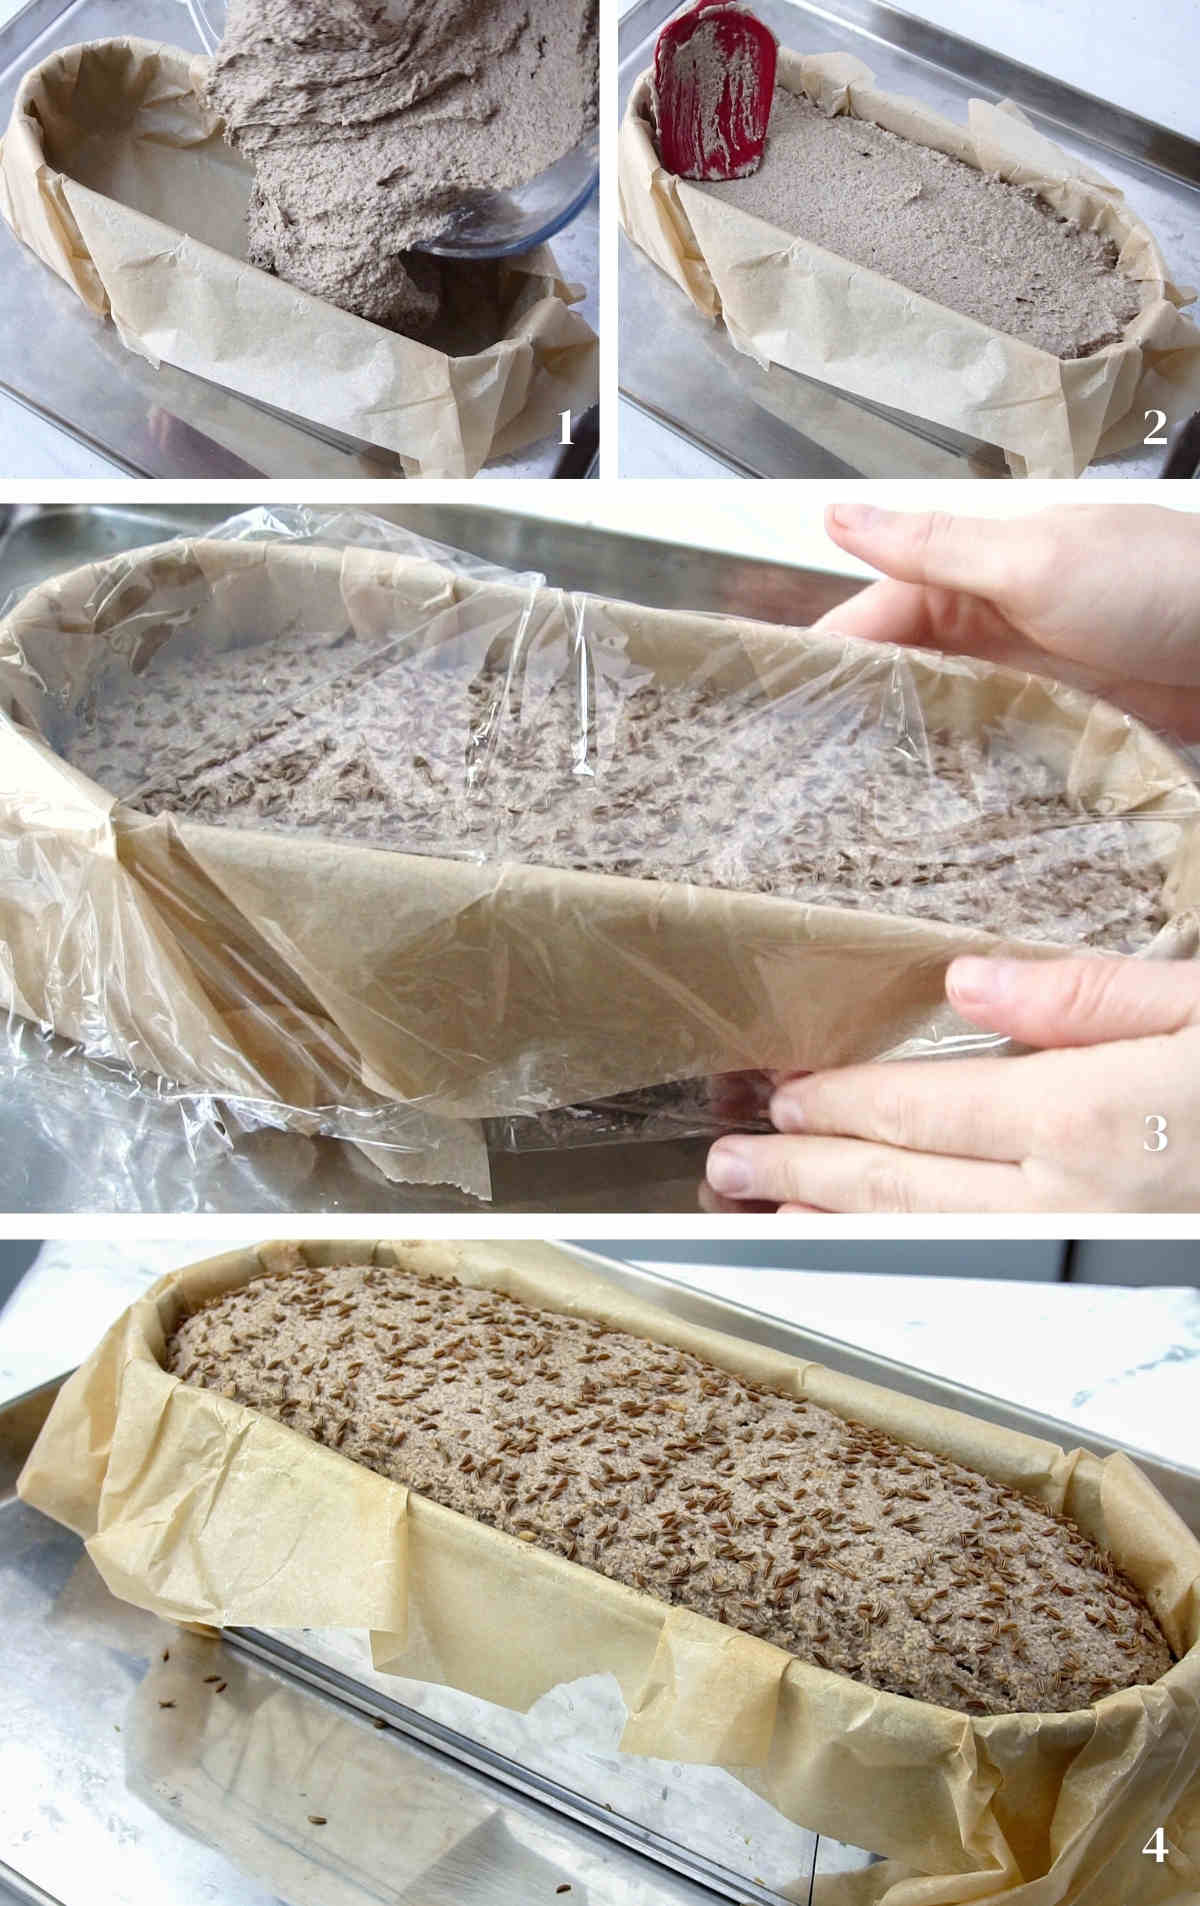
3) Proof (4–6 hours; maybe longer in winter)
- Line your loaf pan (or adjustable frame like I use) with parchment. Scrape in the batter and smooth the top. Sprinkle a few caraway seeds on top if you like.
- Cover gently with plastic or a towel to keep moisture in, and proof in a warm environment (75–85°F) until the loaf looks slightly domed, aerated, and tiny bubbles form at the edges, usually 4–5 hours (cool kitchens can take 6 or 7+ hours). Once I let it sit overnight (10 hours) but it was too much, and the dough deflated.
Don’t overproof: If left too long, the loaf can rise and then deflate. When it looks airy and slightly domed, bake!
4) Bake The Bread
- Preheat the oven to 425°F (220°C).
- Uncover the loaf (the towel you used for proofing). Tent with foil or with a fitting lid (don’t let it touch the batter, or it will deflate).
- Place in the oven, immediately reduce to 380°F (200°C) and bake 30 minutes (covered).
- Remove foil (and remove the tin walls if using an adjustable frame) and bake 40–50 minutes more, until the loaf feels set and firm.
- For doneness, aim for internal temp 205–210°F (96–99°C).
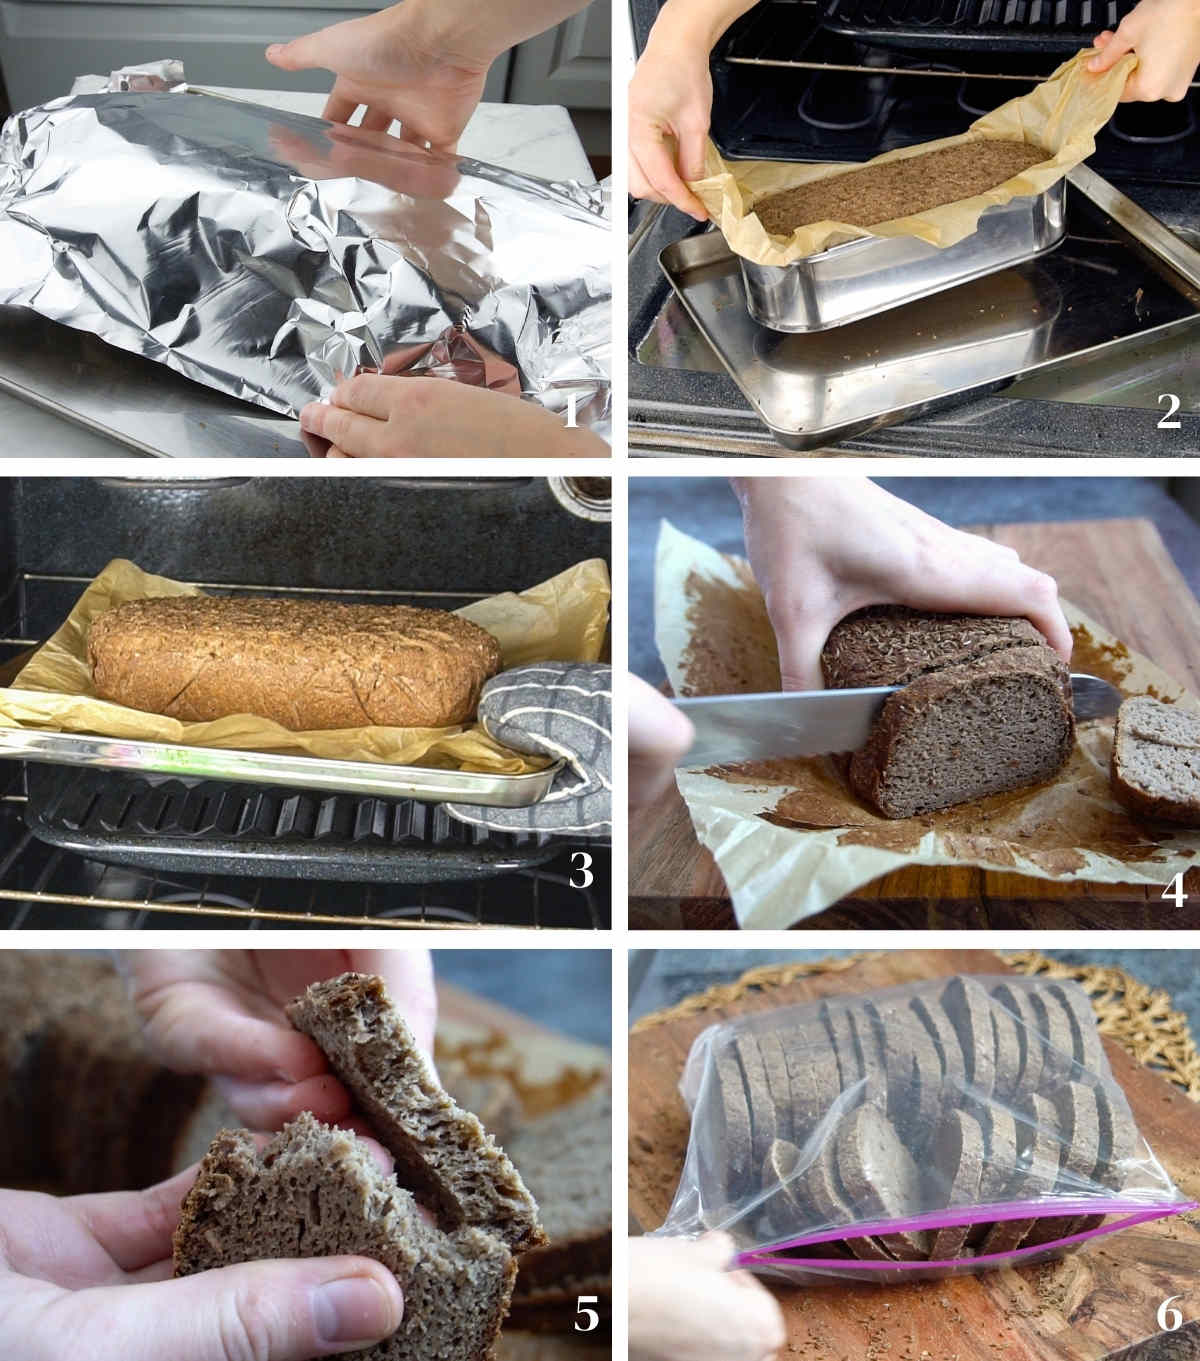
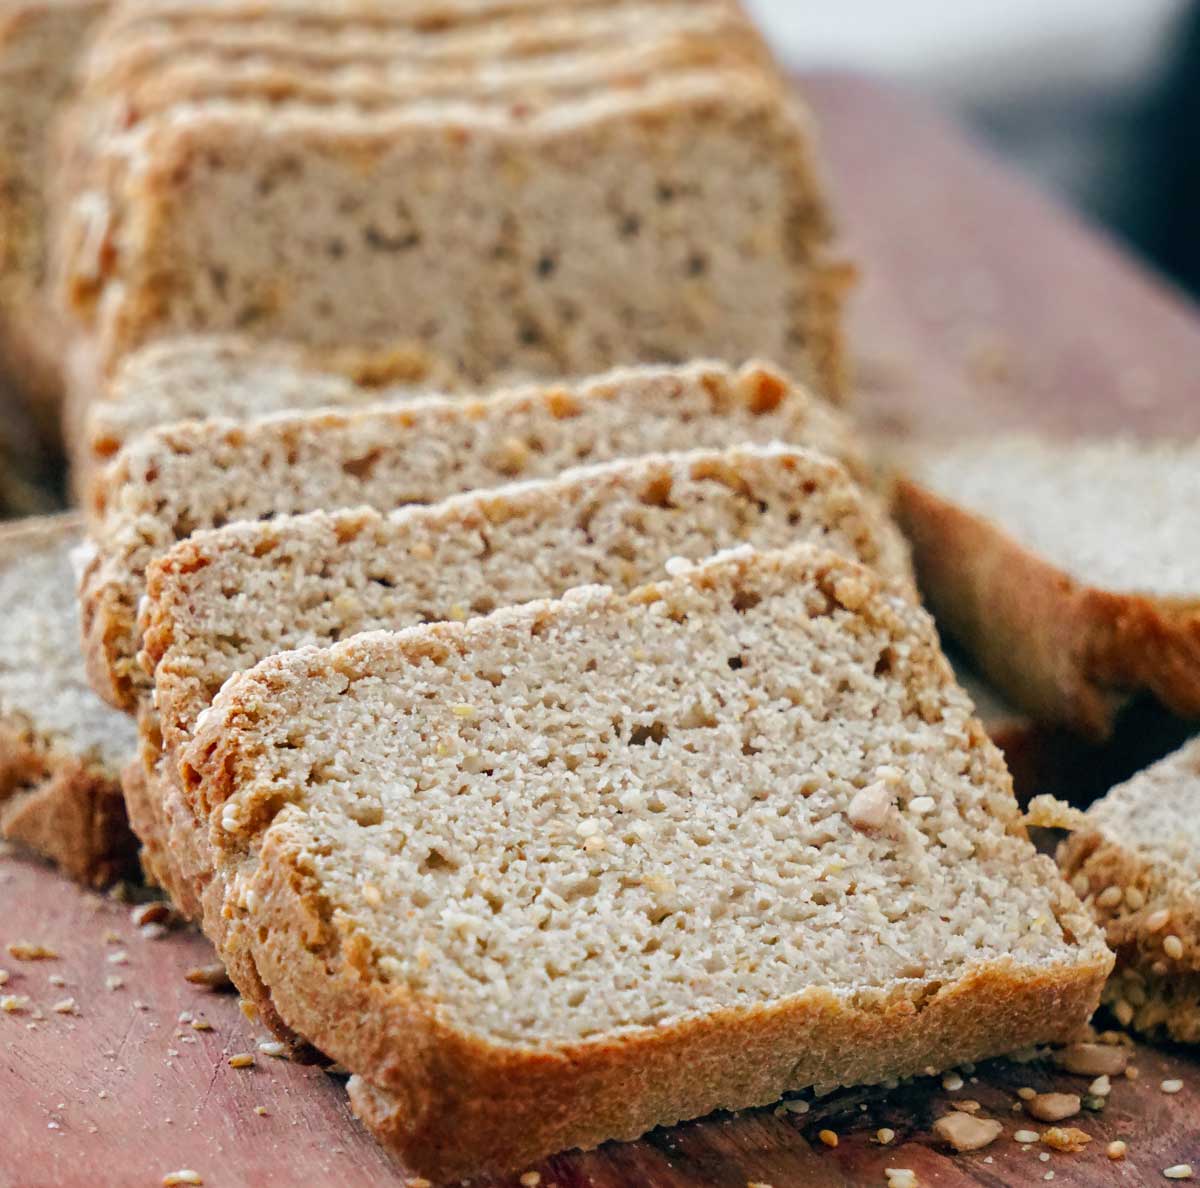
5) Cool (crucial!)
- Cool on a rack completely: 8-12 hours, before handling or slicing! This prevents a gummy crumb and lets the structure set. I often slice the next day and freeze.
Video: How To Make Teff & Buckwheat Sourdough (Gluten-Free Pumpernickel Loaf)
Watch the video and make a gluten-free, vegan pumpernickel-style sourdough with teff & buckwheat, no yeast, no gums. Activate, mix, proof, bake, slice!
If the video isn’t showing, please disable your ad blocker.
Tips for Success
- Temperature: Proof at 75–85°F (24–29°C) for best lift. The warmer the spot the quicker the gluten free sourdough bread will rise.
- Consistency: Finished batter should look like thick oatmeal porridge. Too thick will result in a poor rise; too thin – underbaked/gummy center.
- Sift flours: Adds air and removes lumps for a more even crumb.
- Pan to use: A high-wall non-stick loaf tin or adjustable frame makes release easy and supports rise. An Enameled Cast Iron Loaf Pan with Lid or CS Pullman works too, see FAQ.
- Filling the pan: pour in batter to about ⅔ of the pan’s height before proofing.
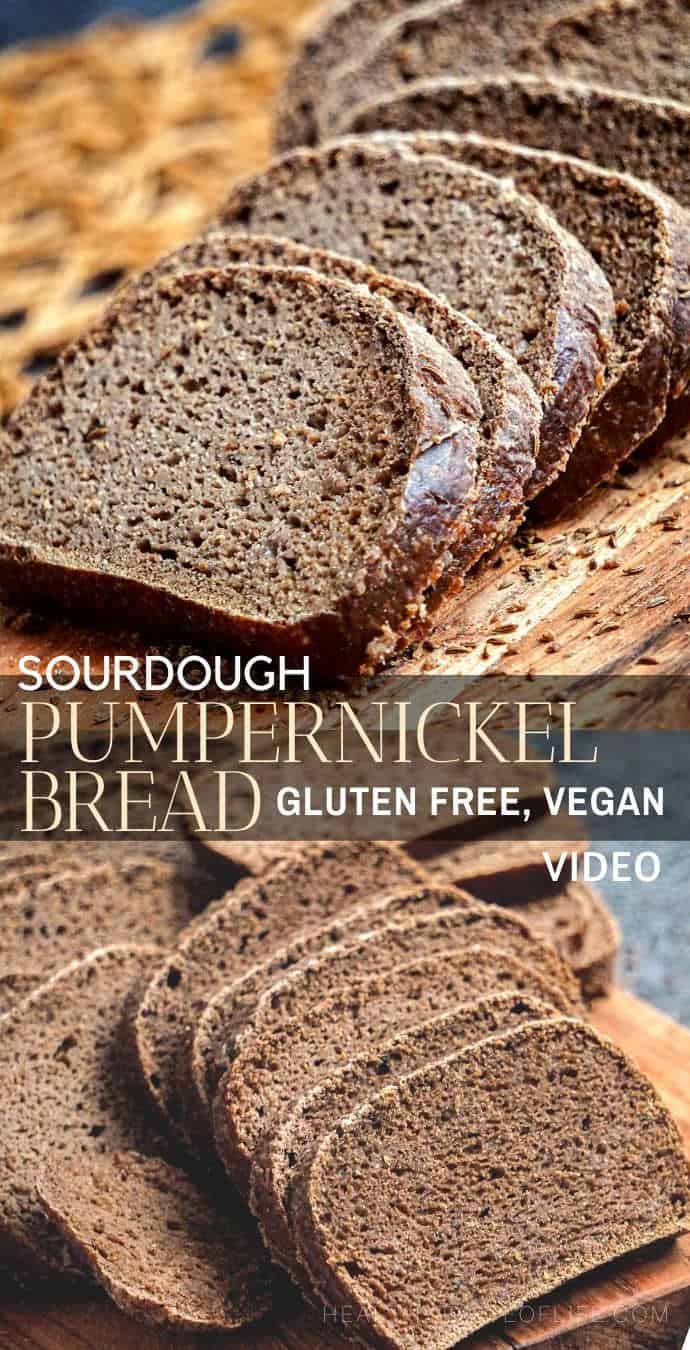
What Is Pumpernickel. Is It Gluten-Free?
Traditional pumpernickel is a German rye sourdough baked low and slow for a dark color and malty sweetness. Because it’s made with rye (contains gluten), it’s not gluten-free. This recipe recreates the pumpernickel flavor profile, using teff & buckwheat (both GF), spices, and a GF sourdough starter, for a similar taste and texture without wheat or rye.
FAQs: Pumpernickel, Starters & Substitutions
No. Rye flour (the main ingredient) contains less gluten than wheat flour but still has gluten. My recipe is a gluten-free, pumpernickel-style sourdough using teff & buckwheat.
Keep teff for best flavor. If you must, use sorghum 1:1 + 1 tsp molasses for color; check batter (add 1-2 tsp of water if it gets stiffer than “thick oatmeal” consistency).
Most common causes: starter wasn’t fully active, the batter was too thick, or cool temperature while proofing. Activate starter until domed & bubbly; mix to “thick oatmeal porridge” consistency; proof warm (75–85°F) until slightly domed.
Yes. Fill about ¾ full. If using a lidded Pullman, bake first 30 minutes covered, then uncover to finish so the top sets and gains color. Make sure the lid doesn’t touch the surface.
Yes, no commercial yeast. It’s naturally leavened with a gluten-free sourdough starter (I used a brown-rice-based starter).
Storage & Slicing
- Room temperature (3–4 days): Store in a sealed container once fully cool.
- Freeze (best for longer): Slice, then freeze in a bag for up to 4 months.
- Reheat/Defrost: Toast slices straight from the freezer for a fresh, warm sandwich base.
More Gluten Free Bread Recipes
- Moist & Fluffy GF Sourdough Banana Bread (Vegan)
- Gluten Free Sourdough “White” Loaf
- Gluten Free Sourdough Buns (Vegan)
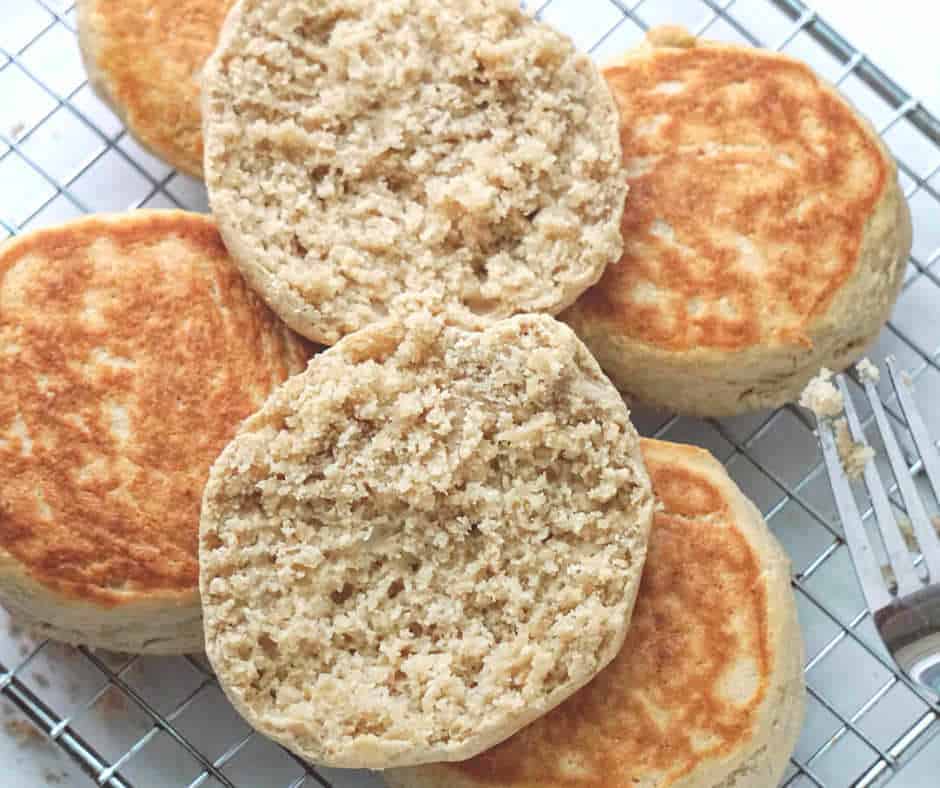
- Sourdough Gluten Free English Muffins (Vegan)
- Buckwheat Bread (GF, DF)
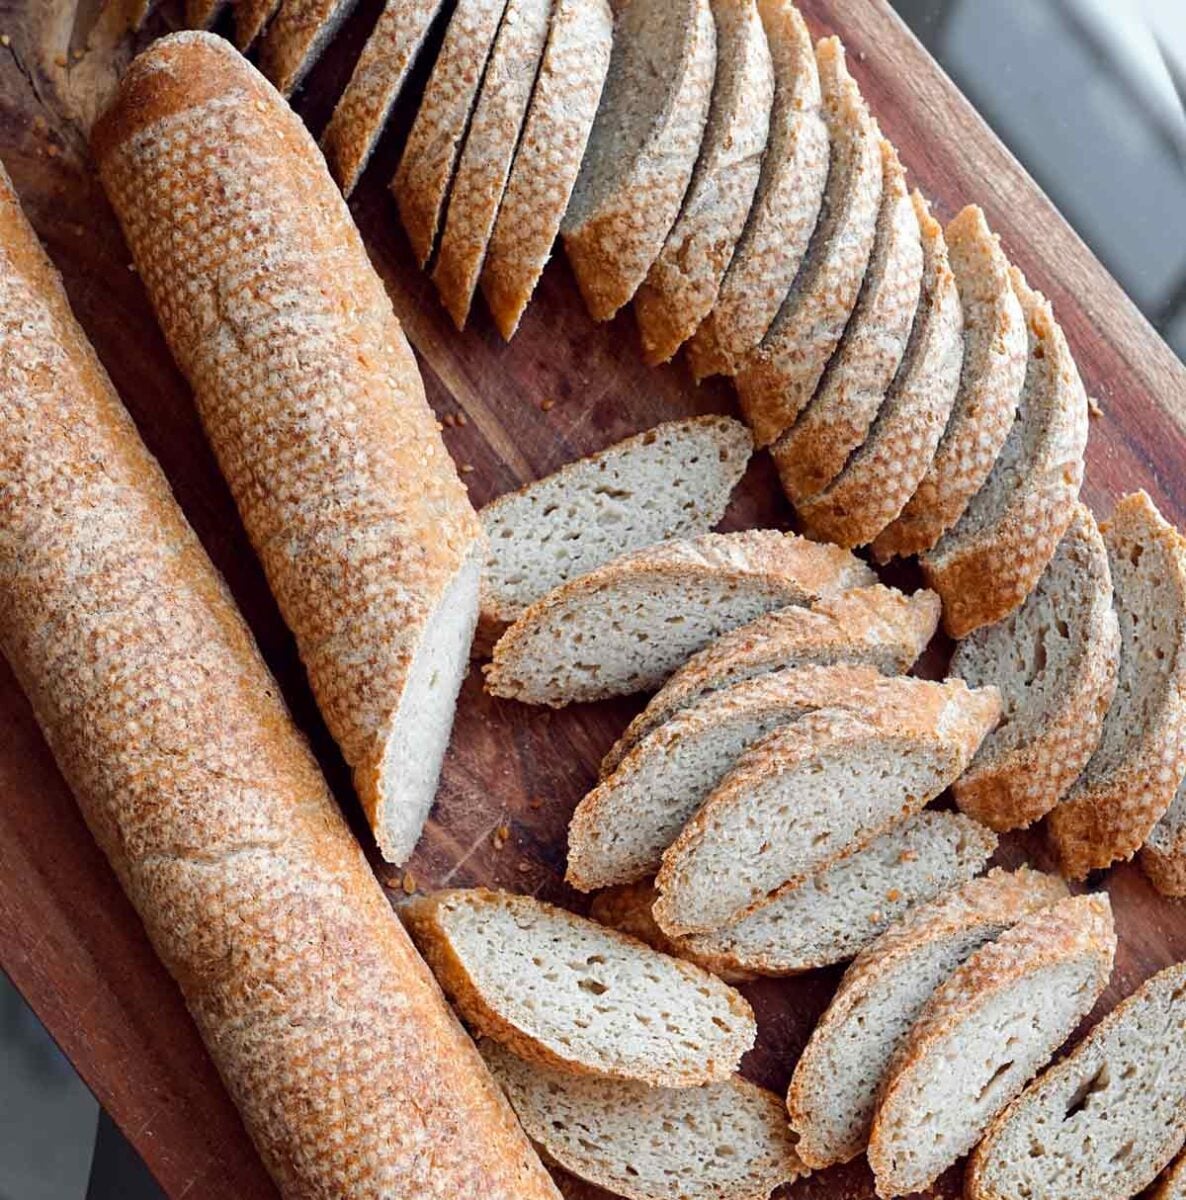
- Gluten Free Sourdough Baguette (No Yeast Added)

For more gluten free sourdough bread recipes check out my cookbook.
Tried Baking This Loaf? I’d love to hear how it turned out! Tap ⭐⭐⭐⭐⭐ to rate it or leave a quick comment below! your feedback helps other readers (and keeps me creating new treats).

Teff & Buckwheat Sourdough Bread (Gluten-Free Pumpernickel-Style) Recipe
Ingredients
For Sourdough Starter Activation
- 1 cup gluten free sourdough starter - (previously made and refrigerated)
- ½ cup brown rice flour
- ½ cup filtered water - (adjust if needed)
For The Dough:
- 1½ cup buckwheat flour - ~180 g
- ⅔ cup teff flour - ~80 g
- ½ cup flax meal - ~55 g
- 2 tbsp sunflower seeds - ground ~18 g
- 2 tbsp pumpkin seeds - ground ~16 g
- 2 tbsp whole psyllium husk - not powder, ~10 g
- 2 tbsp caraway seeds - ground ~12 g
- 1 tbsp coriander seeds - ground ~6 g
- 2 tbsp maple sugar - ~26 g, or coconut sugar
- 1½ tsp fine sea salt - ~9 g
- 2½ cups filtered water - 590–600 ml, plus 2–3 tbsp as needed
Optional
- 2 tbsp cacao powder - ~12 g, for a more dark color
Instructions
- Prepare all the seeds and grind them with an electric coffee grinder.
Step 1. Activate The Gluten Free Sourdough Starter (3–6 hours)
- Take the amount of starter you need (1 cup) and place it in a large bowl. The rest feed it and place it (back) in the fridge. I'm using an established gluten free sourdough starter that I keep in the fridge and feed once a week, to maintain it.
- In the same bowl, add the brown rice flour (½ cup), and water (½ cup). Mix well. Cover and let stand warm (75–85°F / 24–29°C) until domed, airy, and bubbly (3–4 hours; cooler kitchens may need 5–6 hours).This step will activate the cold dormant starter that you just took out of the fridge.
Step 2. Mix The Dough (5-10 min)
- Once the starter is ready and active (you can see when a starter has peaked because it will have a dome-shape on top and will have air pockets inside) add the water and psyllium husk. Mix to combine. The psyllium will expand in the water, while you sift the rest of flours.
- Sift in buckwheat + teff; add ground flax, ground seeds, caraway, coriander, sugar, salt, and cocoa/carob (optional).
- Mix to a thick oatmeal batter (mounds, doesn’t pour). If too stiff, add 1–3 tbsp water.The dough should look like a very thick pancake batter or like a brownie batter. No kneading is required.
Proof (4-6+ hours)
- Prepare the baking pan by lining it with parchment paper, it will prevent sticking. I’m using an extendable baking tin. It has no bottom so it’s easy to remove while baking. It extends in and out easily.
- Scrape the dough into the pan and smooth it out. Sprinkle with some caraway seeds on top.
- Cover with a plastic wrap or a towel to seal moisture and let it rise in a warm place (75–85°F), until slightly domed, aerated, and tiny bubbles appear at edges, approximately 4-5 hours (it might take an hour or two longer during winter).
Bake (70–80 minutes total)
- Preheat to 425°F (220°C). Tentthe loaf with foil (no contact) or a fitting lid.
- Place in oven and immediately reduce to 380°F (200°C); bake 30 minutes (covered).
- Remove foil (and tin walls if using an adjustable frame) and bake 40–50 minutes more, until firm. Internal temp: 205–210°F (96–99°C).
- Allow to cool completely before handling or slicing! The longer the better. I usually slice it the next day and freeze it.
Video
Notes
Tips For Success
- To measure the flours I scoop the flour into the measuring cup then tap the cup once and then I use the back of a knife to level off the top. Do not dip the measuring cup into the flour, you’ll get more than you need.
- Sifting the flours will clear out any lumps and bring more air into the dough.
- Batter consistency is everything: Aim for thick oatmeal porridge consistency, too thick = poor rise; too thin = gummy center.
- Starter hydration: Written for ~100% hydration starter. If your starter is notably thicker/thinner, adjust dough water by ±1–2 tbsp.
- Pullman pan: Fill ~¾ full. Bake 30 min covered, then uncover to finish.
Nutrition
The information shown is an estimate provided by an online nutrition calculator.
©HealthyTasteOfLife. Content and photographs are copyright protected and need prior permission to use. Copying and/or pasting full recipes to other websites and any social media is strictly prohibited. Sharing and using the link of this recipe is both encouraged and appreciated!

This turned out really nice and light for the first bake. I’m always amazed new recipes for sourdough can be so different. This one being so easy is a keeper. Thank you!
Would it be possible to provide metric equivalents in future recipes? It would be very helpful
Question – I am ready to activate the starter, but the link in step 1 doesn’t seem to be working. Any suggestions? Thank you!
Thank you for telling me about the link, it looks that is not working anymore. Usually when you buy the starter, there is a booklet with details on how to activate it. The starter comes in a dehydrated state, so for activation you basically need the following steps:
1.Pour contents of package into a glass jar (2 quart size) and add ¼ cup water (room temperature) then add ¼ cup gluten free flour, in this case is brown rice flour and stir until everything is combined. Cover with a thin translucent fabric, linen, or cotton or a coffee filter, secure with a rubber band. Place in a warm area, 70°-85°F, for 8-12 hours.
2.After 8-12 hours, feed the starter: mix in ½ cup water and ½ cup brown rice flour. Stir well. Cover and return to the warm spot for 4-8 hours.
3.After 4-8 hours, discard all but ½ cup starter. Mix in ½ cup water and ½ cup brown rice flour; stir and cover. Place the discarded starter in a separate jar and keep it in the fridge covered with a loose lid. You will use it later for baking.
4.Repeat steps 2 and 3 every 4-8 hours, until mixture becomes light and bubbly (about 3 to 7 days, it depends on the temperature and location).
5.Once starter is bubbling within a few hours of being fed, then you can cover tightly and place it in the refrigerator and maintain it by feeding once a week (or once in 10-14 days).
This is a wonderful recipe. I love that it doesn’t contain a lot of unusual ingredients. Thank you so much for sharing it.
Thank you! I tried to make it as natural as possible while keeping a good texture… my daughter also loves it! 🙂
How wide did you extend the pan? It looks longer than the average bread pan. Thanks!
A couple of inches, about 13″ total with extension.