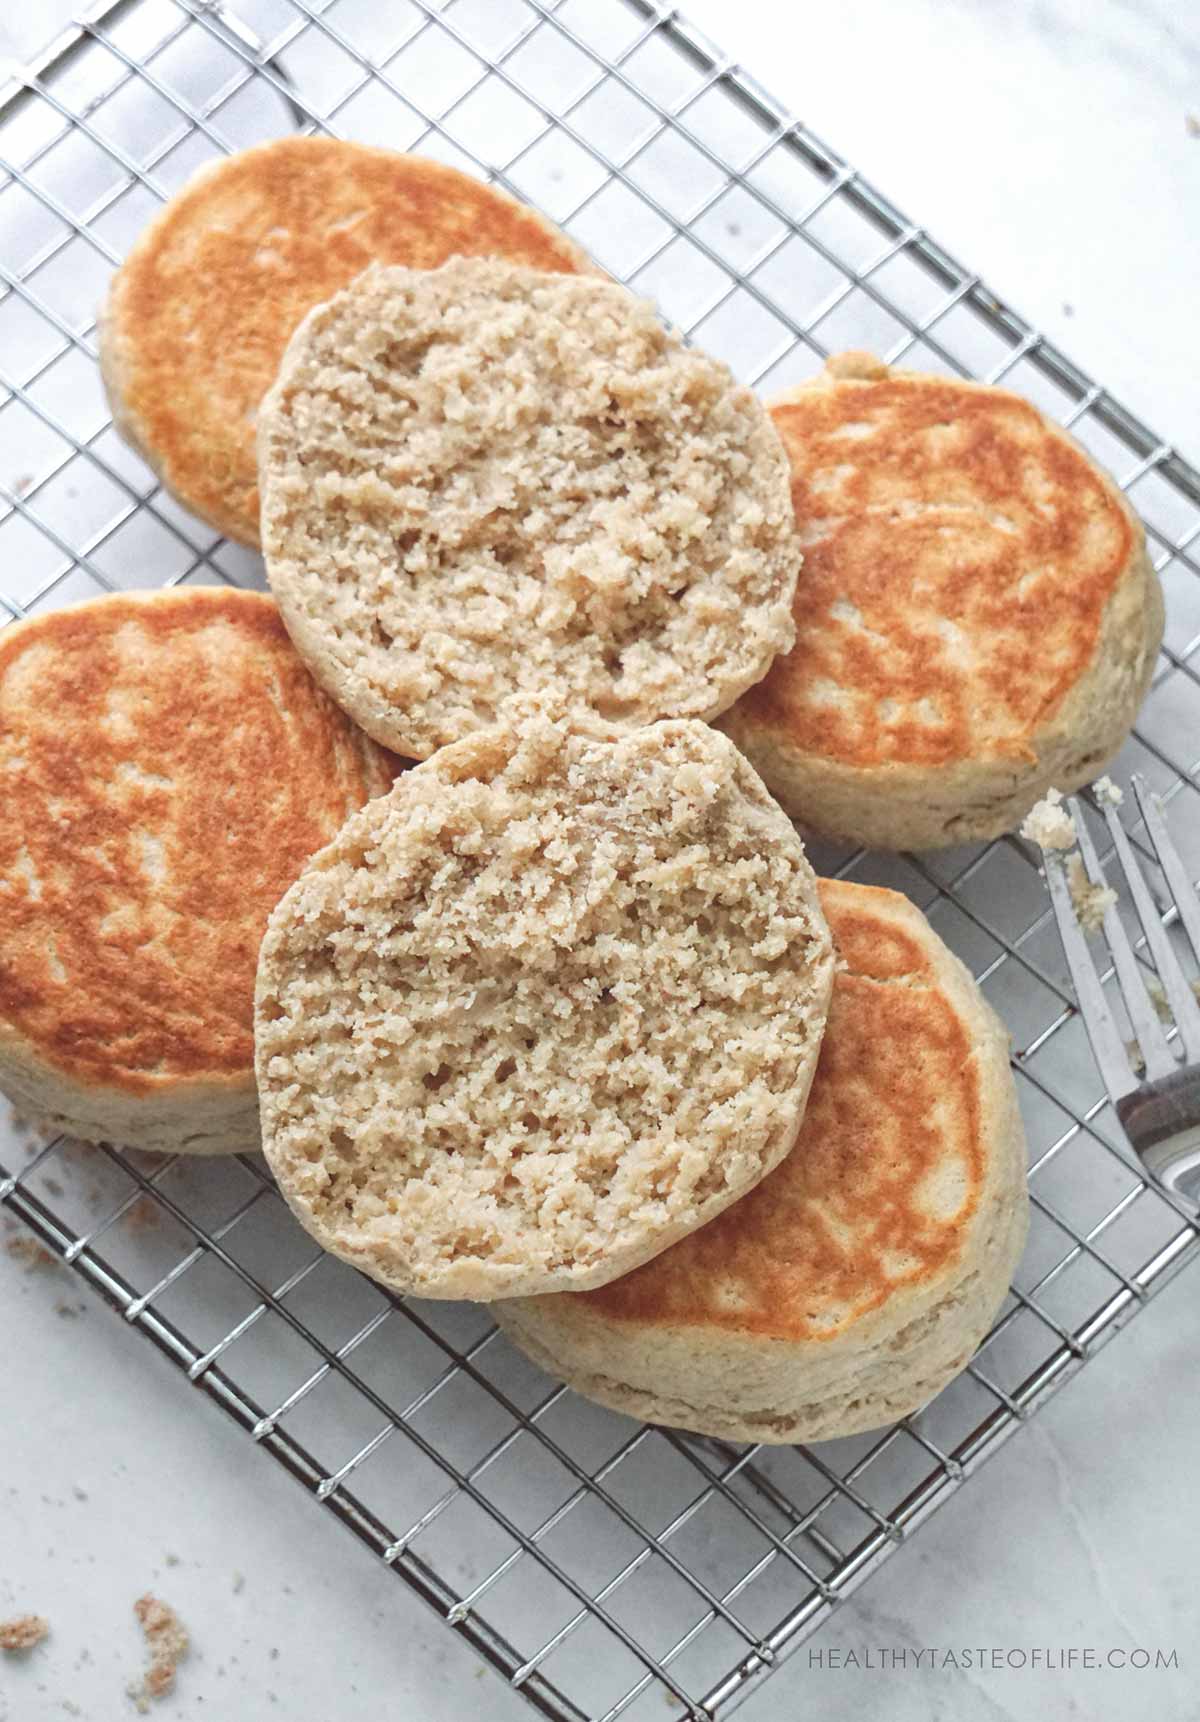
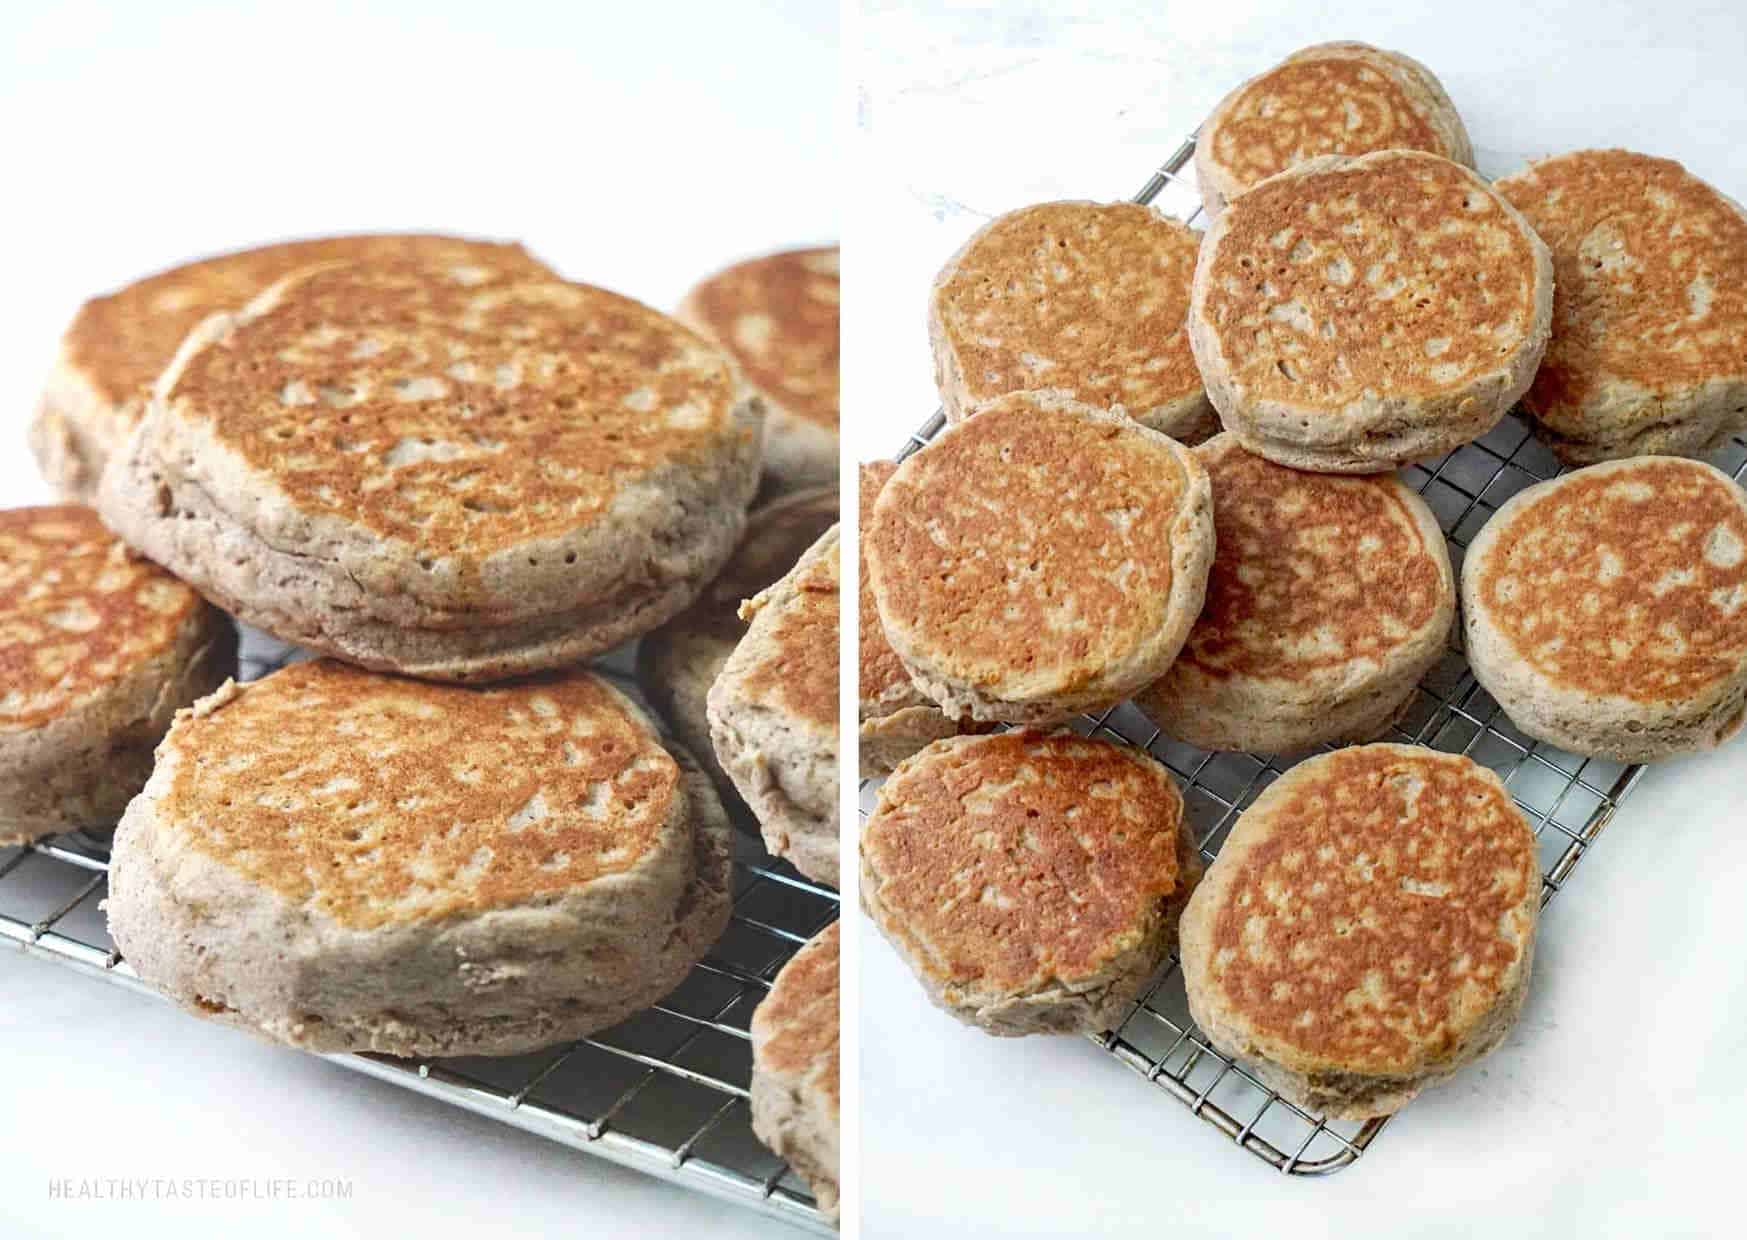
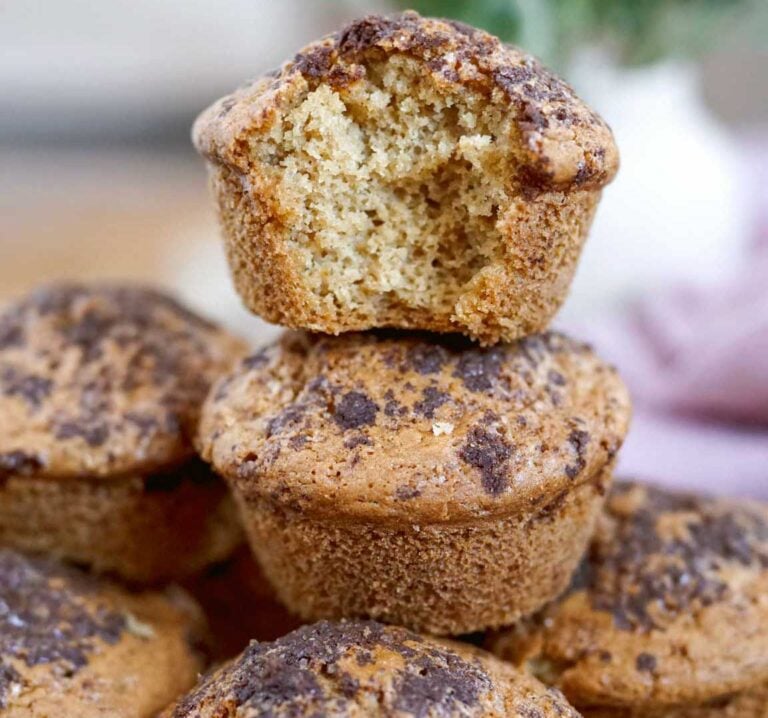
Gluten Free English Muffins (Vegan, Sourdough)
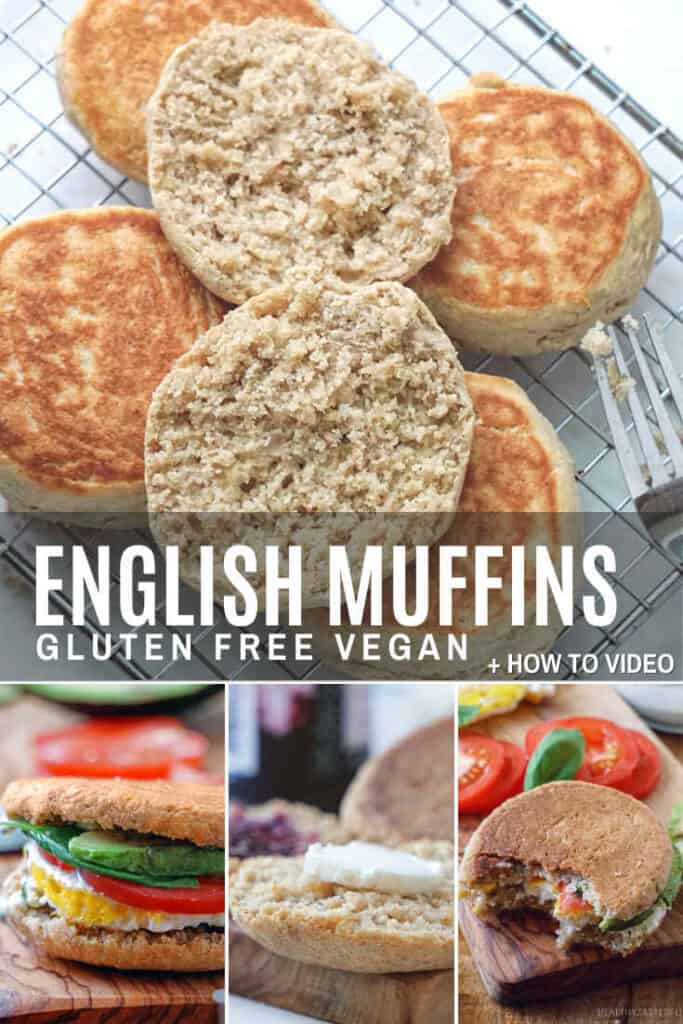
These gluten-free sourdough English muffins are vegan, dairy-free, and made without commercial yeast. You cook them on a skillet for that classic browned outside, then finish them in the oven so the center cooks through, no rings and no kneading. They’re ready in about 30 minutes if your starter is active.
Quick Overview
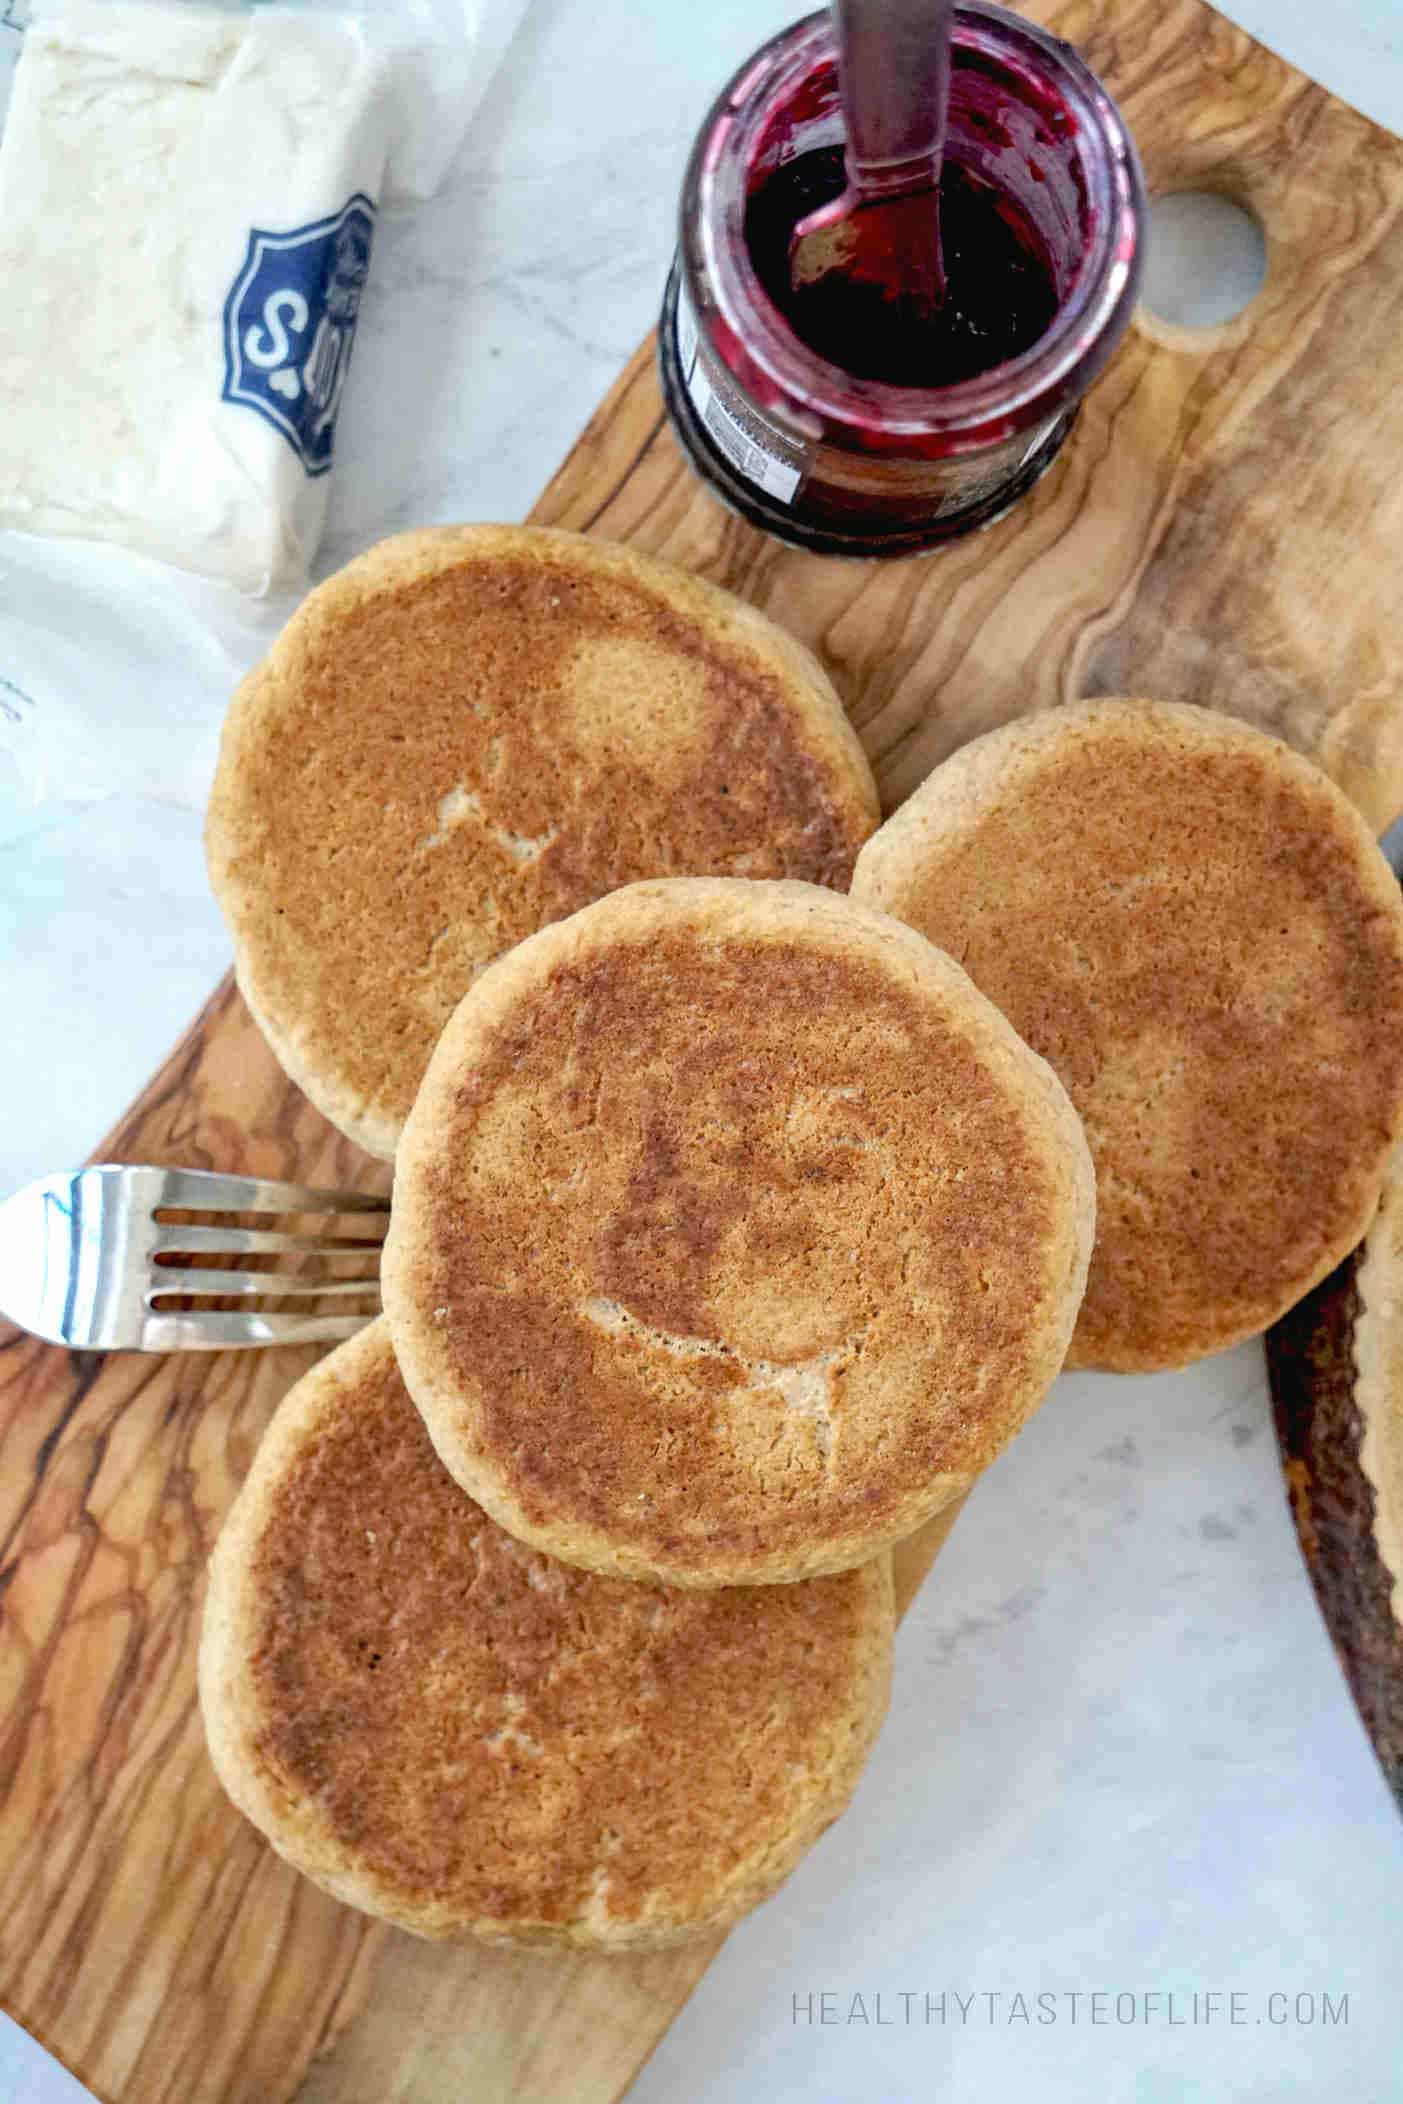
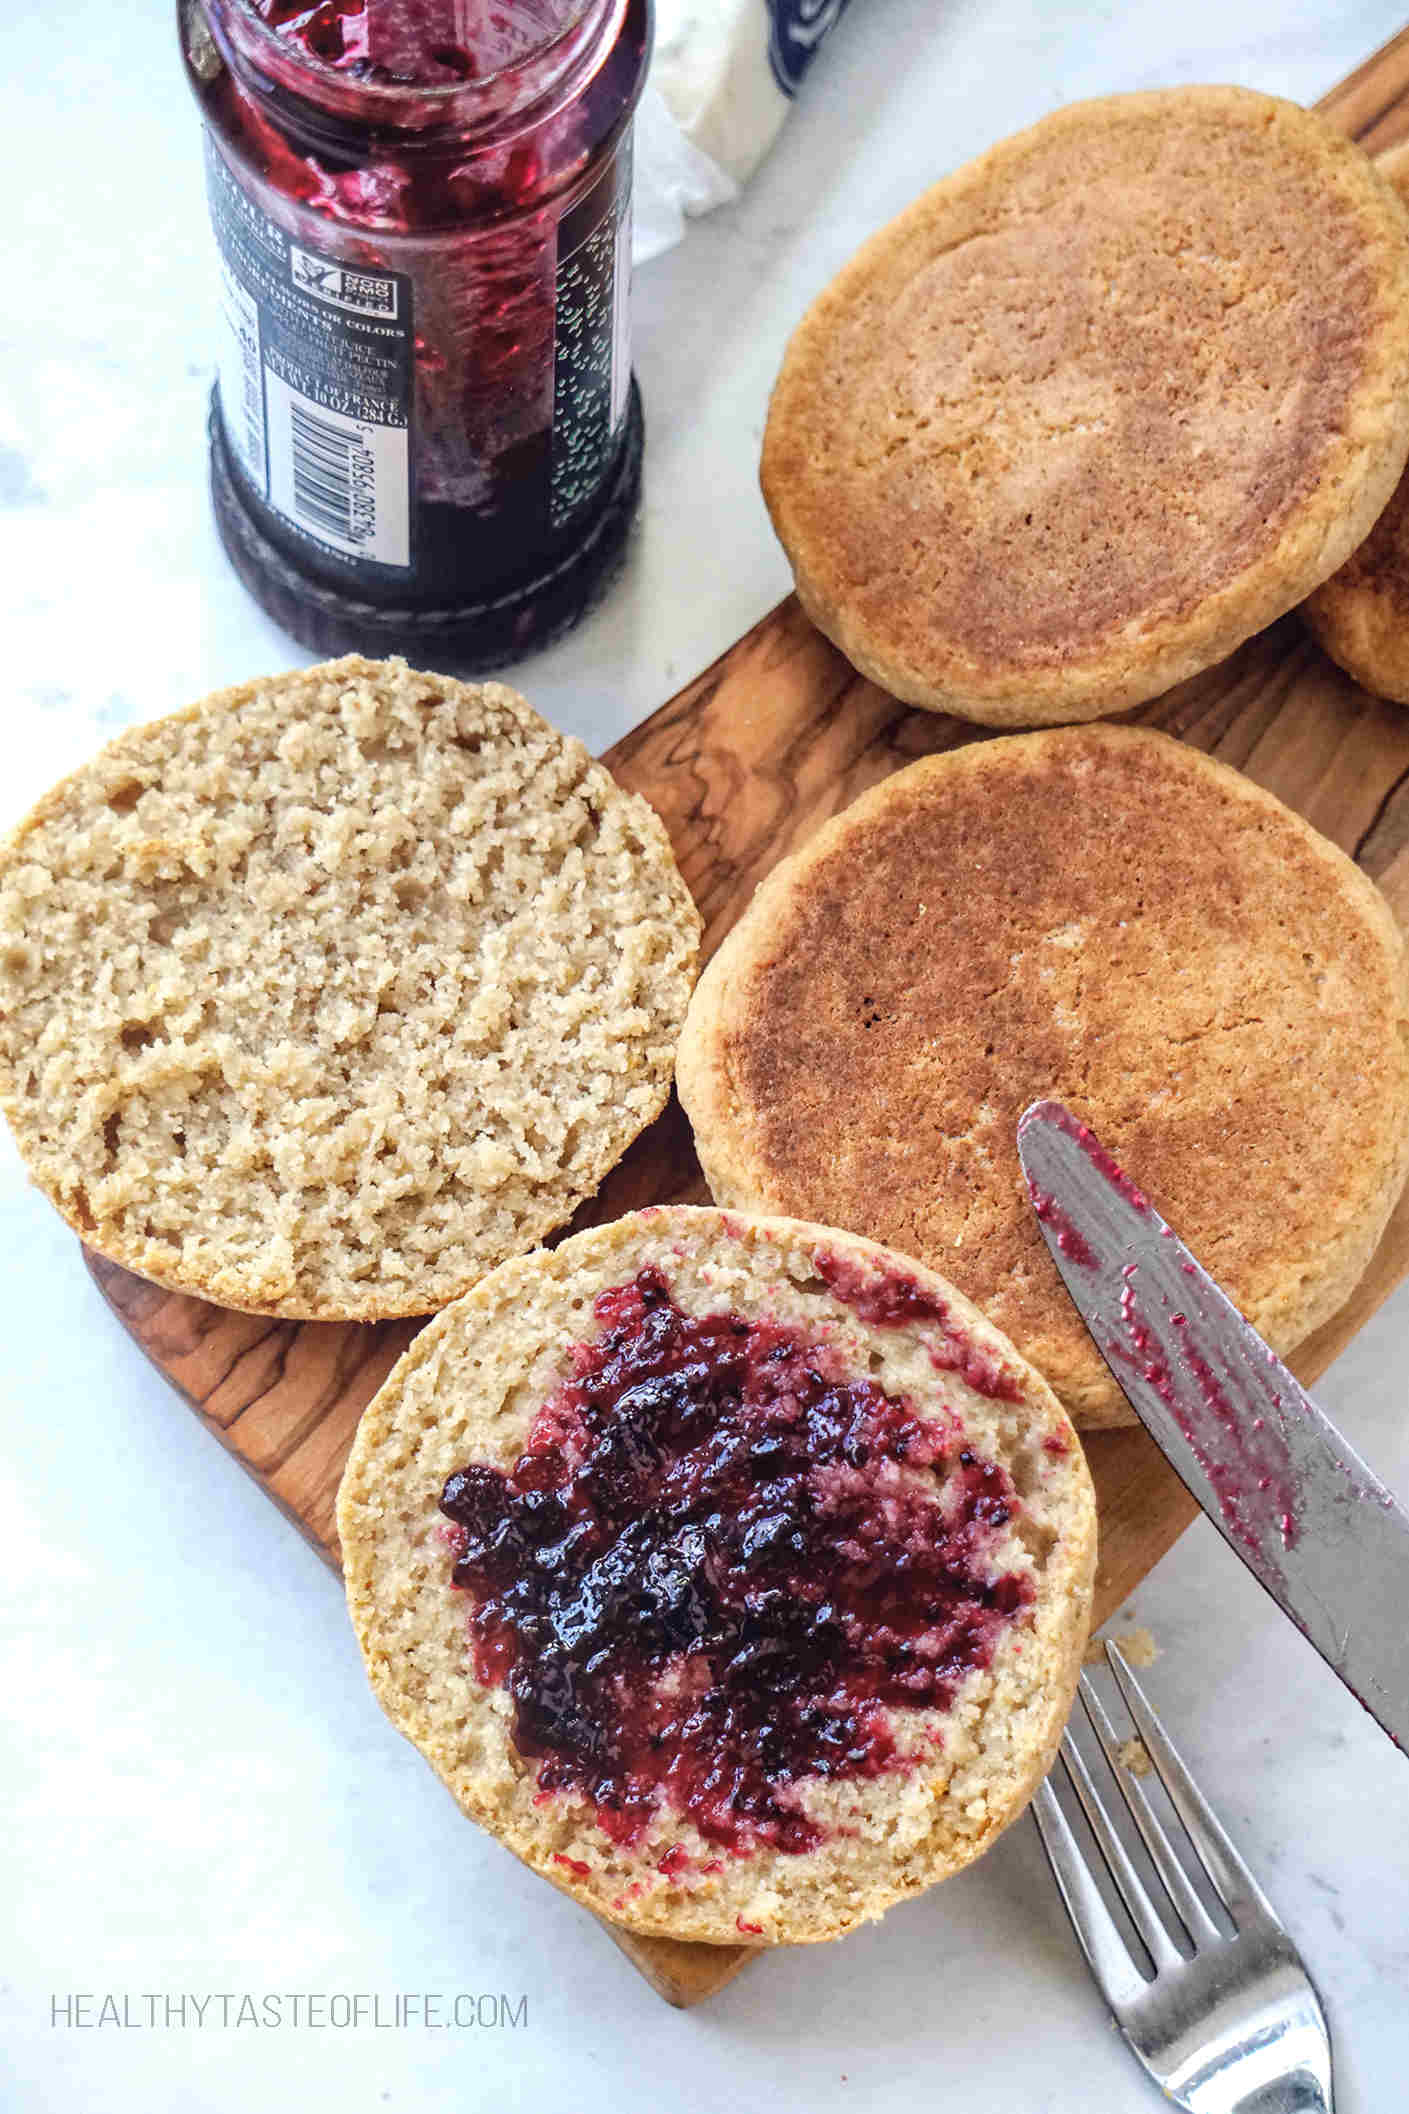
- Texture: crisp browned outside, soft inside
- Flavor: mild sour tang (stronger if you let the dough sit 1–2 hours)
- No rings needed: you shape with greased hands and press on the skillet
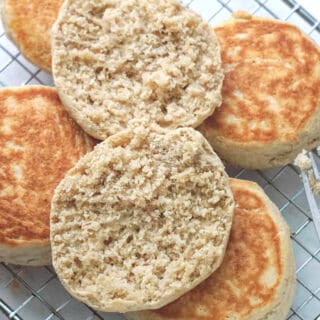
- Best “nooks & crannies”: fork-split after cooling (don’t knife-slice)
- Dough: Gluten-free muffin dough is wetter than wheat dough. The skillet gives you browning and flavor on the outside and sets the shape so the muffins don’t spread. Then the oven finish makes sure the center cooks through without burning the outside.
Want a loaf version? Try my GF sourdough loaf.
A quick note on fermentation and My Experience
Sourdough fermentation changes flour over time and can improve flavor. Some people also report it feels easier on digestion compared to non-fermented bread.
I bake gluten-free sourdough often, but I used to think English muffins were “too much work,” so I’d reach for something fast like my gluten-free sourdough pancakes.
Then I finally tested homemade sourdough English muffins, and they’re on a different level from store-bought. Better flavor, simpler ingredients, and I can skip commercial yeast.
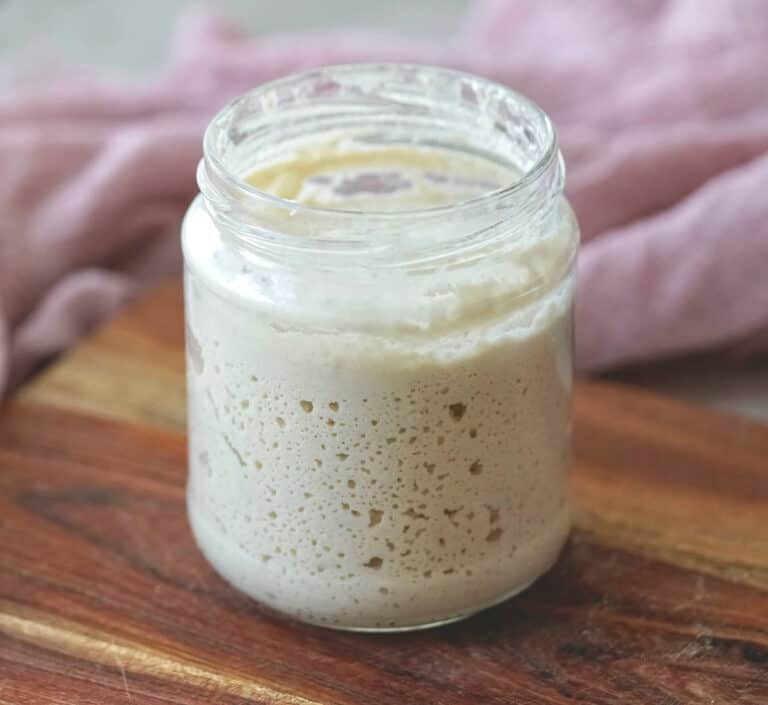
The only real requirement is an active, bubbly sourdough starter. If yours isn’t active, feed it a few hours before you mix the dough.
I also tested a version with egg. Didn’t improve the texture much, so I kept it vegan.
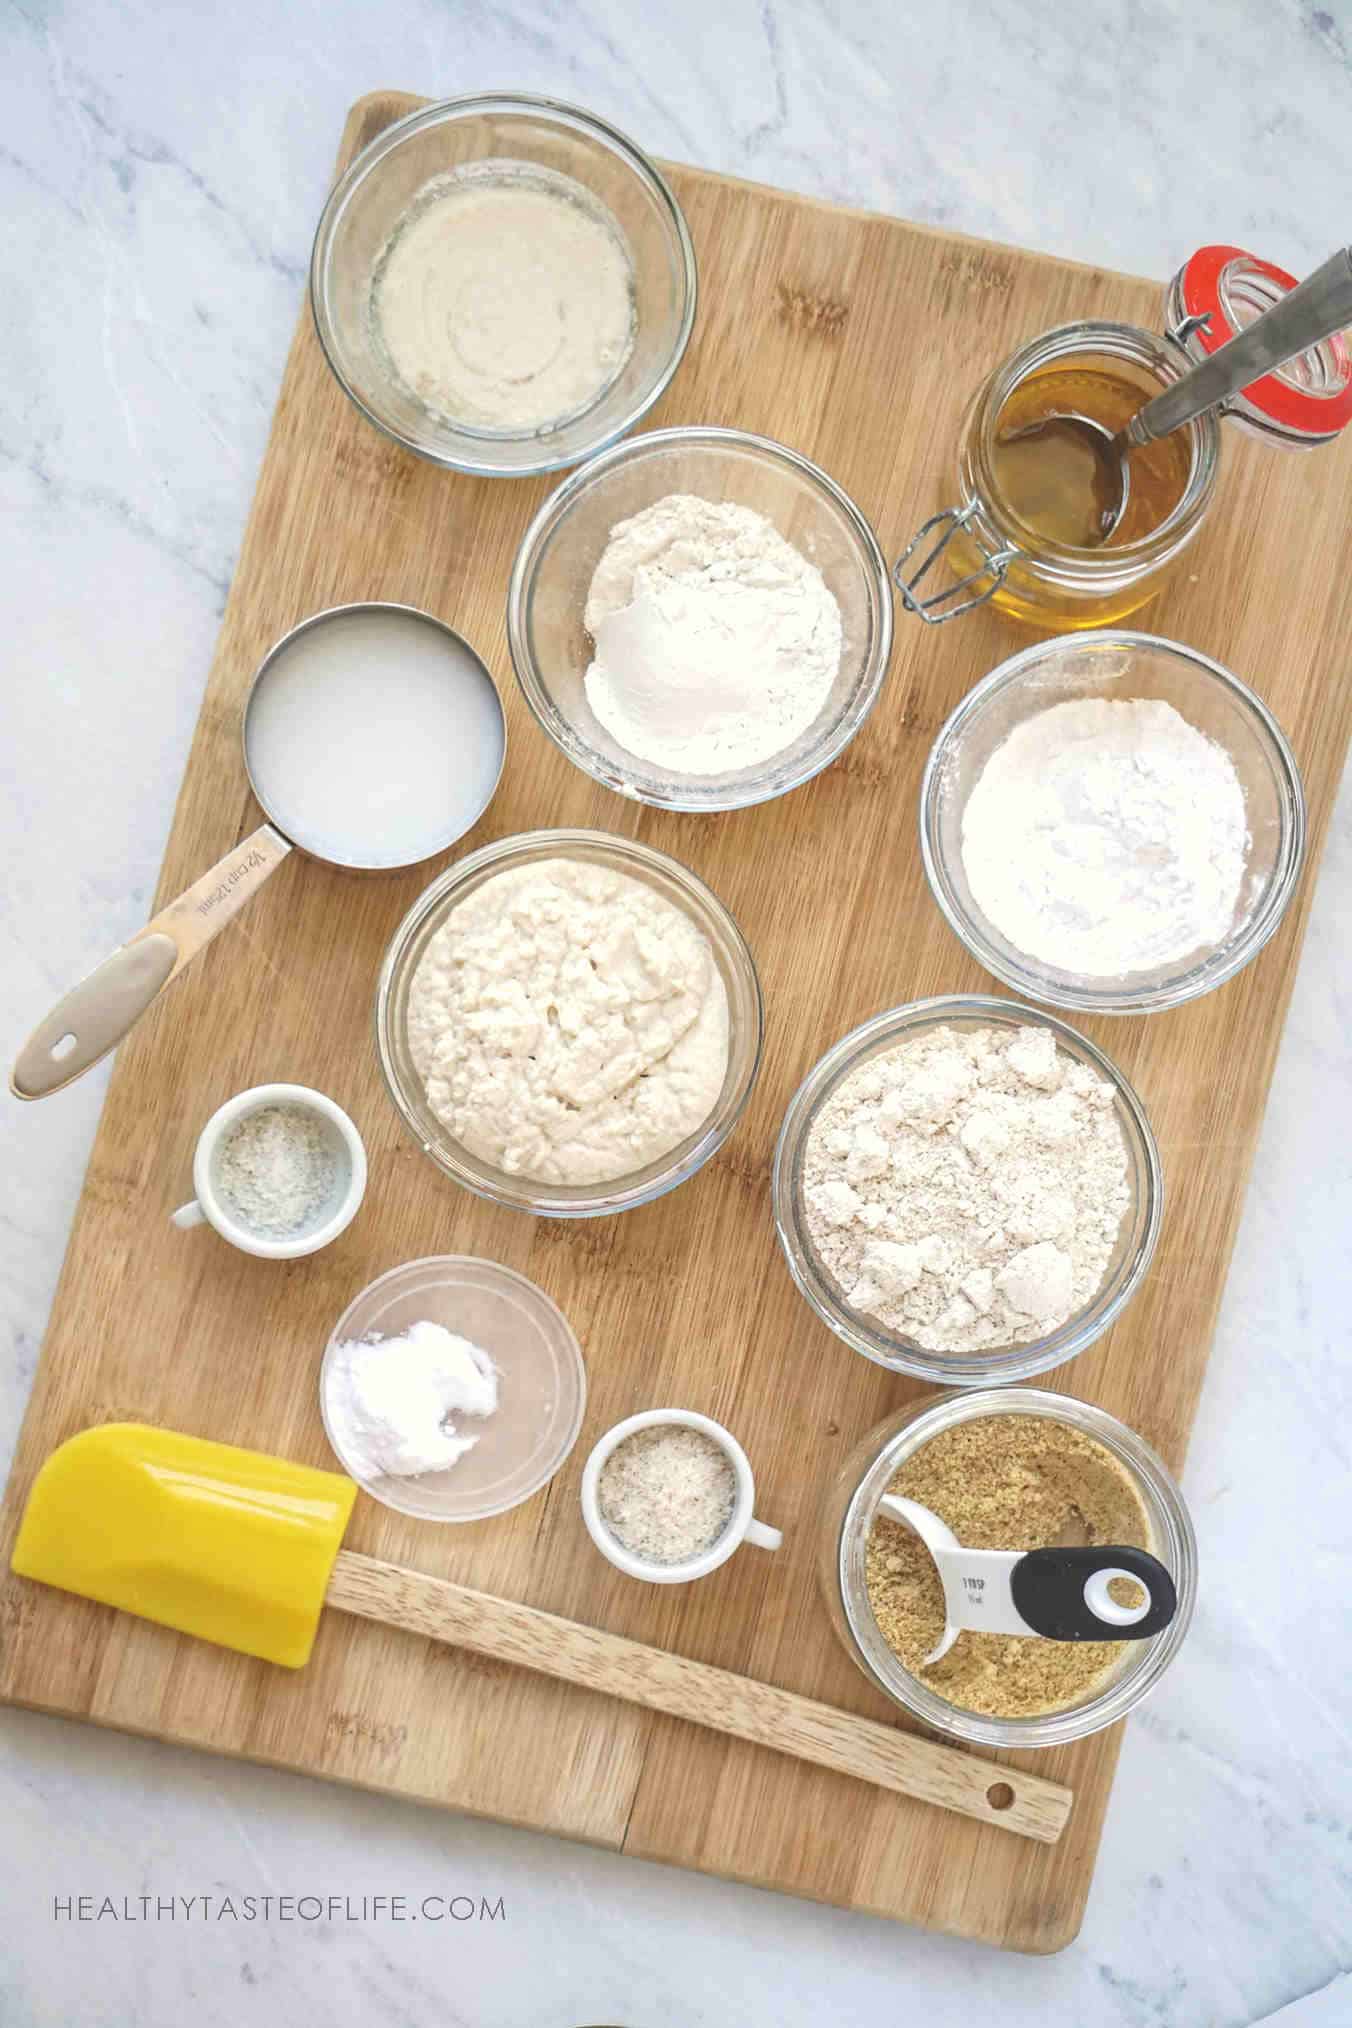
Ingredients (and the job each one does)
Keep exact measurements in the recipe card below (this section is for understanding + swaps.)
- Gluten-free sourdough starter (active or discard): gives flavor + acts as a fermentation base
- Oat flour (or sorghum): main flour body that provides structure
- Arrowroot flour: helps bind and reduces crumbling
- Cassava flour: provides structure + chew
- Psyllium + fine flax meal: binder + moisture management (important for GF structure)
- Warm water or non-dairy milk: for hydration
- Vegan butter: I used Miyoko’s, or use oil.
- Baking soda + apple cider vinegar: quick lift right before cooking (baking powder replacement)
- Salt + Optional sweetener: for flavor and a slightly sweeter muffin
Learn how to make a gluten free (brown rice based) sourdough starter first, if you don’t have one. The second best option is just mixing brown rice flour (1/2 cup) with warm water or plant based milk (1/3 cup) instead.
Step-by-Step: How To Make Gluten Free Sourdough English Muffins
Step 1. make the dough
- Mix the base: Mix wet ingredients first (including starter). Then stir in psyllium + flax so they hydrate and thicken.
- Add dry ingredients: Mix in flours + salt until you get a sticky dough (between batter and dough).
- Add the leavening last: Right before cooking, stir in baking soda + apple cider vinegar to create bubbles. At this point you could leave your dough ferment for an hour or two (if you want a more tangy flavor) or proceed to baking right away.
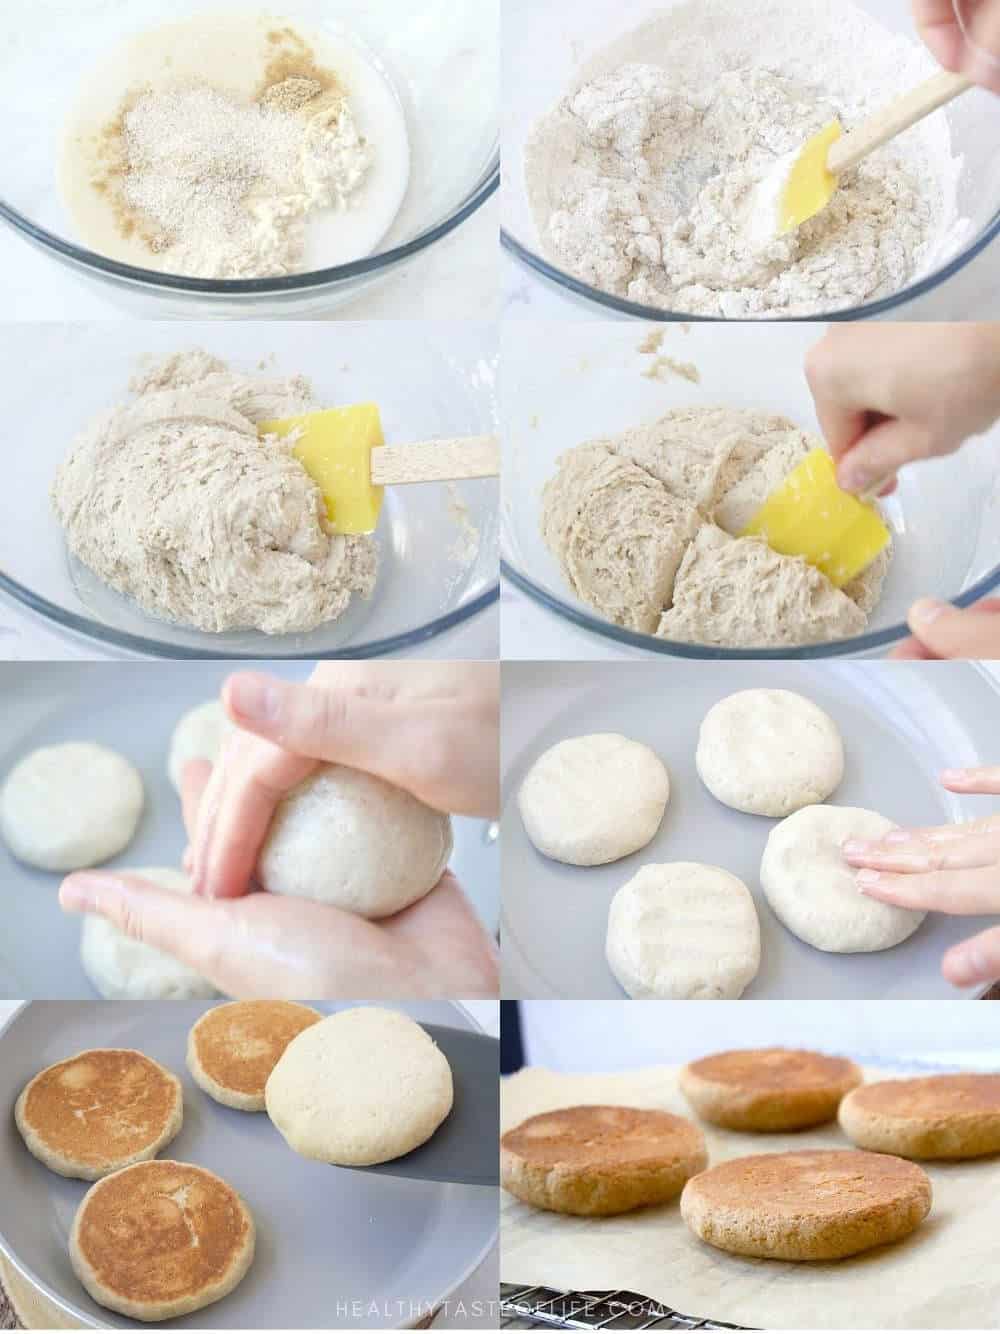
Step 2. Shape
- Shape. Divide into portions, form rough balls with greased hands (1/3 -1/2 cup dough each), place on a medium-low skillet, then press into thick rounds. Brown both sides.
Step 3. Cook
- Cook. Spacing at least 1½ inches apart place the balls on the preheated skillet and press dough balls into thick (or thinner) rounds. Brown both sides and place the muffins in the preheated oven and bake until they are cooked through inside.
- Finish in the oven. Transfer to a 350°F oven and bake until cooked through inside. Cool at least 20 minutes before eating.
Video Tutorial
Gluten-Free Sourdough English Muffins (Vegan, No Yeast)
Troubleshooting
- Dough too runny? Your starter might be looser than mine, or your flour brand absorbs less. Add 1–2 tablespoons extra oat/sorghum flour and let it sit 5 minutes.
- Dough too thick / hard to shape? Add 1–2 tablespoons warm water/milk and mix again.
- Muffins browning too fast/dark on skillet? Heat is too high. Use medium-low; you want slower browning.
- Centers undercooked? Don’t skip the oven finish; bake a bit longer.
- Crumbly muffins? Don’t reduce psyllium/arrowroot, those help hold structure.
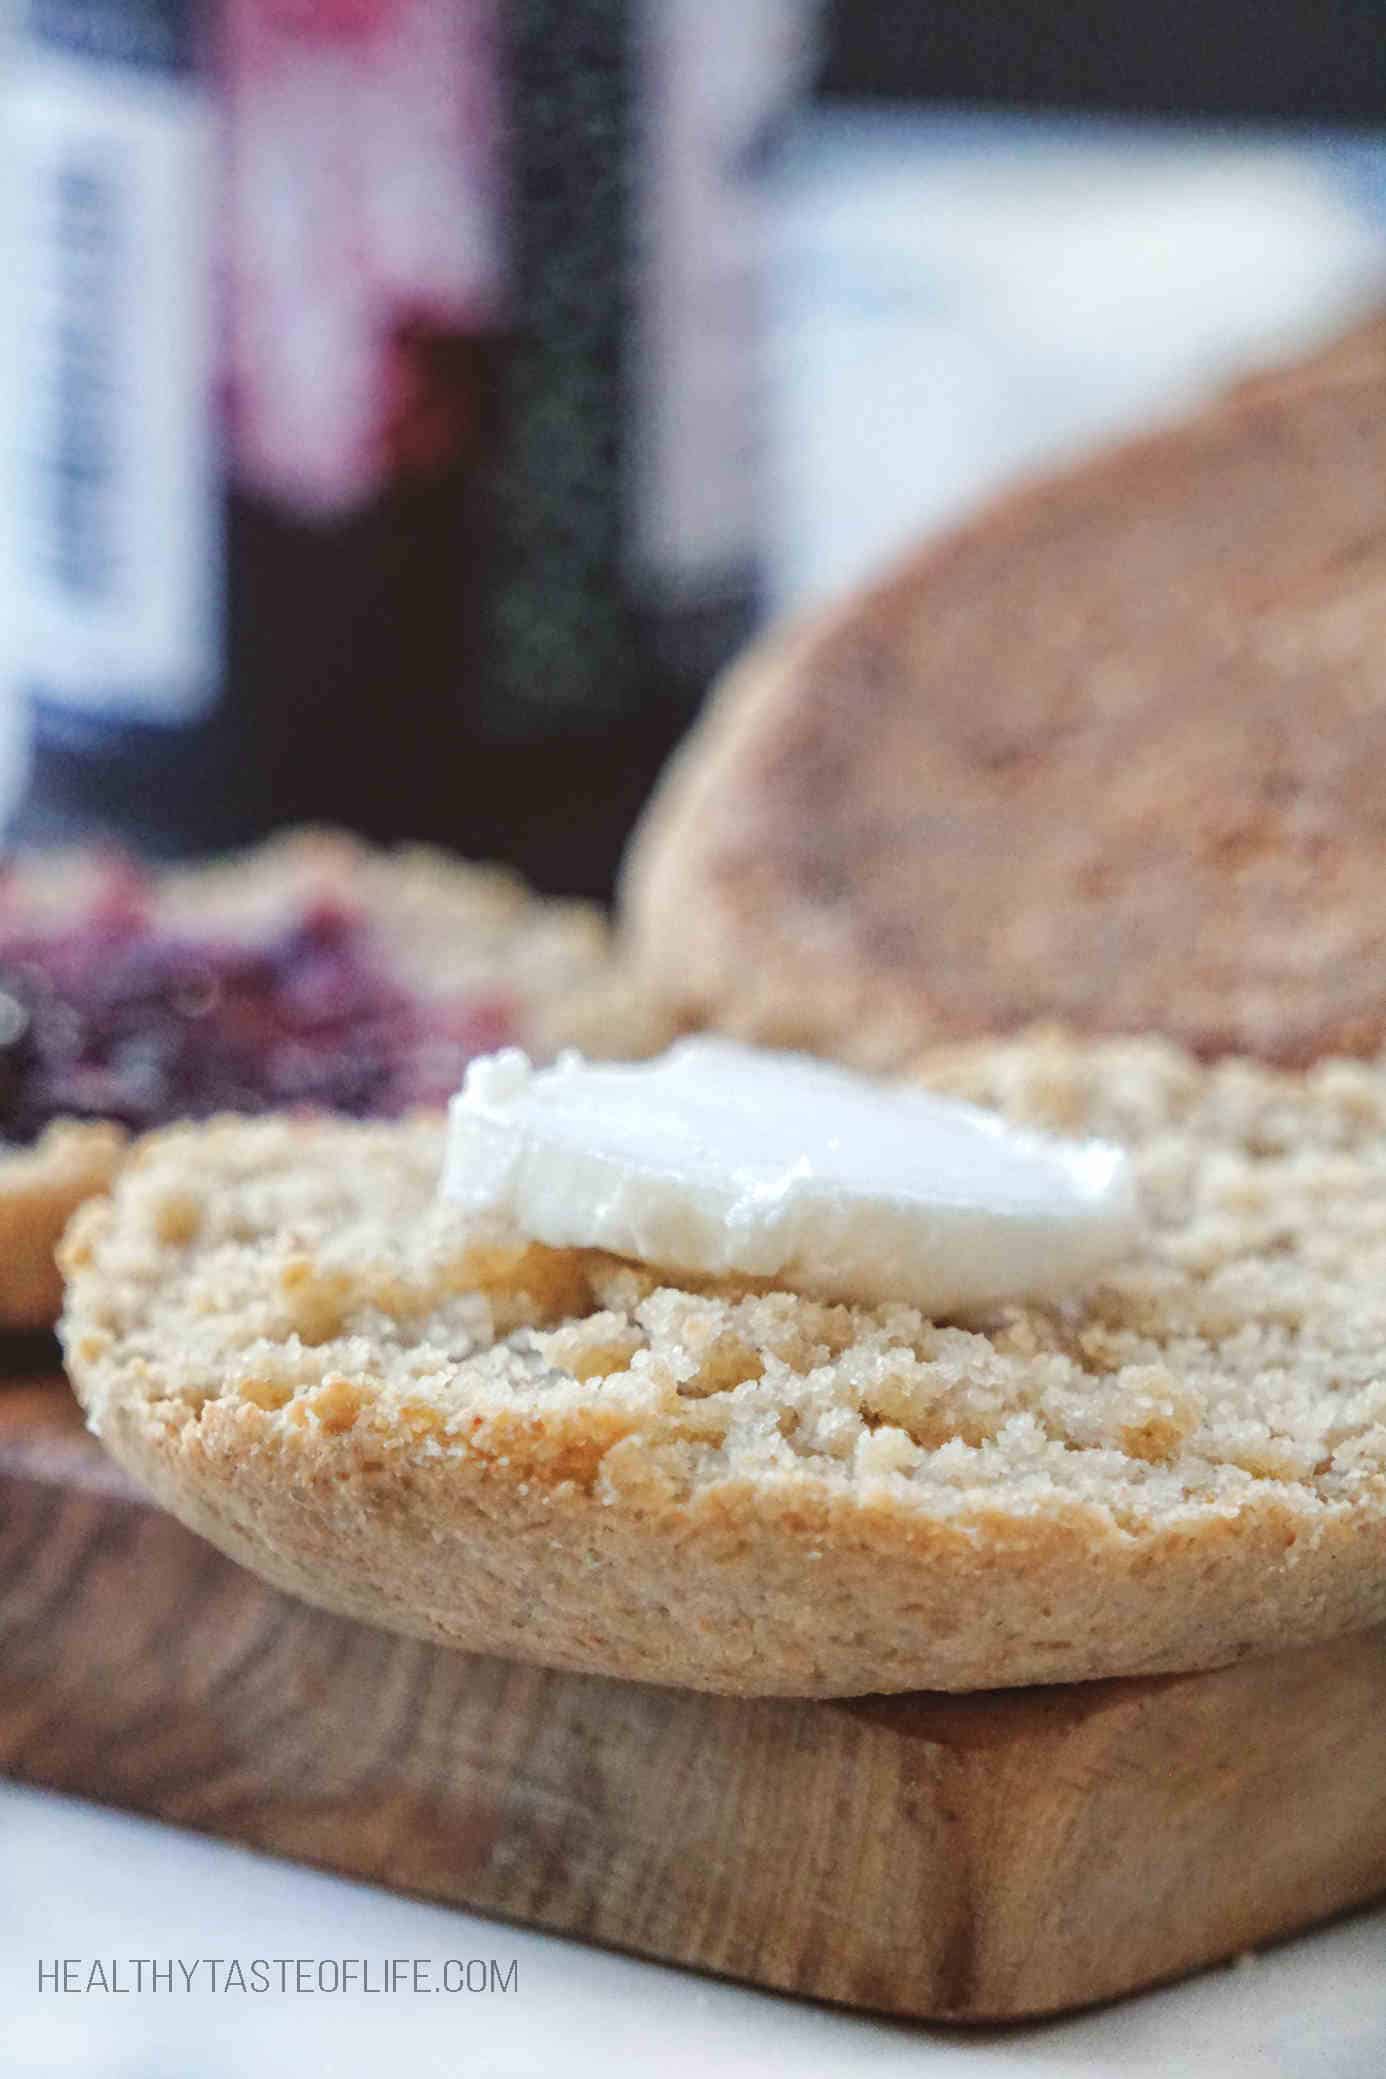
Ways to Serve (Savory + Sweet)
- Savory: avocado + egg+ tomato + basil (breakfast sandwich style)
- Sweet: jam, nut/seed butter, or honey (if not vegan)
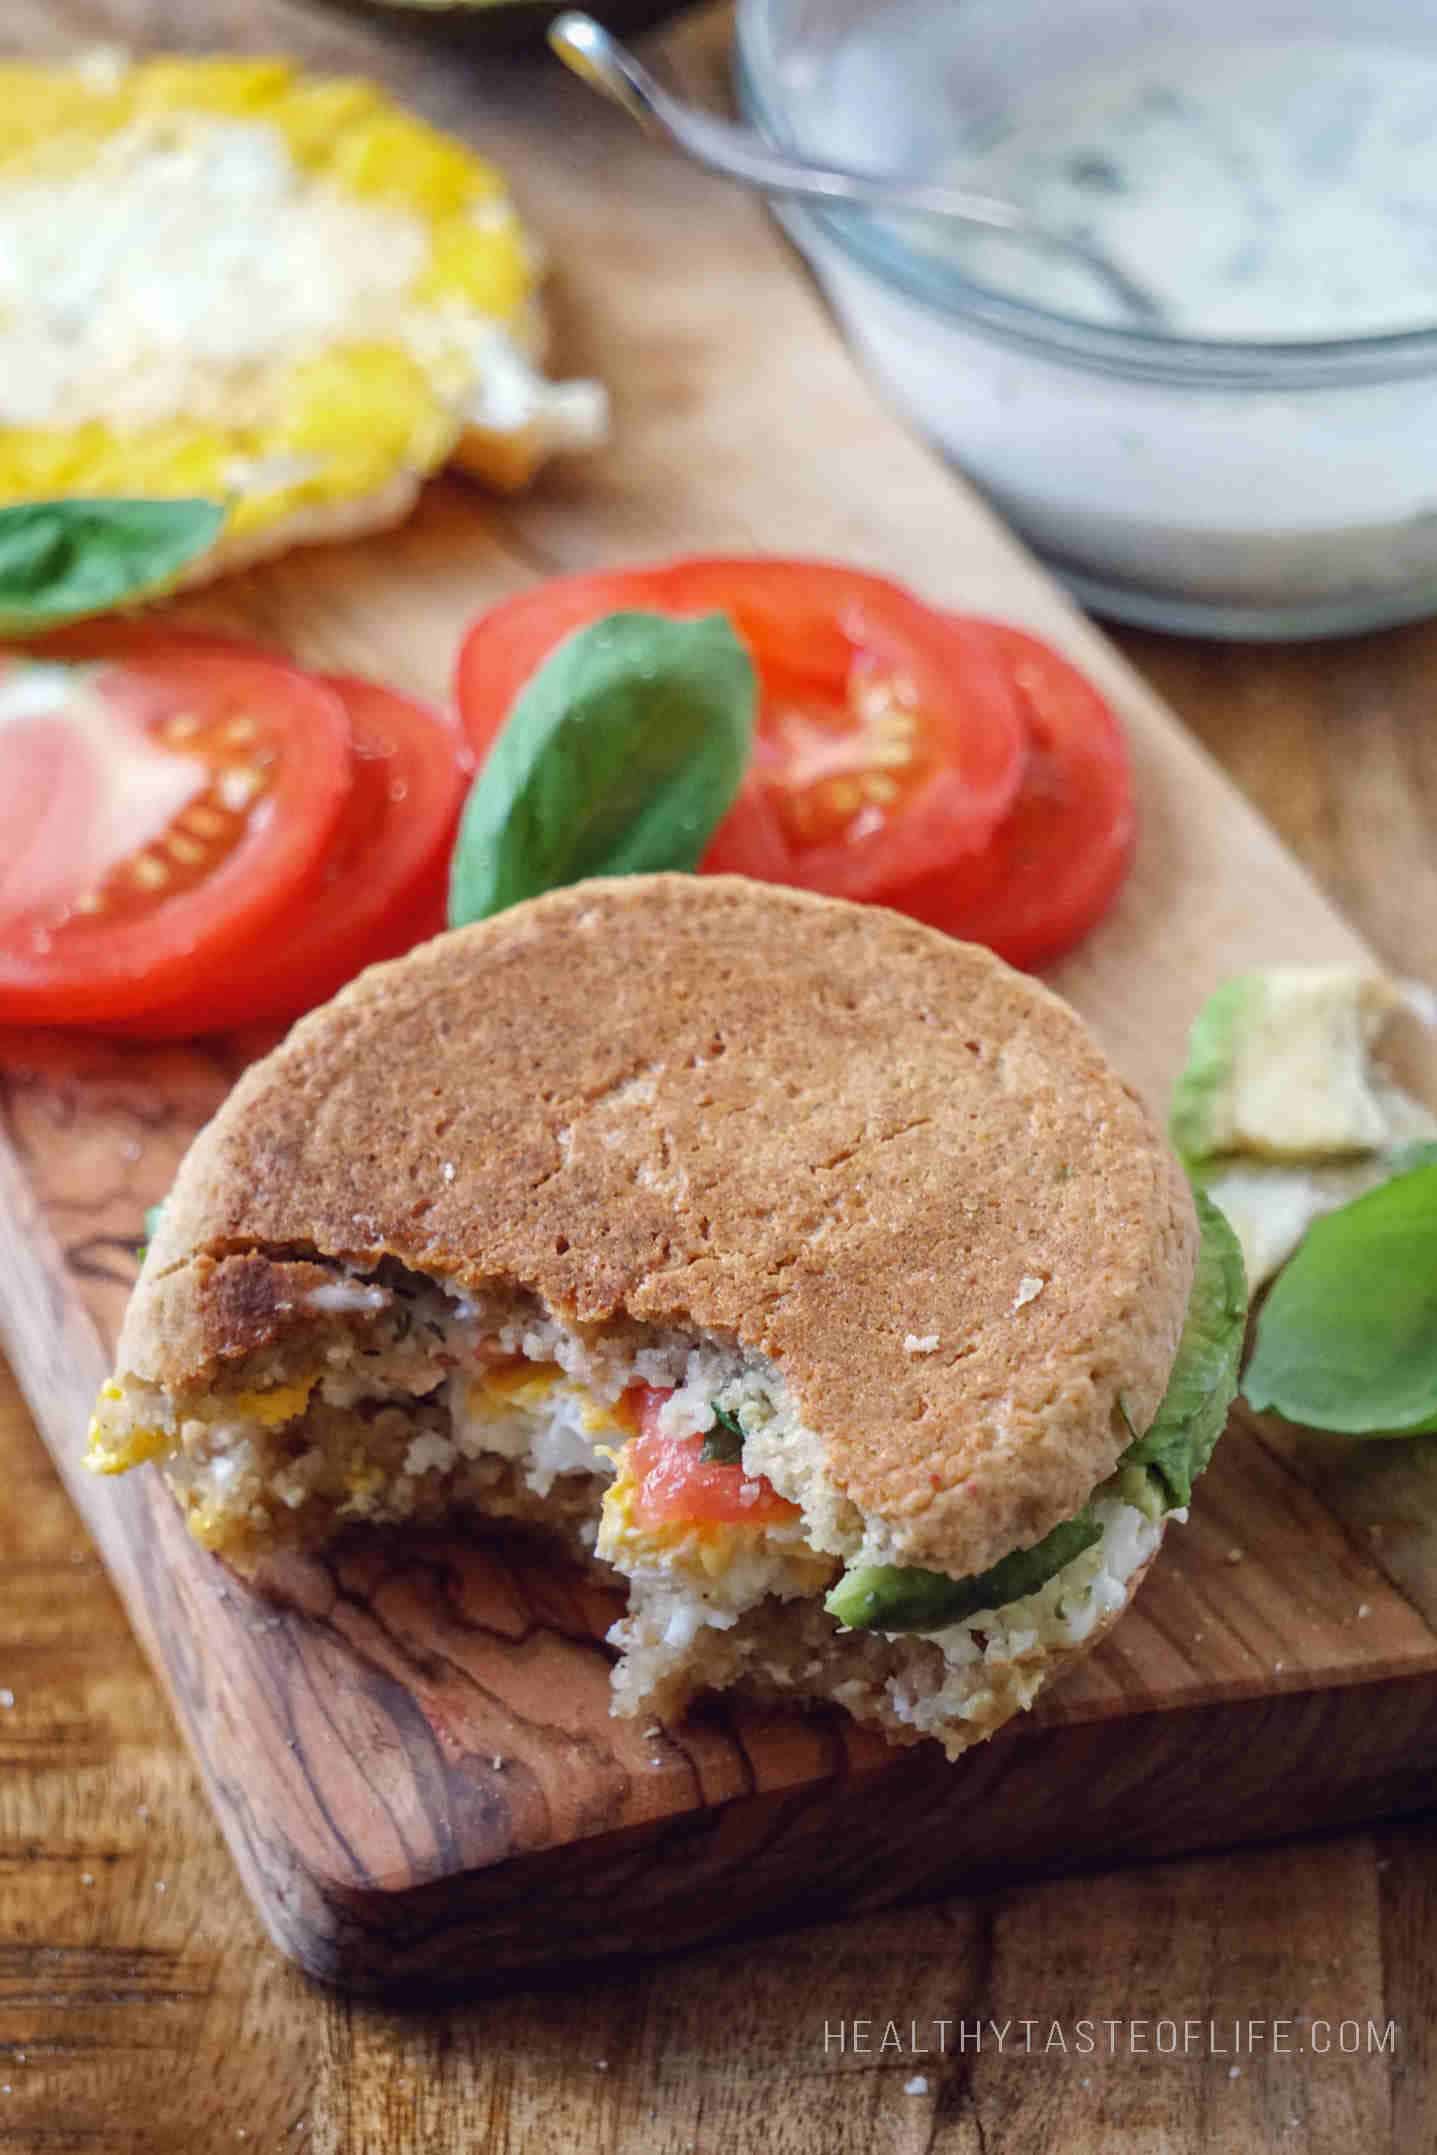
For bigger sandwiches, I also make gluten-free sourdough buns.
Storing Tips
- Fresh gluten free sourdough English muffins will keep at room temperature for 3 to 4 days. For longer storage, pack the muffins into freezer bags and freeze up to 3 months. Pre-slicing them will allow you to separate them easier later while frozen.
- To defrost, they can be thawed completely in the refrigerator overnight, heated in a conventional oven or in a toaster (use the frozen setting). Fork split the muffin, and serve.
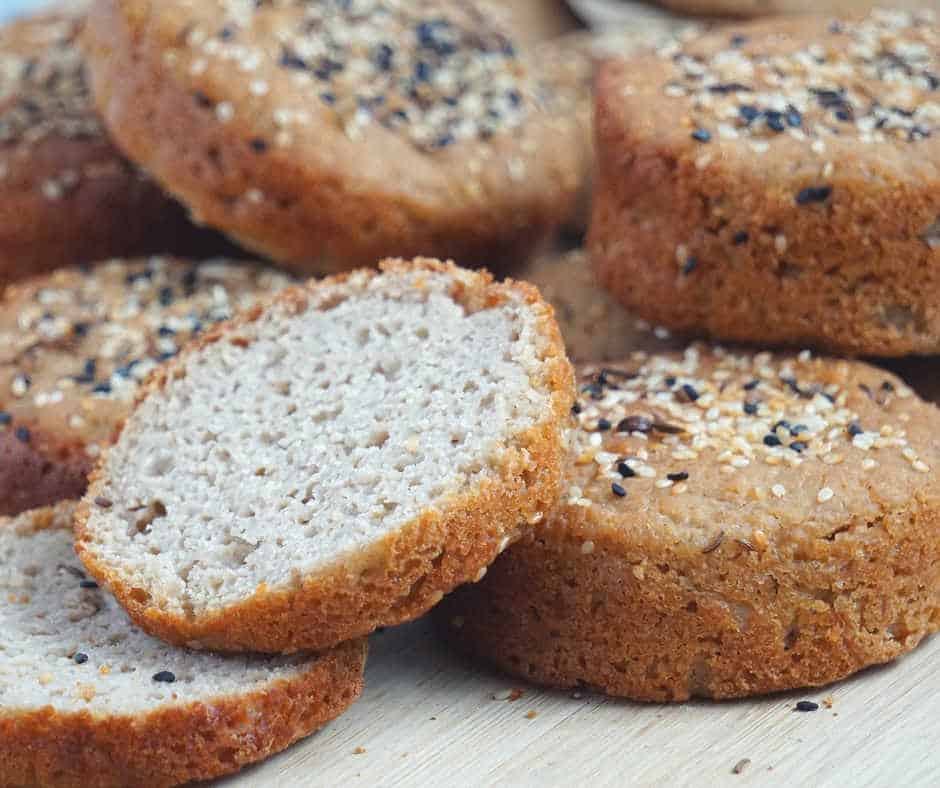
Flour Variation: Make Them With Sorghum Flour and Buckwheat Flour
Tried This Recipe? I’d love to hear how it turned out! Tap ⭐⭐⭐⭐⭐ to rate it or leave a quick comment below! your feedback helps other readers (and keeps me creating new treats).
Gluten-Free Sourdough English Muffins (Vegan, No Yeast) Recipe
Ingredients
- ½ cup gluten free sourdough starter - active or discard
- ⅓ cup oat flour - or sorghum flour
- ⅓ cup arrowroot flour - or other starchy flour
- ¼ cup cassava flour
- 1 tsp psyllium husk
- 1 tbsp flax meal - very fine
- 2 tbsp vegan butter - (I used Miyoko's), melted
- ⅓ cup + 1 tbsp non dairy milk (or water) - warm
- ¾ tsp baking soda
- ¾ tsp apple cider vinegar - or lemon juice
- ¾ tsp sea salt
- 1 tbsp maple syrup - or honey (if not vegan) – optional
Instructions
Make The Dough
- In a large bowl mix all wet ingredients (including the gluten free starter), then add the psyllium husk and flax seed meal in order to soak and form a slightly gelatinous substance.
- Then add the rest of dry ingredients and give it a good mix. The dough should be sticky and soft, something between “batter” and “dough”. At this point you could leave your dough ferment for an hour or two (if you want a more tangy flavor) or proceed to baking right away.
- When ready to cook, add the leavening agent (baking soda and apple cider vinegar) and mix to combine. This will create lots of air bubbles and provide some lift.
- Pre-heat the skillet to med-low heat and the oven at 350F.
Divide and Shape the Dough
- Using a spatula divide the dough in equal parts (1/3 -1/2 cup dough each), shape into rough balls.
- You can make smaller balls or larger, it's up to you. Use greased hands to prevent sticking.
Cook (Skillet / Oven)
- Spacing at least 1½ -2 inches apart place the balls on the preheated skillet and press dough balls into thick (or thinner) rounds. Brown both sides (about 2-3 minutes). I'm using a non-tick oven safe ceramic pan, so I'm not using any grease. If you are using a regular one, spray the pan with oil before cooking.
- Flip and cook the second side until brown, similar to pancakes.
- Then transfer the muffins in the preheated oven (350F) and bake until they are cooked through inside (about 20-25 minutes).Let cool at least 20 minutes before serving.
Video
Notes
- Dough should be sticky (between batter and dough).
- Add baking soda + vinegar right before cooking for best lift (this is your baking powder replacement).
Nutrition
The information shown is an estimate provided by an online nutrition calculator.
More Gluten-Free Baking / Breakfast / Sourdough Recipes


©HealthyTasteOfLife. Content and photographs are copyright protected and need prior permission to use. Copying and/or pasting full recipes to other websites and any social media is strictly prohibited. Sharing and using the link of this recipe or article is both encouraged and appreciated!


What can i sub for cassava flour?
Tapioca, or any other starchy flour.
Made it twice already. Delish! Thank you again, Olga!
I’m glad you enjoyed it. My pleasure!
Hello Olga! I’m late to finding your wonderful blog! My sourdough starter (which I started yesterday) is a GF one-for-one mixture. Am I able to use that same kind of flour for this recipe? My stomach doesn’t like pure oat flour. I’m so excited to browse all of your blog recipes! Thanks again!
Hi Noelle, congratulations on starting your sourdough!
Just replace the oat flour with another gluten free flour that has the same texture. Or you can make a mix of less starchy and more starchy flours to have a balanced weight.
@HealthyTasteOfLife, Thank you, thank you! My starter is ready and I have your recipe printed! And I LOVE your blog!
If using the quick brown rice flour + water/milk for the sourdough starter, how long does it have to sit? Or do you really need the fermented sourdough starter for this recipe?
About 10-15 minutes would be enough. But using the sourdough starter would yield a much better taste.
I tried them today, I’m really impressed how easy it is, no need to wait 4-5 hours until they rise.
I’m really glad you tried them!