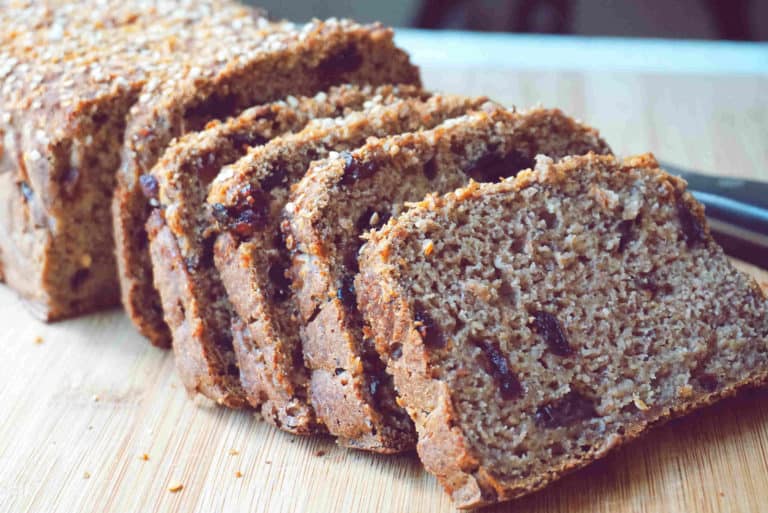
Gluten Free Sourdough Baguette (No Yeast Added)

If you’ve been missing a real baguette, the kind with a golden, crackly crust and a soft chewy crumb, this recipe is for you. This gluten free sourdough baguette is made with a live sorghum-based sourdough starter and a custom flour blend, with no added commercial yeast, no xanthan gum or egg and none of the gummy texture that so many store-bought gluten free breads have. Just real, fermented, homemade bread, the way it should be.

As a recipe developer and integrative nutrition health coach, I’ve spent a long time testing gluten free breads that actually taste good and support gut health too. This baguette checks both boxes. The natural fermentation from the sourdough starter does the heavy lifting (it improves digestibility) adds depth of flavor, and gives the bread a lovely rise without any commercial yeast at all. A rice based starter would work just as well (I tried with both).
This one is not trying to imitate bakery wheat bread perfectly. It gives you a wholesome, crusty, satisfying baguette-style loaf that works well for meals, toast, sandwiches, soups, and snack boards. It gives you three baguettes – practical for freezing and saving for later.
Why this recipe is worth making
This recipe is a good fit if you want:
- a gluten-free sourdough baguette made without commercial yeast: fermented, flavorful, crusty and all
- a bread recipe made with simple pantry ingredients (no gums)
- a custom gluten free flour blend I that’s great specifically for this shape/texture (not a packaged blend)
- a baguette that is egg-free, dairy-free, and vegan friendly
- clear steps on dough consistency and tips for getting that bakery-style crust which matters a lot in gluten-free bread baking.
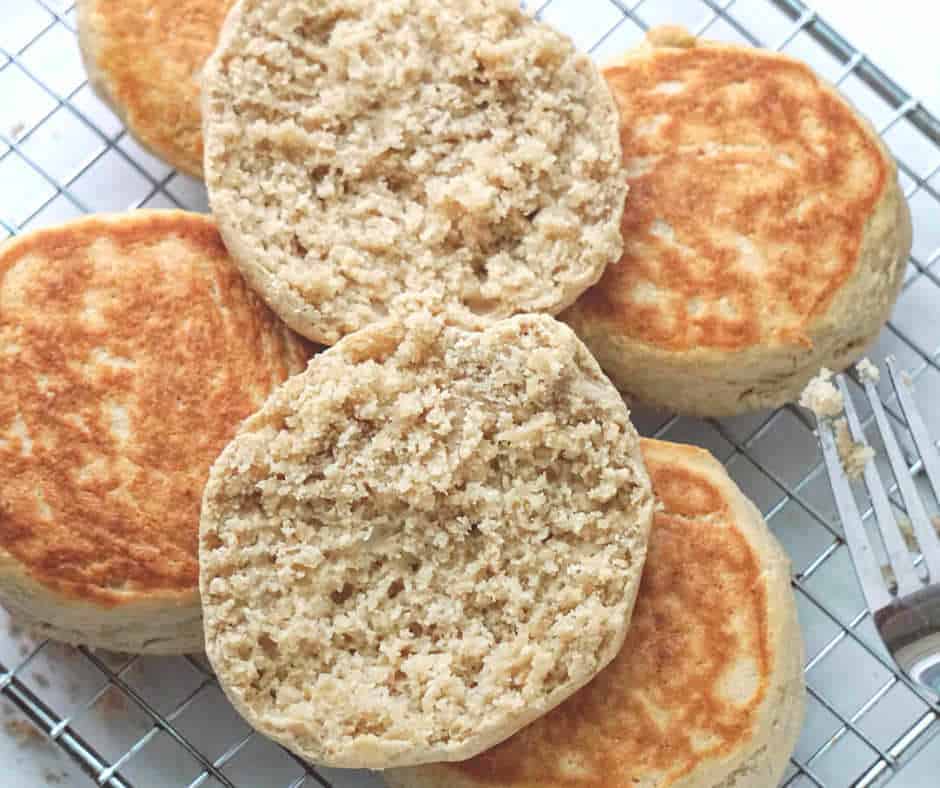
Try these gluten free sourdough buns (for a different shape and a slightly different flour composition).
Ingredients, and why each one matters
The flour blend
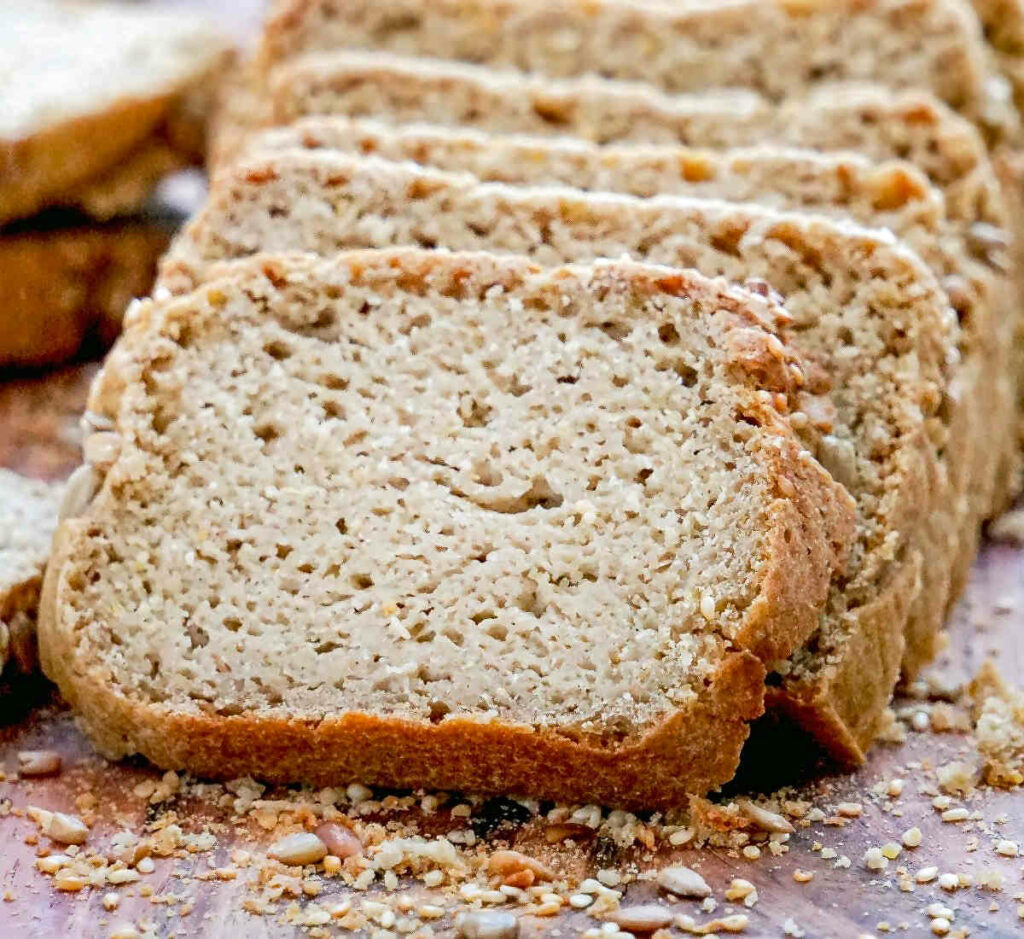
I use a mix of four flours here, each with a specific job. White rice flour is the neutral base – light and finely milled. Sorghum flour adds a mild, slightly sweet flavor that’s closer to wheat than most gluten free flours, plus it brings a good amount of fiber. Cassava flour gives elasticity and helps with that chewy crumb. Arrowroot powder lightens the texture so the baguette doesn’t come out dense or heavy. Together, they work. You can mix a big batch ahead of time and keep it in a jar for your next bake.
Sourdough starter
It must be active and bubbly. Feed it and keep it at room temperature a few hours before starting – a flat, sluggish starter won’t give you a proper rise. I use a sorghum-based starter to keep everything grain-consistent and gut-friendly. You can use a rice-based starter as well.
The binding agents
Psyllium husk and ground flax seeds – These are your natural binders. This is what helps the dough hold together, trap moisture, and keep more structure during proofing and baking. The psyllium husk forms a gel with water that gives the dough structure and mimics the stretchiness of gluten. Don’t skip it and don’t substitute with xanthan gum, the texture will be totally different. And the ground flax seeds add omega-3s and fiber. Grind them fresh if you can (pre-ground flax goes rancid quickly).
Honey
Feeds the starter and adds just a touch of natural sweetness. A small amount helps with browning and rounds out the sourdough flavor. It does not make the bread too sweet. You can swap for maple syrup if you prefer.
Try this Gluten Free Sourdough Bread Recipe if you want a tall, sliceable loaf instead. Or this soft buckwheat bread recipe.
How to make gluten free sourdough baguettes
Step 1. Prepare your starter and psyllium gel
- Feed your sourdough starter a few hours before baking. It should be bubbly and active (if it smells sour and has risen noticeably, it’s ready). If your starter is sluggish, the baguettes will take much longer to proof and may turn out more dense.
- Prepare the gluten free flour mix.
- Grind the flax seeds into a fine flour.
- In a small bowl, combine psyllium husk, honey, and 1 cup of water. Stir and let it sit for 2–3 minutes until it forms a thick gel.

Step 2. Mix the dough
- In a large bowl, combine your active starter with the psyllium gel. Mix to combine.
- Sift in the ground flax meal and the GF flour mix. Add salt, then pour in the remaining 1 cup of water.
- Mix with a spatula until a soft, cohesive dough forms with no dry spots. It should be soft but manageable, not batter-like. Nor stiff like traditional bread dough. It should hold together, but it will not feel elastic like wheat dough. Leave it for 2 minutes to rest befor making any tweaks. Then check:
- If it looks too wet and loose, add flour a tablespoon at a time.
- If it feels too firm and hard to mix, add a small splash of water.
- This part matters because different gluten-free flours (brand type) can absorb water a little differently.

Step 3 . Rest and shape
- Transfer the dough to your work surface, cover with plastic wrap, and let it rest for 15 minutes. It will set and firm up slightly (helps the psyllium and flour fully hydrate).
- Divide into 3 equal pieces. No flour or oil neede, this dough doesn’t stick much. Roll each piece into a log, then gently roll outward from the center so the thickness stays even across the loaf. Each baguette should be about 14″ long and 1.5–2″ thick.
- Line a perforated baguette pan (15.2″ x 9.6″) with parchment paper and transfer the shaped loaves.

Step 4: Add the topping and proof
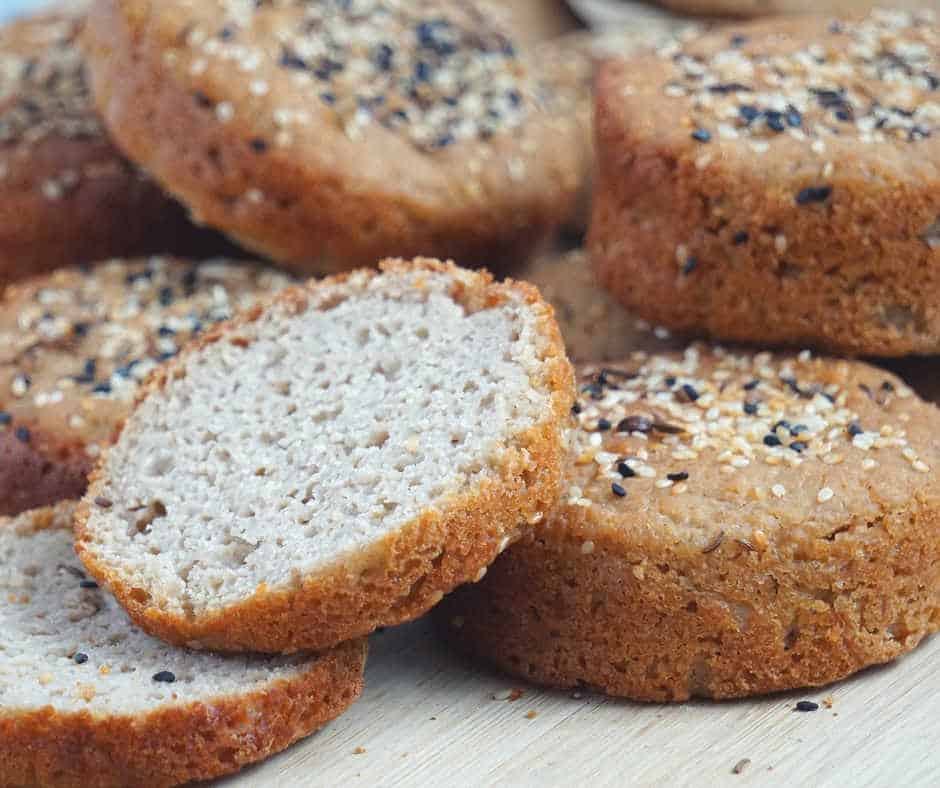
- Mix 1 tablespoon oil with 1 tablespoon maple syrup. Brush the surface of each baguette lightly. This helps the sesame seeds stick and gives the crust better color. Sprinkle sesame seeds on top.
- Cover the baguettes with plastic wrap and let them rise until they look slightly puffy and lighter than when you first shaped them. They do not need to double. At around 70°F, this may take about 4 hours. In a cooler kitchen, it may take closer to 6 hours. If they start spreading too much, they may be overproofed.

Step 5. Bake with steam
- Preheat oven to 450°F with a cast iron pan on the bottom rack.
- Cover baguettes with aluminum foil, so the steam stays around the loaves early on. Load them into the oven, then carefully pour about 1 cup of water into the cast iron pan and quickly shut the oven door. The steam helps the baguettes rise and forms a real crust.
- Bake 15 minutes covered, then remove the foil and bake another 20 minutes uncovered or until deep golden brown.
Step 6: Cool before slicing
Transfer the baked baguettes to a rack and let them cool fully.

Tip: For an even crisper crust, turn off the oven, crack the door open about 2 inches, and let the baguettes cool inside the oven. This way you can skip the steam creating step and just use a foil to cover.
Customization Options
- Higher protein flour variation: Replace ½ cup of the rice flour with certified GF oat flour for a slightly heartier crumb.
- Smaller rolls: Divide into 6 smaller pieces for dinner rolls, reduce the baking time by about 10 minutes.
- Single large loaf: Shape into one large batard instead and bake in a Dutch oven for a more rustic loaf.
- Skip the sesame seeds, or use poppy seeds if you prefer.
- Use a different gluten-free starter. If your starter is based on brown rice or millet and it is active and healthy, it may still work here, though the flavor and proofing speed can change a bit.
Storage and tips
- Same day: Best eaten within a few hours of baking, or the next day while the crust is still crispy. Then store covered to prevent drying for up to 2-3 days.
- For the best texture: toast before eating
- Freezing: Slice the cooled baguettes and freeze flat in a zip-lock bag (up to 3 months). Pull out individual slices and toast directly from froze, no thawing needed. This is honestly the best strategy if you don’t plan to eat all three baguettes right away. And you’ll have homemade gluten free bread on hand whenever you need it.

Troubleshooting Tips
- My dough is too wet: Your flour may be absorbing less water than mine. Add a little more flour, 1 tablespoon at a time.
- My baguettes did not rise much: Your starter may not have been active enough, or your kitchen may have been too cool. Gluten-free sourdough also tends to rise more modestly than wheat dough.
- My baguettes spread too much: That usually means the dough was too wet, under-structured, or proofed too long.
- My crust softened after cooling: That can happen with gluten-free bread. Put the baguettes back in a warm oven for a few minutes, or toast slices before serving.
What to serve with these baguettes
These baguettes are great for slicing and eating with almost anything. A few things that work especially well:
- Soups and stews: use a slice to mop up a bowl of creamy butternut squash soup, or serve with dips and salads.
- Cheese boards: slice thin and arrange on a board with hard cheeses, olives, and fruit. Looks beautiful, tastes even better.
- Avocado or nut butter: toasted slices with avocado, lemon, and sea salt make a genuinely satisfying breakfast or snack. I like to pair these with sardines too. See more toast topping ideas.
- Bruschetta-style appetizers: top with roasted veggies for a crowd-pleasing starter.
- Serve as crostini: topped with savory ingredients like cheeses, meats, spreads, veggies, olive oil, and herbs.
- Sandwich-style: Slice lengthwise and fill with grilled vegetables, hummus, or your protein of choice.
FAQs
For this recipe, active starter is the better choice. You want as much natural lift as possible since there is no commercial yeast added.
Yes, this is different from a commercial yeast bread. Sourdough fermentation is slower and the rise is more modest. Look for the loaves to look slightly puffier and lighter in color. If your kitchen is cold (below 68°F), extend the proofing time or place the pan near a warm spot.
Technically yes, but results will be totally different. Most store-bought blends contain xanthan gum, which may make the texture way gummier when combined with psyllium.
A baguette pan helps with shape (especially for softer gluten-free dough-it prevents spreading). The form of the pan (with the tiny holes) supports the dough and allows the heat and air to flow during baking so that you get a nicely rounded golden-brown baguette bottom (which produces a superior baguette).
You can test a cold proof, but since this recipe is written for room-temperature proofing, expect some trial and error with timing and texture.
With gluten free sourdough, scoring is optional. The dough doesn’t have the gluten tension that makes scoring necessary for wheat breads. You can score lightly with a sharp knife if you want the look, but skip it if you want, it won’t affect the bake.
Yes, especially when fully cooled and sliced. It is also very good toasted.
If you already keep a gluten-free starter going, this is a satisfying homemade bread to add to your rotation. It gives you that baguette feel without using packaged bread mixes, gums, or yeast, and the method is simple once you understand what the dough should look like.
If you make it, leave a comment and share how it turned out for you. Tap ⭐⭐⭐⭐⭐ to rate it or leave a quick comment below! I’d also love to hear what starter you used and whether you made any flour swaps.

Gluten Free Sourdough Baguette (No Yeast Added) Recipe
Ingredients
- 1½ cups active gluten-free sourdough starter - sorghum based, rice-based is fine too
- 3 cups gluten-free flour mix
- 4 tbsp golden flax seeds - ground
- 2 tbsp psyllium husk - not powder
- 2 tbsp honey
- ½ tbsp sea salt
- 2 cups water
Topping
- 1 tbsp 1 tbsp avocado oil - or other neutral oil
- 1 tbsp maple syrup
- 2 tbsp sesame seeds
Instructions
- Feed your gluten-free sourdough starter a few hours before starting so it is bubbly and active. You'll need only 1½ cup. The rest place in the fridge for a later bake.
- Grind the flax seeds into a meal.
- In a bowl, mix the psyllium husk, 1 cup water, and honey. Let it sit for a few minutes until thickened.
- In a large bowl, combine the active starter with the psyllium mixture. Mix to combine.
- Sift in the ground flax and gluten-free flour mix. Add the salt and the remaining 1 cup water.
- Mix with a spatula until a soft dough forms and there are no dry spots. Adjust with a little extra flour or water if needed.
- Cover the dough and let it rest for 15 minutes.
- Divide the dough into 3 equal pieces and shape each into a log.
- Roll each piece into a baguette about 14 inches long and 1½ to 2 inches thick.
- Place the shaped loaves on a parchment-lined perforated baguette pan.
- Mix the oil and maple syrup, brush over the tops, and sprinkle with sesame seeds.
- Cover and proof until until slightly puffed and lighter in appearance, about 4 hours at 70°F, or longer in a cooler kitchen (it could take up to 6 hours when cooler).
- Preheat the oven to 450°F with a cast-iron pan on the bottom rack.
- Cover the baguettes loosely with foil and place them in the oven.
- Pour about 1 cup water into the hot cast-iron pan and quickly close the oven door.
- Bake for 15 minutes covered.
- Remove the foil and bake another 20 minutes, or until deep golden brown. You can also use the broil function for the last 2 minutes of baking.
- Cool on a rack before slicing. For a crisper crust, let them cool in the turned-off oven with the door slightly open.
Notes
- 1 baguette can be cut into about 4 servings. So total yield: 12 servings.
- For a heartier crumb you can use my Gluten Free All-Purpose Flour Blend as the base instead (I tested it). It’s made with sorghum, millet, oat, and arrowroot, and works well too with a more whole-grain taste. Just keep an eye on dough consistency and adjust water by a tablespoon or two if needed, since the absorption can vary a little between the two blends.
Nutrition
The information shown is an estimate provided by an online nutrition calculator.