
Mackerel in Jars (Oven-Cooked or Pressure Canned)
If you have a large amount of fresh mackerel, this is one of the simplest ways to prepare it for later. The fish cooks slowly in its own juices with just salt, olive oil, vinegar, black pepper and bay leaf, producing tender, flavorful pieces that are ready to serve straight from the jar. I used very fresh Atlantic mackerel my husband and I caught in New Hampshire, and the fish came straight from the boat to our kitchen the same day.
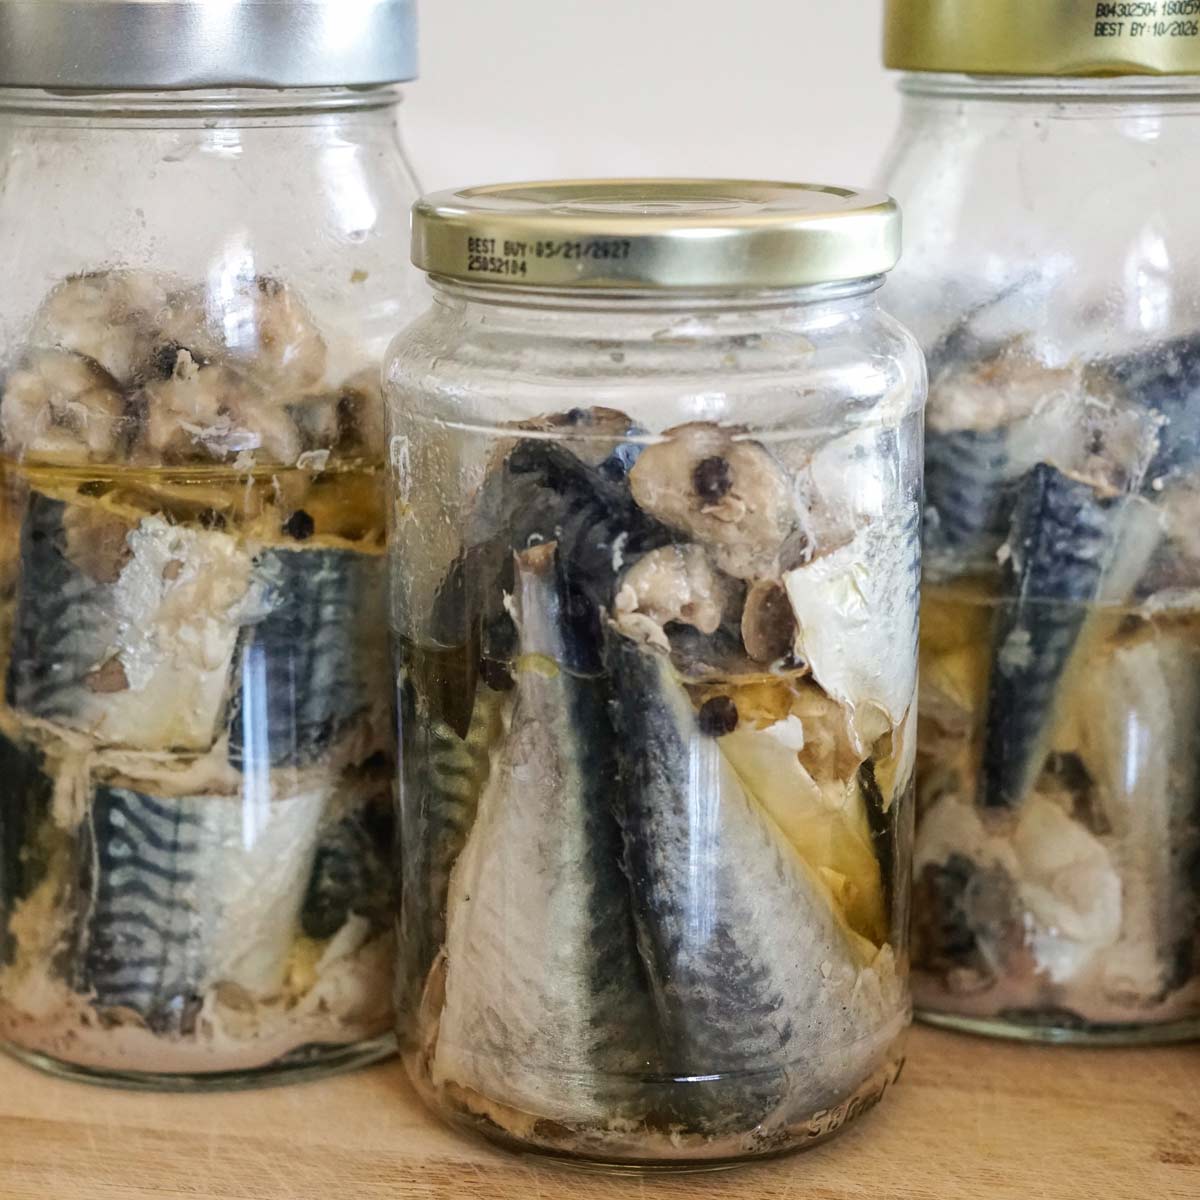
This is the way I have traditionally prepared the fish: slowly cooked in jars so it releases its own juices, with no need to add water or broth.
From here, you can choose the method based on how you want to store it. The oven method keeps the original preparation and flavor, but the finished fish is recommended to be refrigerated or frozen. For long-term pantry storage, use the pressure-canning method below.
If you prefer a salt-cured preparation rather than freezing or canning, try my wet or dry-cured mackerel, another traditional way I use to preserve very fresh fish.
Why This Mackerel Recipe Works So Well
Mackerel is naturally rich and flavorful, so it doesn’t need a complicated sauce. Slow cooking softens the fish while its own juices collect around the pieces.
The vinegar gives it a very mild brightness rather than making the fish taste pickled, while olive oil rounds out the flavor. Bay leaf and pepper add just enough seasoning without covering the taste of the mackerel.
It is especially useful when you have freshly caught fish and more than you can eat immediately. Once prepared, individual jars can be chilled or frozen and thawed as needed.
Ingredients
For the Oven-Cooked Version
- fresh mackerel
- sea salt to taste
- olive oil to taste
- black pepper or several whole peppercorns per jar
- bay leaves
- vinegar (optional) to taste
The exact number of jars will depend on the size of the fish and the jars you use.
For the Pressure-Canned Version
For the closest match to a research-tested fish-canning process, use:
- fresh mackerel
- sea salt to taste
- a few peppercorns or a small amount of dried black pepper
- dried bay leaf
Important: The tested USDA method for mackerel uses raw fish with no added liquid. Salt is optional. Small amounts of dried herbs and spices can generally be used for flavor, but added oil is not recommended unless it is part of a specifically tested canning recipe because fat can interfere with heat penetration.
To keep the flavor very close to my original recipe, simply add the olive oil and vinegar when you open the jar for serving.
Preparing the Mackerel
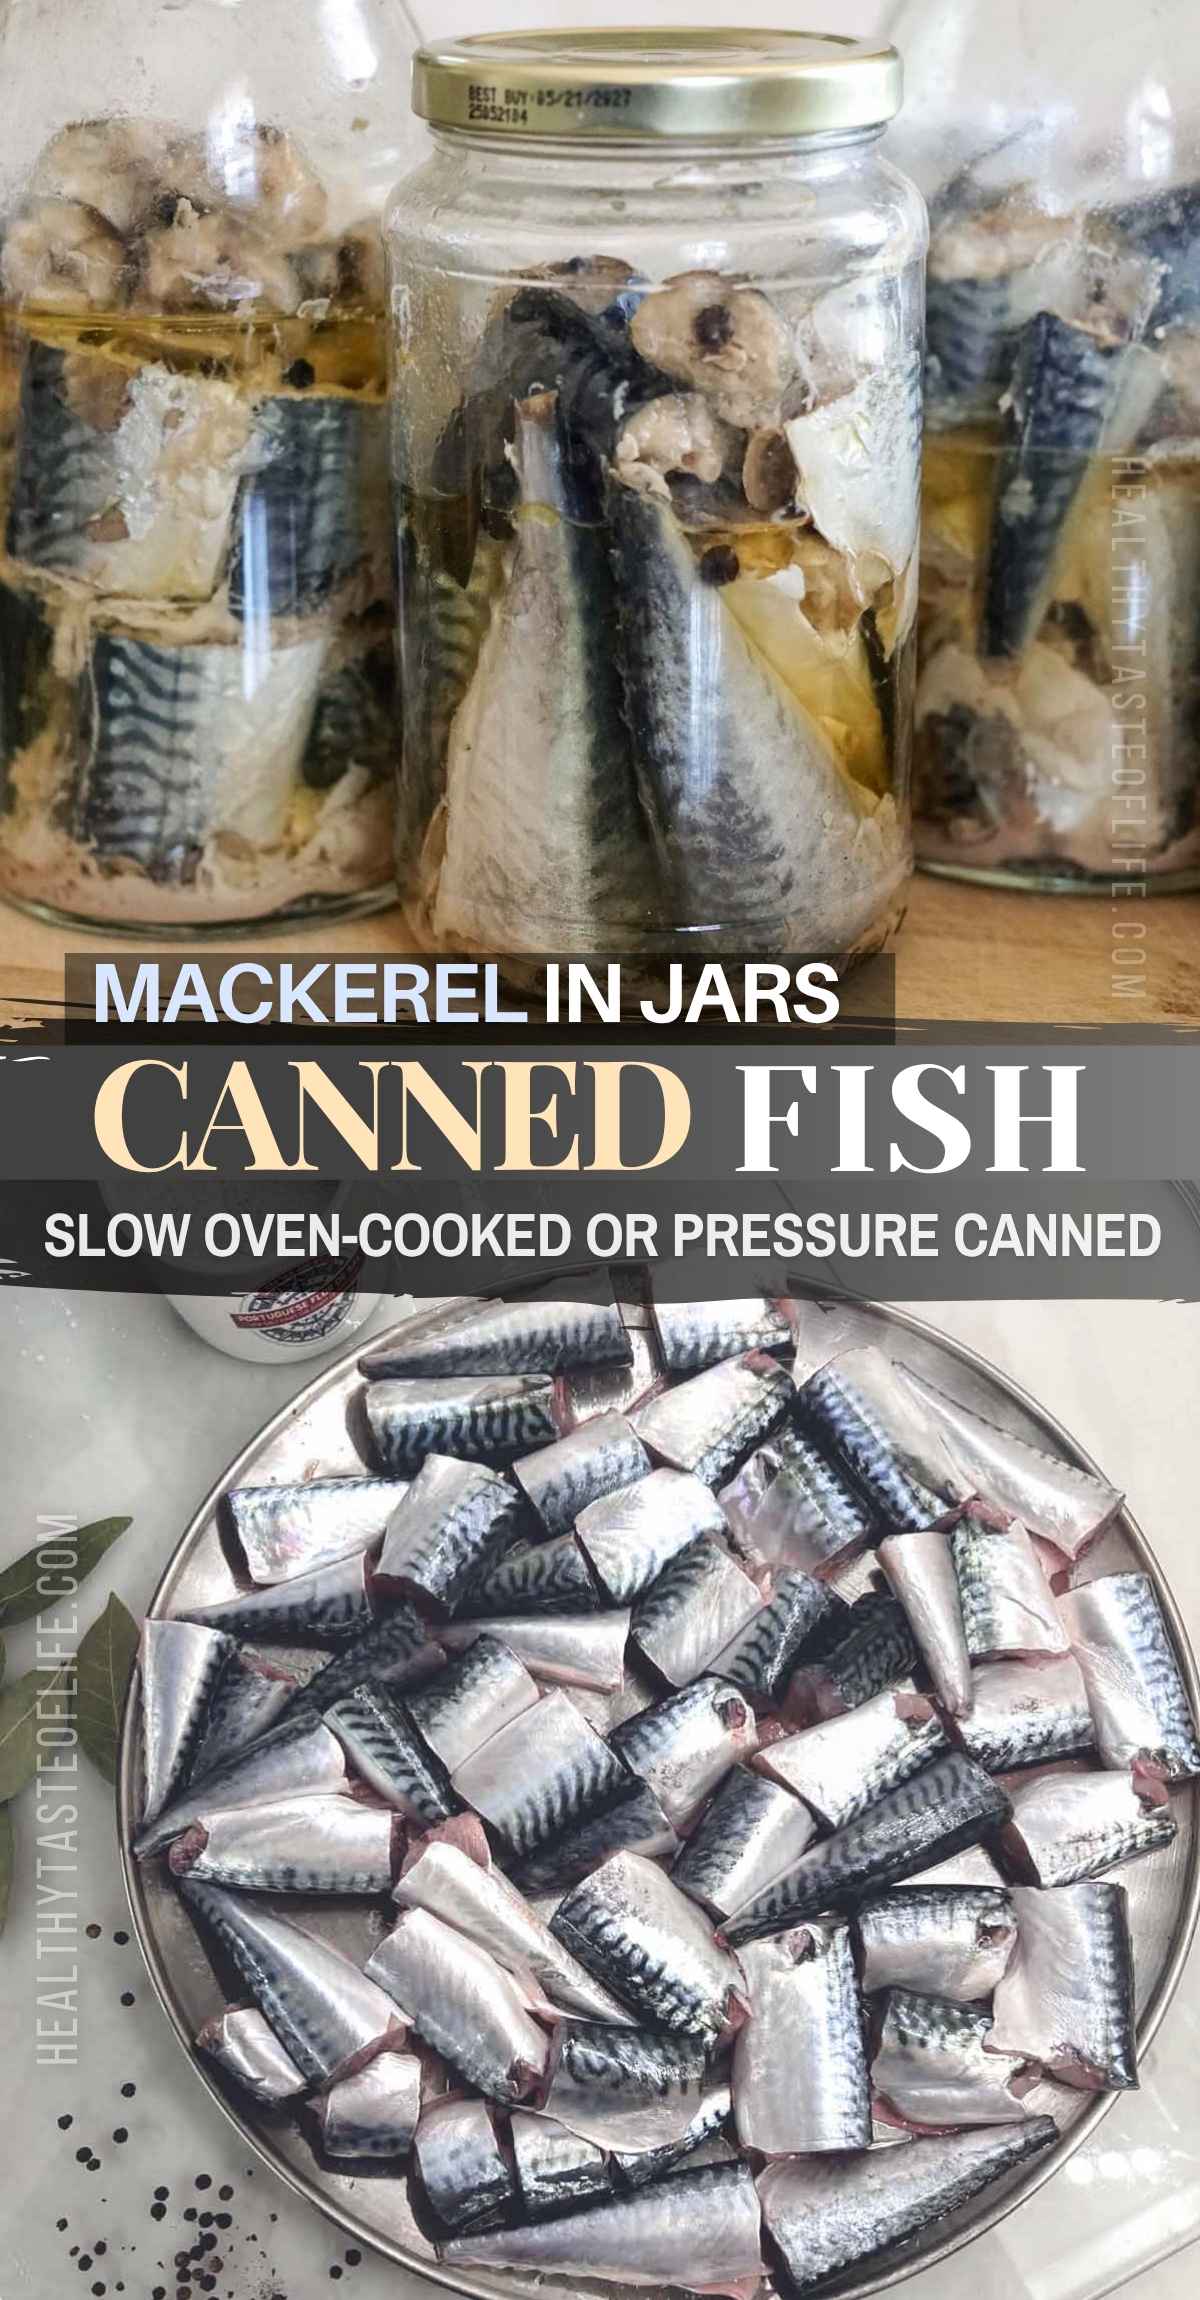
Clean the fish as soon as possible after catching it. Remove the head, tail, fins and innards and wash thoroughly, paying particular attention to removing blood. Pat the fish dry.
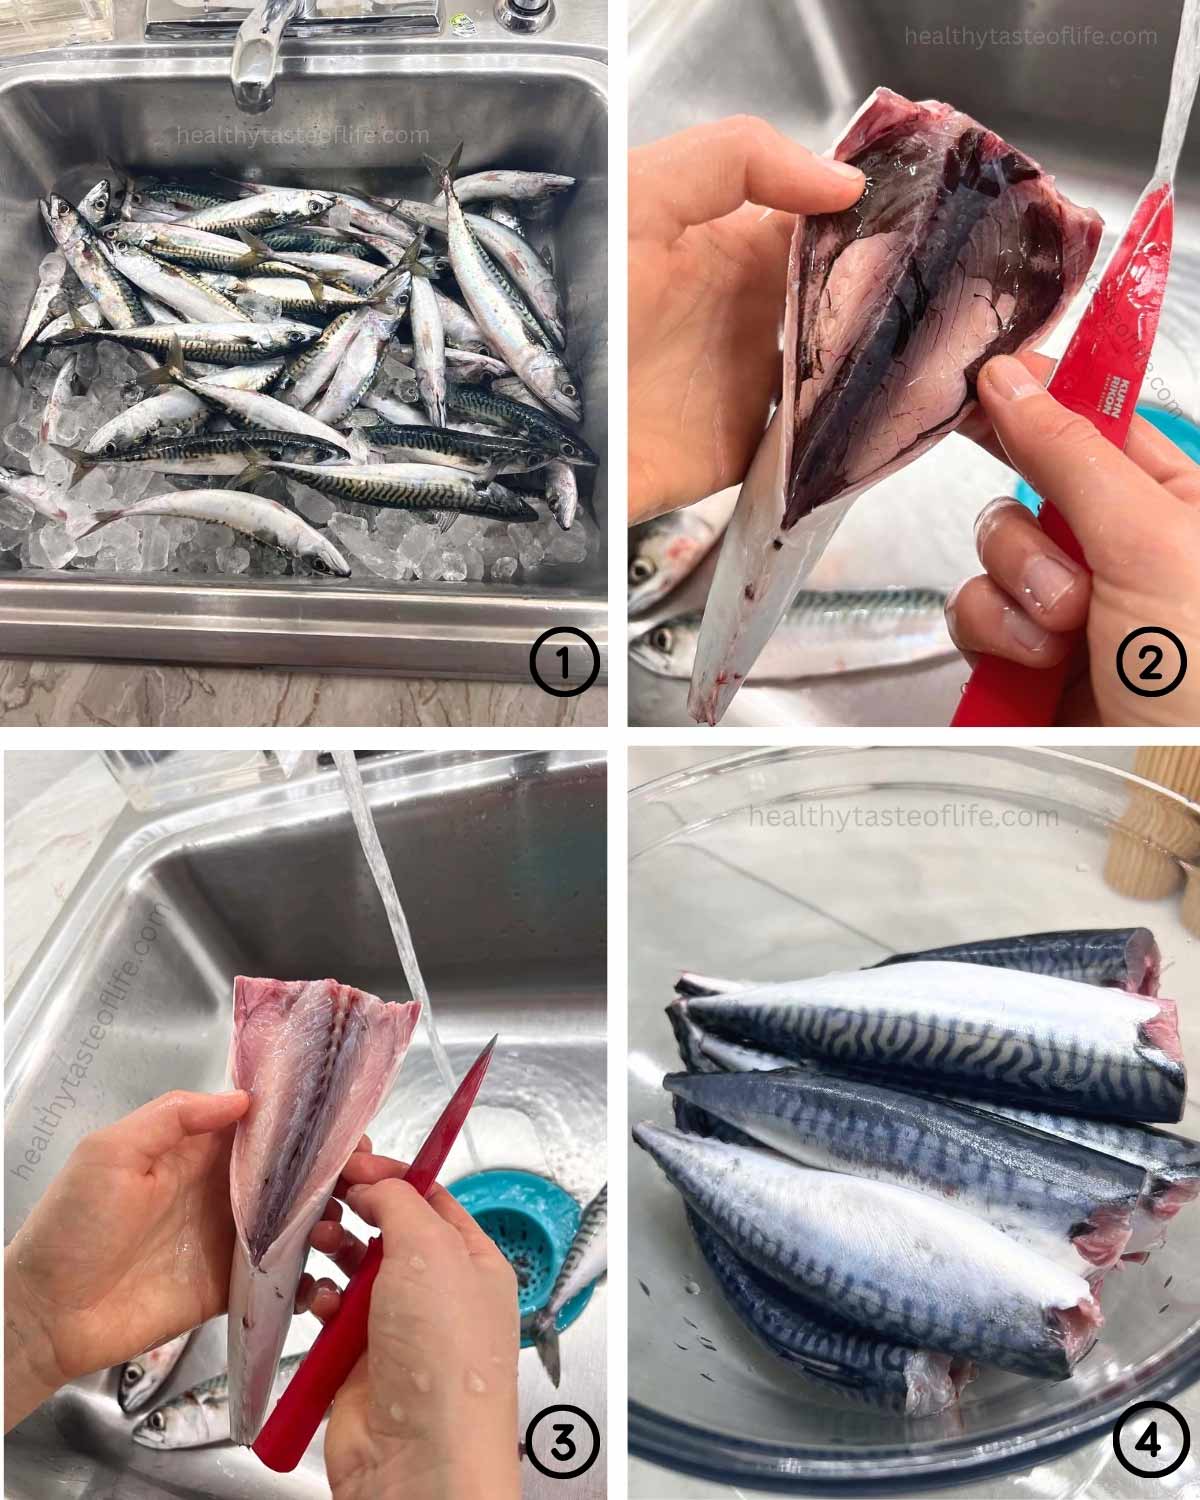
For fish that will be pressure canned, USDA guidance recommends removing the internal organs of freshly caught fish within two hours and keeping the cleaned fish chilled on ice until you are ready to process it.
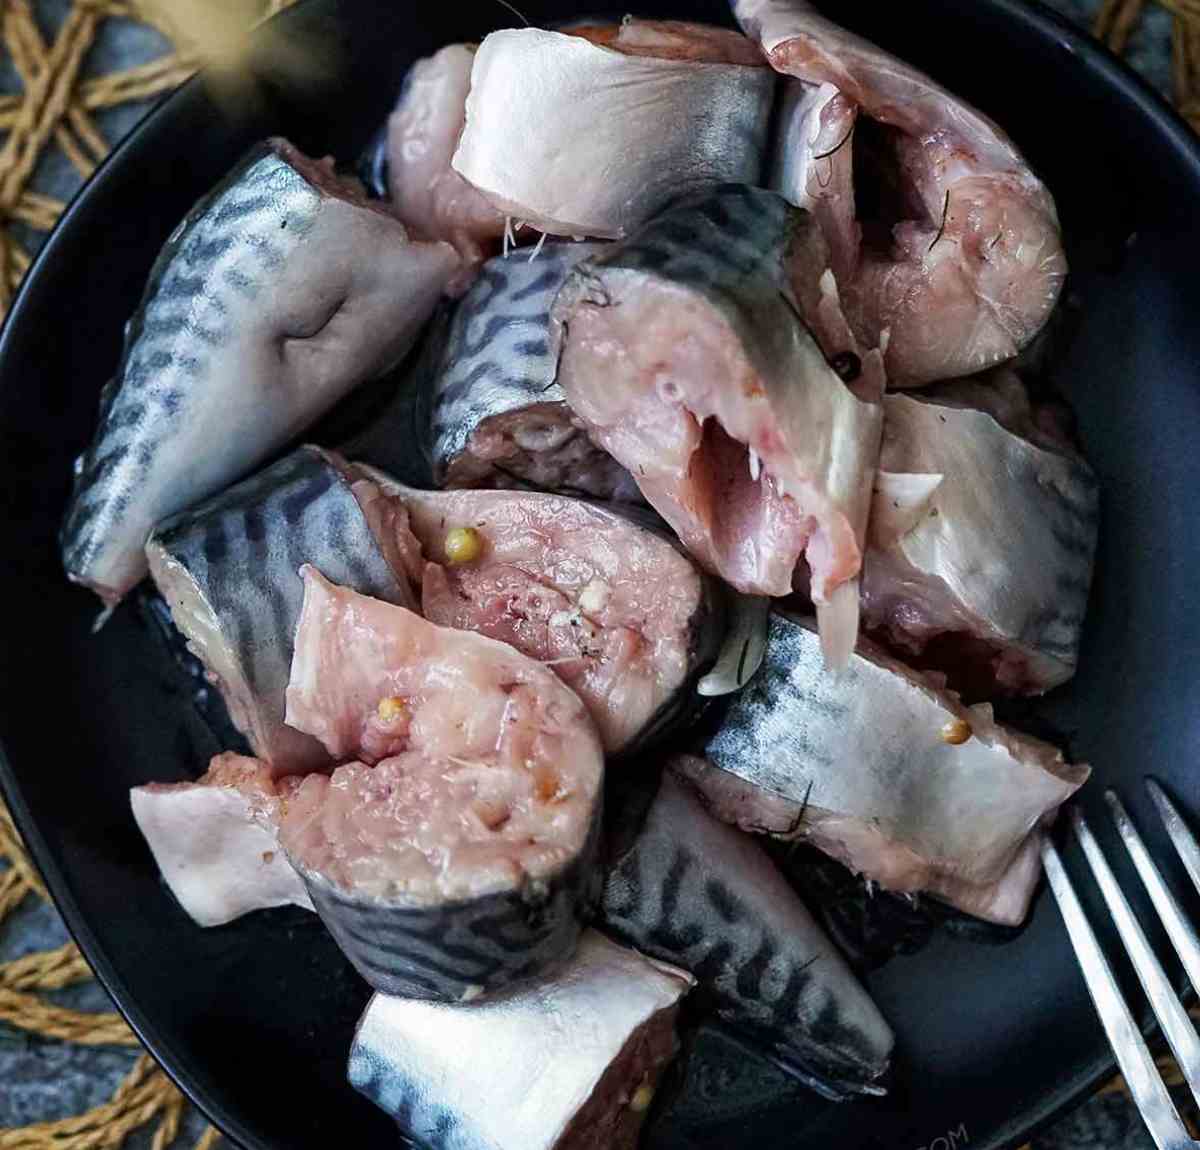
Cut the fish crosswise into pieces about 1 ½ to 2 inches long, depending on the height of your jars.
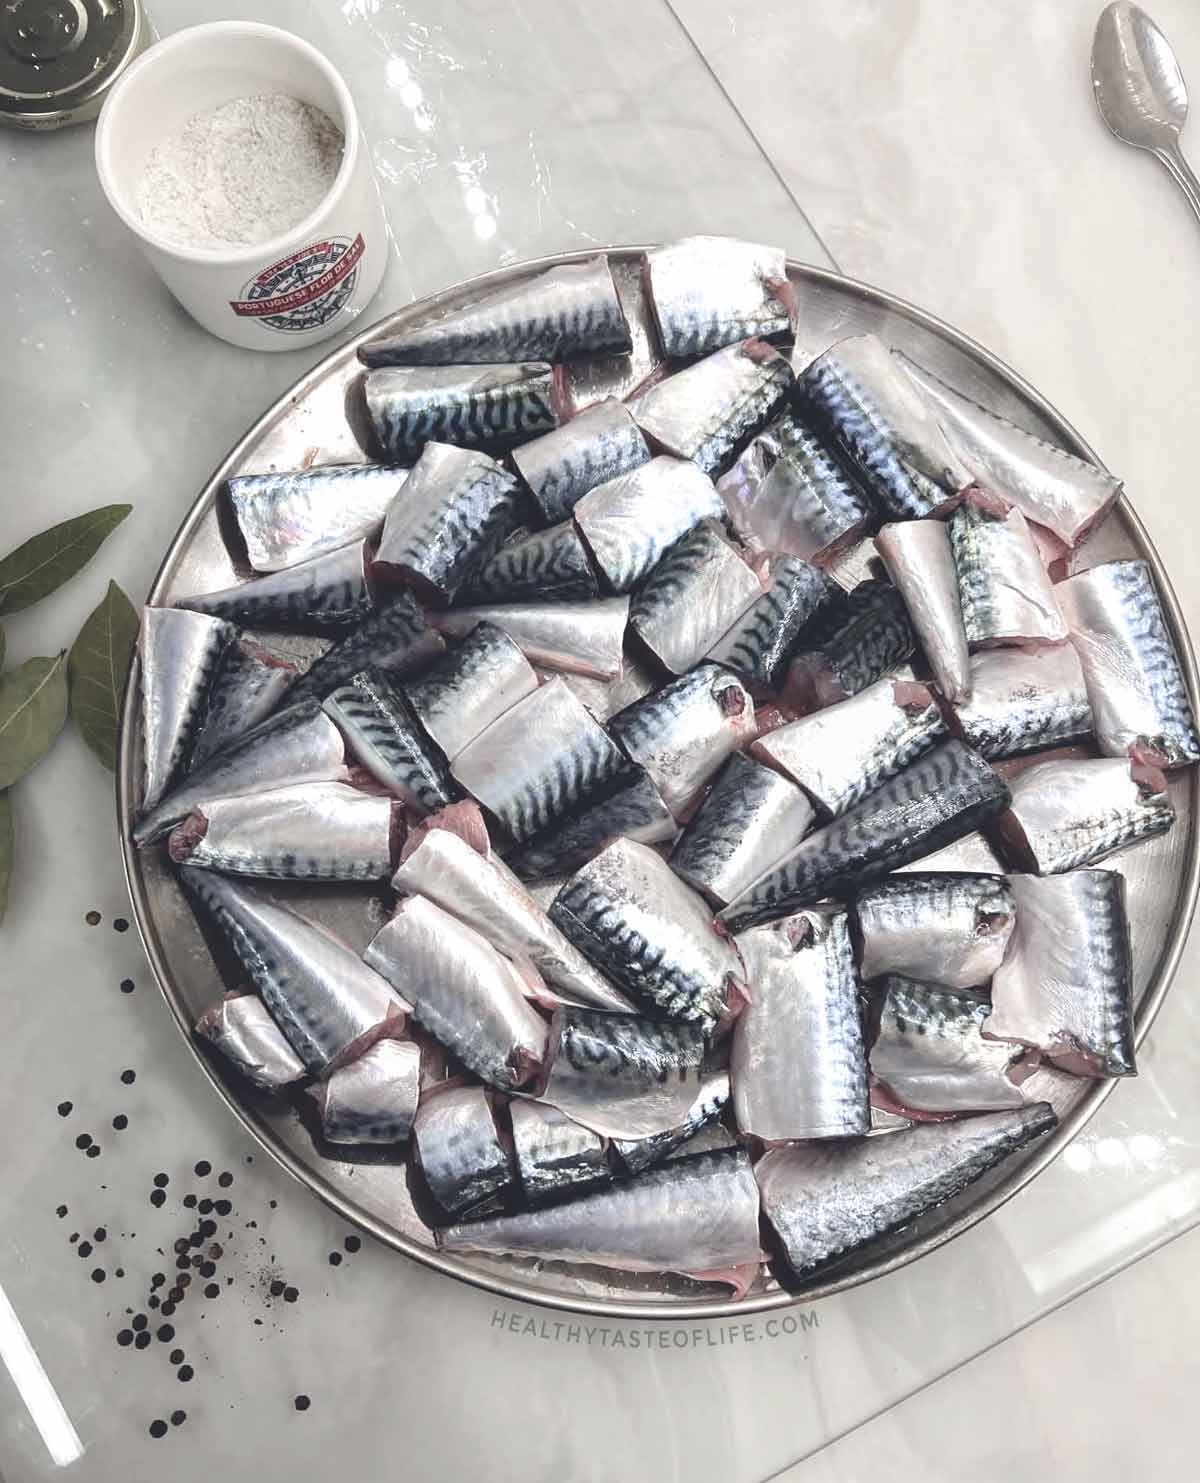
Arrange the fish pieces in a single layer on a large platter or tray. From here, the seasoning is slightly different depending on which method you are using.
Method 1: Season and Pack for Slow Oven Cooking
This method makes tender, ready-to-eat mackerel slowly cooked in its own juices. It is useful when you want to do all the preparation and cooking at once, then freeze individual portions that only need to be thawed before serving.
If your main goal is simply to preserve freshly caught mackerel, you can absolutely clean, portion and freeze the fish raw instead. The advantage of cooking before freezing is convenience: the fish is already seasoned, tender and ready to eat once thawed.
Before You Start
Standard Mason home-canning jars are designed for moist-heat canning rather than dry oven heat, and manufacturers and the National Center for Home Food Preservation do not recommend using ordinary canning jars in an oven because of the possibility of breakage.
If cooking directly in glass, use containers/jars that the manufacturer specifically identifies as oven-safe. Another option is to slow-cook the fish in an oven-safe covered baking dish and transfer it to clean freezer-safe jars/containers afterward.
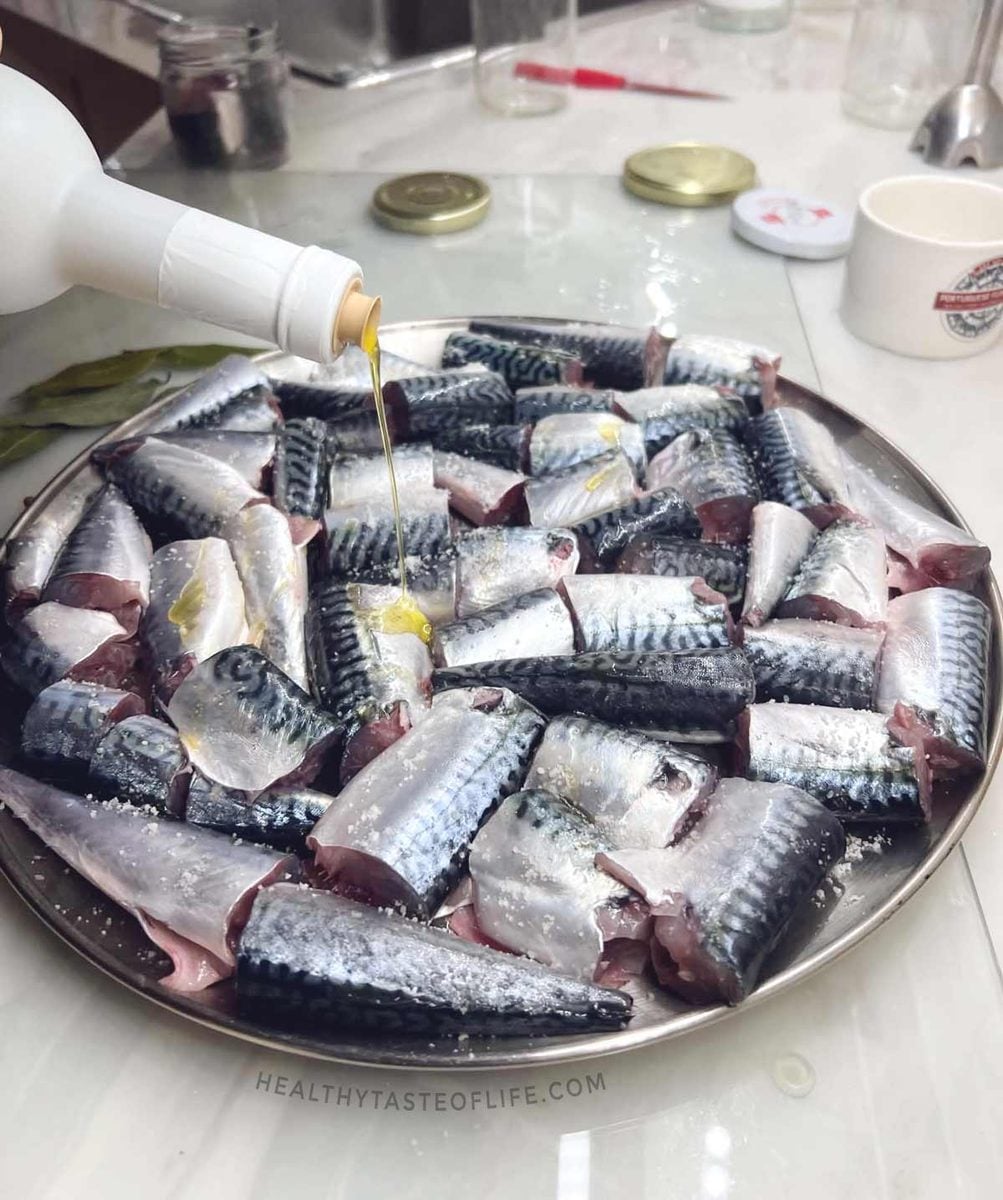
- For the oven-cooked version, season the fish directly on the platter before packing it into jars.
- Drizzle the fish evenly with: sea salt, vinegar and a drizzle of olive oil (just like you would season before frying).
- This is the way I normally prepare the mackerel. Seasoning the whole batch before packing helps distribute the salt, vinegar and olive oil evenly rather than concentrating them in individual jars.
- Pack the seasoned mackerel pieces vertically into the jars, leaving about 1 inch of space at the top. Then add to each jar:
- A few whole black peppercorns
- 1 bay leaf
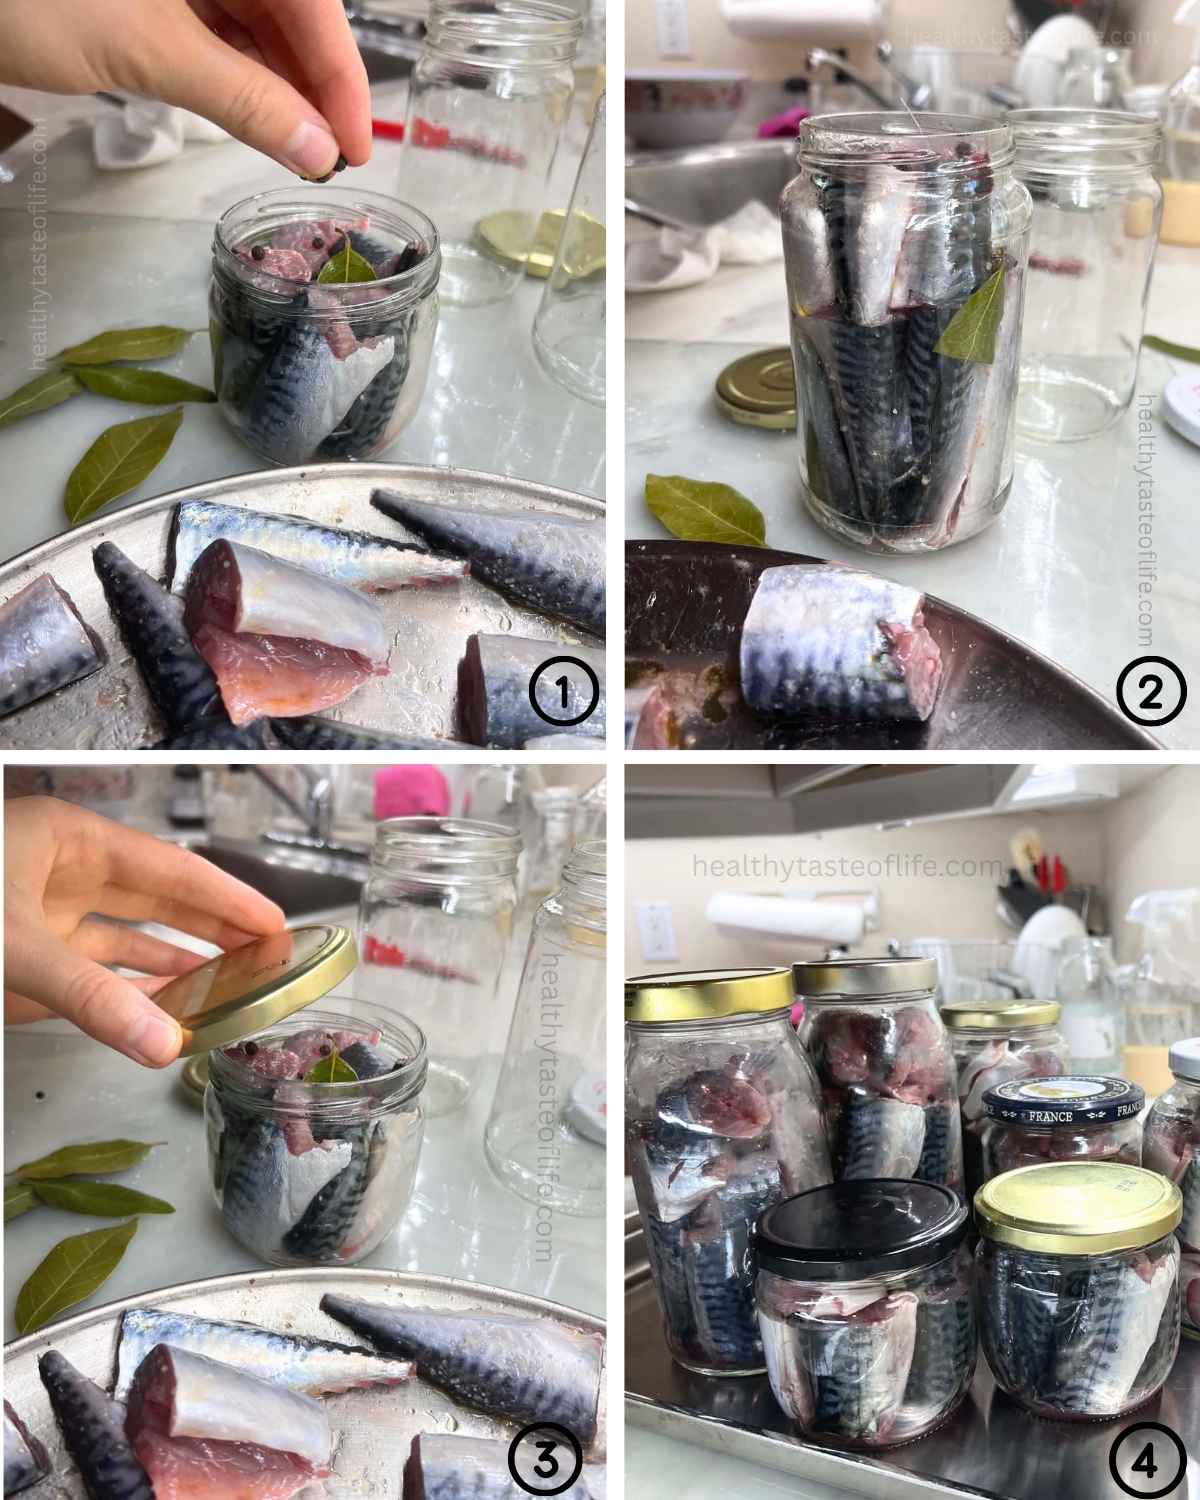
- Do not add water or broth. The mackerel will release plenty of its own natural juices while it slowly cooks.
- Do not preheat the oven. Place the filled jars upright on a heavy rimmed baking sheet or roasting pan, leaving some space between them, and put the pan into the cold oven. Once the jars are inside, turn the oven to 250°F (121°C).
- Starting with a cold oven allows the jars and their contents to heat gradually rather than being exposed immediately to a hot oven. Cover the jars or oven-safe containers loosely. Do not tightly seal them before cooking. Slow-cook the mackerel for about 3 hours, counting the cooking time from when the oven is turned on.
- As the fish heats, it will release its own juices. Toward the later part of cooking, you should see the liquid gently bubbling around the fish.
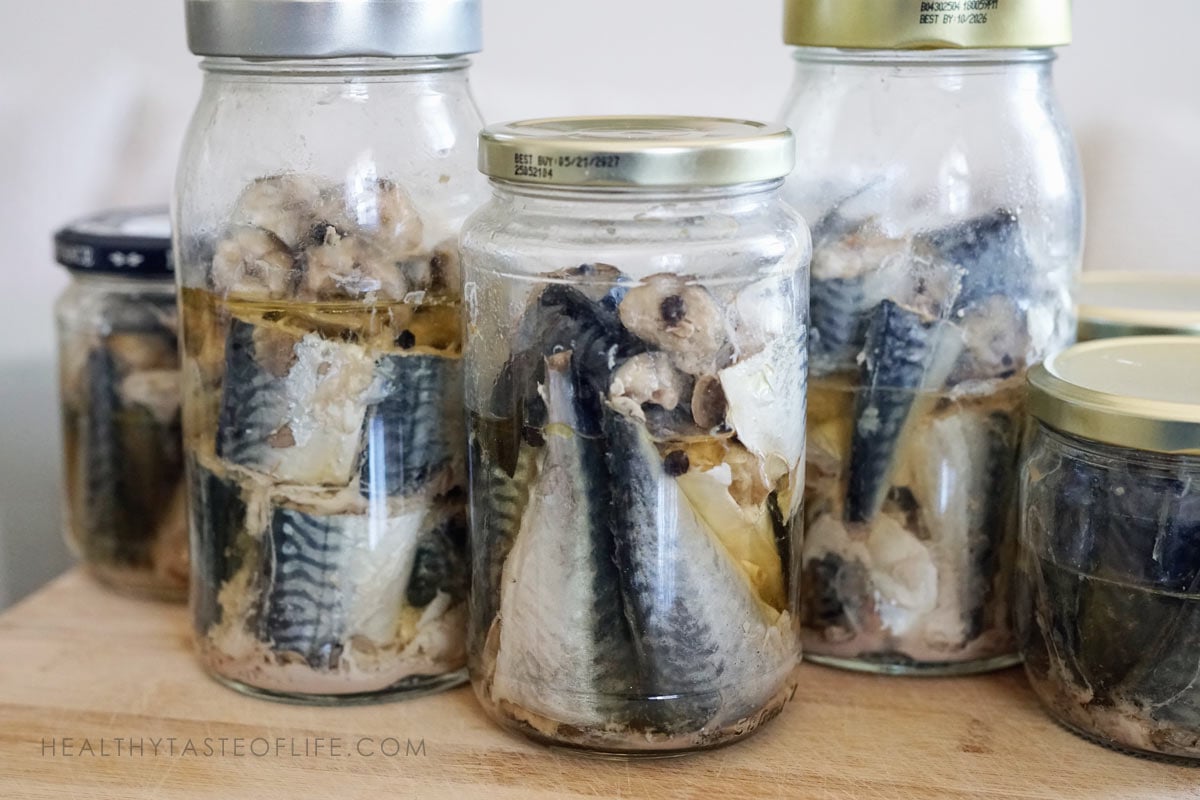
The three-hour cooking time is used here to achieve the slow-cooked texture and flavor because according to USDA/National Center for Home Food Preservation guidelines, oven processing is not considered a validated method for making low-acid foods such as fish shelf-stable, regardless of whether the jars seal. For this reason, I recommend refrigerating or freezing this version rather than storing it at room temperature.
Can Oven-Cooked Mackerel Be Stored in a Cool Pantry?
This is actually the method I grew up with and the one my family and I have used ourselves. We have stored oven-prepared jars of fish in a cool place for months and, in our own experience, have never had an illness from them. I also personally prefer the flavor and simplicity of this traditional method.
However, personal experience (even repeated experience) cannot guarantee that every batch prepared in every kitchen will have the same outcome. Since I am sharing this recipe publicly in the U.S., I also have to take current USDA/National Center for Home Food Preservation recommendations into account and cannot recommend a method for shelf storage that they have not validated.
Mackerel is considered a low-acid food. According to current home-canning guidance, a jar forming a vacuum seal does not confirm that the fish received sufficient heat treatment for safe room-temperature storage. In a sealed, low-acid environment, surviving Clostridium botulinum spores can potentially grow and produce toxin. Dry oven heat also behaves differently from the controlled pressurized steam used in pressure canning, and there is currently no validated oven-canning process for shelf-stable fish.
For that reason, while I am sharing the oven method because it is the traditional preparation I know, use and enjoy, I recommend treating this version as cooked fish rather than pantry-stable canned fish. Refrigerate it for short-term use or freeze the jars for longer storage. If you specifically want mackerel that can be safely stored on the pantry shelf, use the pressure-canning method below.
Refrigerator Storage
Refrigerate shortly after cooking rather than leaving the jars at room temperature overnight. Cooked fish should be refrigerated at 40°F/4.4°C or colder and used within 4 days.
Freezing the Jars
Freezing is the more practical option when making a large batch. Allow the fish to cool briefly, then refrigerate it within two hours. Once thoroughly chilled, freeze.
If using glass jars, choose straight-sided or tapered freezer-safe jars rather than jars with shoulders, and leave approximately 1/2 inch of headspace so the contents have room to expand.
For best flavor and texture, use frozen cooked fish within about 3 to 3.5 months.
Thaw one jar overnight in the refrigerator whenever you need it.
Method 2: Pressure-Canned Mackerel for Pantry Storage
If your main reason for making this recipe is to preserve a large fresh catch for several months, pressure canning is the appropriate method.
Mackerel is specifically included in the USDA process for fatty fish. Raw fish is packed directly into pint jars without added water or broth and processed for 100 minutes under pressure.
Prepare and Pack for Pressure Canning
- For pressure canned mackerel, prepare the fish in the same way: clean it, cut it into pieces and arrange it on a large platter, but leave out the vinegar and olive oil.
- If desired, lightly season the fish with salt before packing. Alternatively, add up to ½ teaspoon salt per pint jar, which is optional in the tested fish-canning method.
- Pack the raw mackerel vertically into clean pint Mason jars, leaving a full 1 inch of headspace.
- Add to each jar:
- A few whole black peppercorns
- 1 small dried bay leaf
- Do not add water, broth, olive oil or vinegar. The mackerel will release its own juices during pressure processing.
- Wipe the jar rims well because mackerel is naturally oily and grease on the rim can interfere with sealing. Then apply the lids and bands fingertip-tight and continue with the 100-minute pressure-canning process at the pressure required for your altitude.
- Because the fish is processed for 100 minutes, the empty jars do not need to be separately sterilized beforehand, but they should be thoroughly washed and clean.
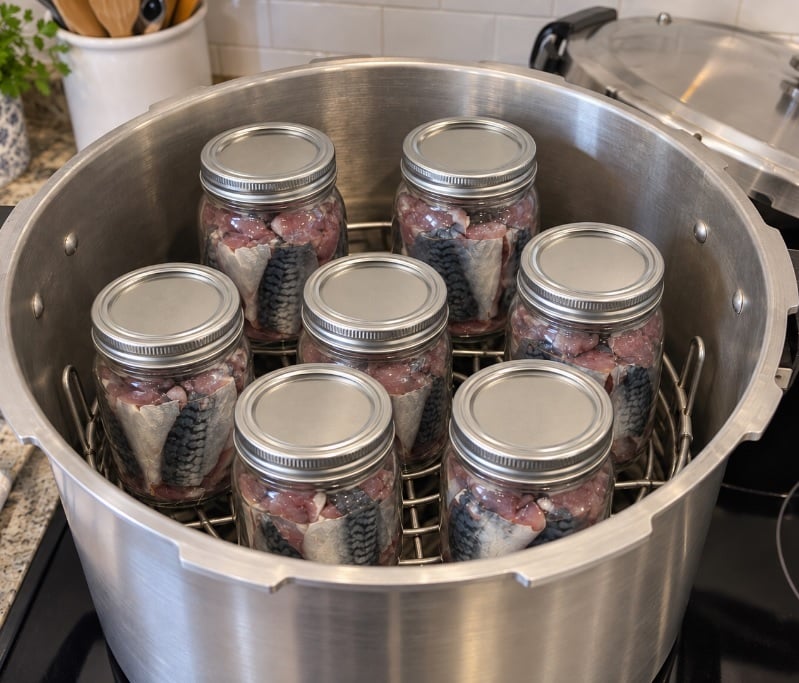
What Kind of Pressure Canner Do You Need?
A pressure canner is different from:
- a water-bath canner
- an ordinary stockpot
- a small pressure cooker
- most electric multicookers such as an Instant Pot
A proper stovetop pressure canner is large enough to hold at least four quart jars standing upright and has either a dial gauge or weighted pressure regulator that allows you to maintain the required pressure.
Recommended Pressure Canner
Presto 16-Quart Pressure Canner – it is a true stovetop pressure canner (not a pressure cooker) designed for pressure canning low-acid foods including fish, meat and vegetables. Works on gas, electric coil and smooth-top ranges, holding up to 10 regular-mouth pint jars or 8 wide-mouth pint jars at once.
How To Prepare/Use the Pressure Canner
Put the rack in the bottom of the canner and add the amount of water recommended by your pressure-canner manufacturer.
Because fish has a long processing time, some Extension seafood instructions recommend starting with 4–5 inches of water to prevent the canner from running dry. Always check this against the directions for your particular pressure canner.
Place the jars upright on the rack. Lock the canner lid in place while leaving the steam vent open.
Vent for 10 Minutes
Heat the canner until a strong, continuous stream of steam escapes through the open vent.
Once the steam is flowing continuously, vent the canner for a full 10 minutes. This step is important because trapped air can lower the actual temperature inside the canner even when the pressure gauge appears correct.
After 10 minutes, close the vent or place the pressure regulator on it.
Bring the Canner to the Correct Pressure
Once the correct pressure is reached, begin timing.
Dial-gauge pressure canner – process pints for 100 minutes:
| Elevation | Pressure |
|---|---|
| 0 – 2,000 ft | 11 psi |
| 2,001- 4,000 ft | 12 psi |
| 4,001 – 6,000 ft | 13 psi |
| 6,001 – 8,000 ft | 14 psi |
Weighted-gauge pressure canner – process pints for 100 minutes:
| Elevation | Pressure |
|---|---|
| 0-1,000 ft | 10 psi |
| Above 1,000 ft | 15 psi |
These are the USDA processing recommendations for mackerel and other fatty fish.
Maintain the required pressure steadily for the entire 100 minutes.
If pressure falls below the required level during processing, bring the canner back to the correct pressure and restart the processing time.
Let the Canner Depressurize Naturally
- When the 100 minutes are complete, turn off the heat.
- Do not open the vent, remove the regulator prematurely, run cold water over the canner or otherwise try to cool it quickly.
- Allow the pressure to return naturally to zero.
- Once completely depressurized, remove the weight or open the vent, wait another 10 minutes, then carefully open the lid away from your face. Forced cooling can cause liquid loss, seal failures and underprocessing.
Cool the Jars And Store
- Lift each jar straight up and place it on a thick towel or cooling rack, leaving some space between jars.
- Do not tighten the bands after processing.
- Leave the jars undisturbed for 12–24 hours while the seals form.
- Once cool, check every seal.
- Remove the screw bands, wash and dry the outside of the jars, label with the date and store in a cool, dry, dark place.
How Long Does Pressure-Canned Mackerel Last?
For best quality, home-canned fish should generally be used within one year. Before opening any jar, check the seal and appearance.
Discard a jar without tasting if the lid has become unsealed or bulged, if liquid spurts when opened, or if you notice unexplained bubbling, mold, unusual discoloration or an abnormal odor.

Tips for Better Homemade Canned Mackerel
❀ Start with very fresh fish. Mackerel deteriorates quickly, so keep it thoroughly chilled between catching, cleaning and processing.
❀ Remove as much blood as possible including the dark red line of meat that runs down the center of the fillet. This gives the finished fish a cleaner flavor.
❀ Don’t add water. Mackerel produces plenty of natural juice during cooking or pressure processing.
❀ Most convenient jar size is for mackerel: for pressure canning, 16-ounce pint jars are the best choice because the tested processing instructions are specifically designed for them. For the oven and freezer method, I actually like having several sizes. A smaller 7- to 10-ounce jar can be a convenient single portion, while a larger jar (25 oz) works well when serving several people.
❀ Don’t pack above the headspace line. A full 1-inch headspace matters for pressure canning.
❀ Clean greasy rims very well. Vinegar on a paper towel helps remove mackerel oil before applying the lid.
❀ Keep the pressure steady. Big changes in pressure can make liquid leak out of the jars and may affect proper processing.
❀ Don’t rush cooling. Natural depressurization is part of the pressure-canning process.
❀ Expect the fish to become very tender. The long pressure process softens small bones considerably and produces a texture similar to commercially canned oily fish.
How to Serve Mackerel From the Jar
For the pressure-canned version, I like to finish the fish after opening with the ingredients from my original recipe: a little olive oil and vinegar, buit this is totally optional. It can be served simply with onions and herbs, added to salads, mashed onto toast or crackers, or used anywhere you would normally use canned sardines, tuna or mackerel.
You can also use the pressure-canned mackerel in place of sardines in this high-protein fish salad with greens, seeds and lemon-tahini dressing.
For a complete meal, serve the mackerel with a crisp cabbage and carrot salad or a Russian potato salad (Olivier).
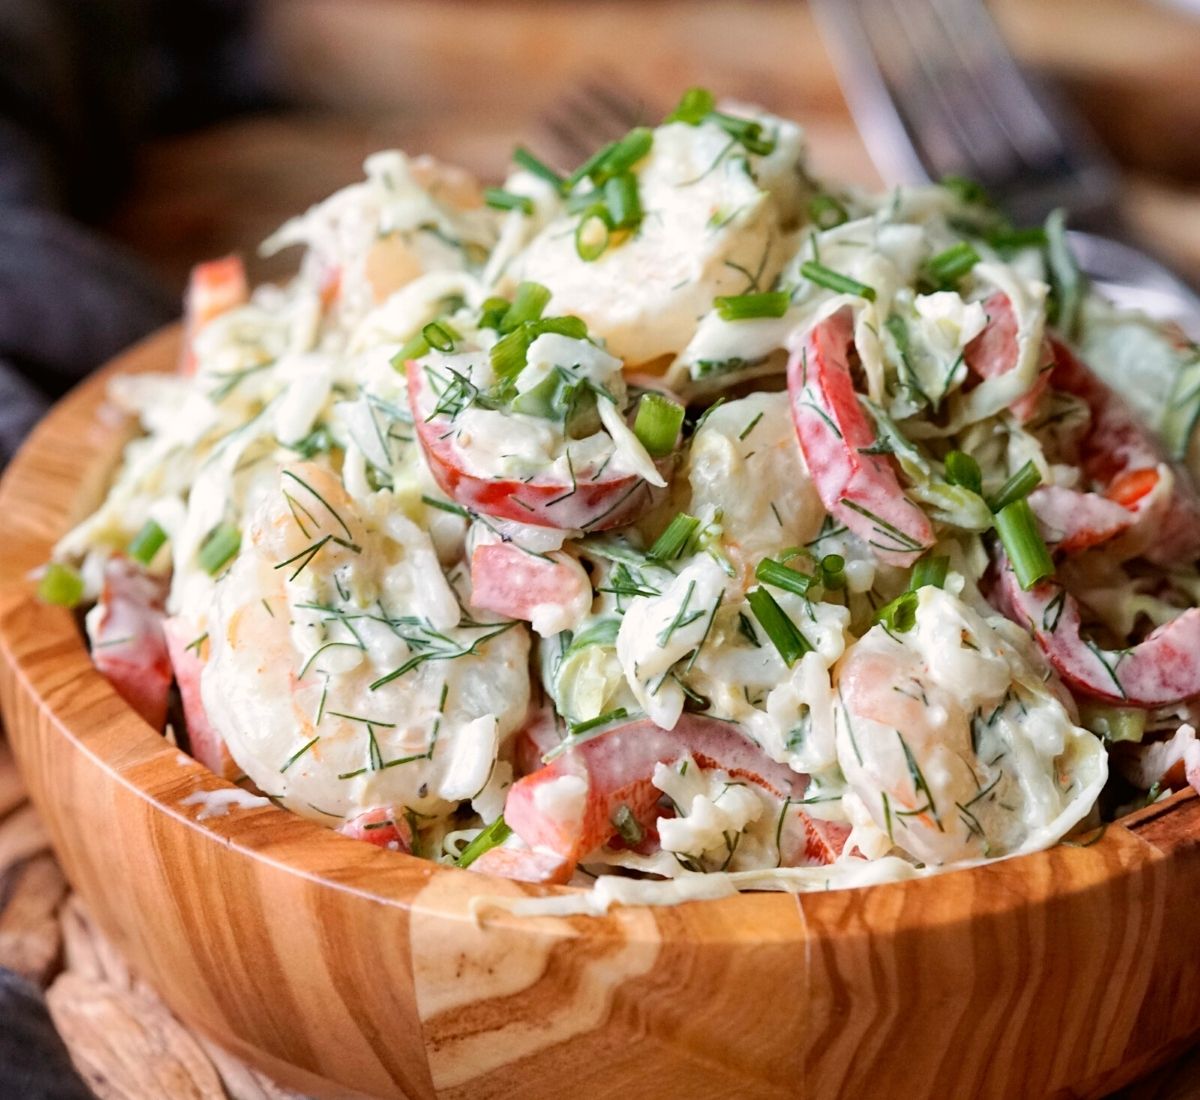
If you enjoy simple seafood meals, try my shrimp cabbage salad with fresh cabbage, rice and a creamy dill dressing.
Frequently Asked Questions
Mackerel contains enough natural moisture and fat to produce its own liquid during processing. The USDA raw-pack method specifically says not to add liquid.
Yes. This is actually how I usually prepare the oven-cooked version. I have used jars from approximately 7 oz to 25 oz in the same batch, depending on the jars I have available and which size best fits the fish.
The smaller jars will heat more quickly than the larger ones, but with the slow 3-hour cooking method they can all cook together.
For pressure canning, I recommend 16-ounce pint Mason jars, because that is the jar size used in the USDA-tested process for mackerel. You can use jars smaller than a pint, but they should still be processed for the full 100-minute pint processing time. Using a smaller jar does not mean you can reduce the processing time. As for larger jars, they heat differently, particularly at the coldest point in the center of the food. There is no tested mackerel processing time for larger jar size, and processing times cannot safely be calculated simply by adding extra minutes.
No. A water-bath canner operates at approximately boiling-water temperature and is intended for high-acid or properly acidified foods. Fish is naturally low acid and requires pressure canning for shelf-stable home preservation.
No. A countertop pressure cooker and a full-sized pressure canner are not automatically interchangeable. USDA/NCHFP processing schedules were developed around pressure-canning equipment capable of maintaining the specified conditions throughout the jar.
Refrigerate it shortly and use it as cooked fish within a few days, or freeze it. Do not place an unsealed jar in pantry storage.
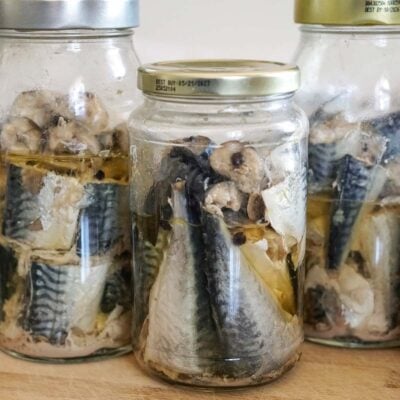
Homemade Mackerel in Jars (Oven-Cooked or Pressure Canned)
Ingredients
For the Oven-Cooked Mackerel
- 10 -12 medium fresh mackerel - cleaned
- ½ teaspoon sea salt - or to taste
- 1 tablespoon vinegar - or to taste
- ½ tablespoon olive oil - or to taste
- Whole black peppercorns - a few per jar
- 1 dried bay leaf - per jar
For Pressure-Canned Mackerel
- 10 –12 medium fresh mackerel - cleaned
- Sea salt - optional, up to 1/2 teaspoon per pint jar
- A few whole black peppercorns per jar - optional
- 1 small dried bay leaf per jar - optional
Instructions
Prepare the Mackerel
- Remove the heads, tails, fins and internal organs from the mackerel. Clean the cavity thoroughly and rinse away any remaining blood.
- Cut the fish crosswise into pieces about 1 ½ to 2 inches long, adjusting the size so the pieces fit comfortably into the jars.
- Keep the cleaned fish cold while you work through the rest of the batch. From here, follow either the oven method or the pressure-canning method.
Method 1: Slow Oven-Cooked Mackerel in Jars
- This is the original way I prepare this recipe. The fish is seasoned before packing and slowly cooks in its own juices. I use this version when I want ready-to-eat mackerel that can be refrigerated for a few days or frozen in convenient portions.
Season the Fish
- Arrange the cut mackerel pieces in a single layer on a large platter or tray.
- Sprinkle with: sea salt, vinegar, and olive oil to taste. This is how I usually prepare the mackerel rather than measuring the vinegar, oil and salt separately into every jar.
Pack the Jars
- Pack the seasoned pieces vertically into the jars. Leave approximately 1 inch of space at the top. These 16 Oz Glass Food Jars with Metal Lug Lids are perfect for this.
- Add a few whole peppercorns and 1 bay leaf to each jar.
- Do not add water or broth. The mackerel releases plenty of its own natural juices while cooking.
Use Whatever Jar Size Fits
Start With a Cold Oven
- Do not preheat the oven. Place the filled jars upright on a heavy baking sheet or roasting pan, leaving some space between them.
- Cover the jars loosely. Do not tightly seal the jars before cooking.
- Put the tray of jars into the cold oven, then turn the oven to: 250°F (121°C). Start counting the cooking time when you turn the oven on.
Slow Cook for 3 Hours
- Cook for approximately 3 hours at 250°F.
- As the mackerel cooks, it will release its own juices. During the later part of cooking, you should see liquid collecting and gently bubbling around the fish.
Cool and Store
- After cooking, remove the tray carefully and allow the jars to cool briefly.
- Do not leave the cooked fish at room temperature for many hours. Refrigerate within 2 hours for up to 3–4 days. Or for a large batch, freezing is much more practical (freeze for about 3 months.) Thaw one portion overnight in the refrigerator when needed.
Method 2: Pressure-Canned Mackerel for Pantry Storage
- If your main goal is to preserve fresh mackerel for long-term shelf storage, pressure canning is the best method. To keep this version close to the tested fish-canning method, do not coat the fish with vinegar or olive oil before pressure canning.
Prepare the Fish
- Clean and cut the mackerel exactly as described above. You can arrange the pieces on the platter while you work, but do not coat them with vinegar or oil. Salt is optional.
Use Pint Mason Jars
- For pressure canned mackerel, use standard: 16-ounce pint Mason jars (tested pressure-canning).
Pack the Mackerel
- Pack the raw mackerel pieces vertically into the pint jars. Leave a full 1 inch of headspace.
- If desired, add: up to ½ teaspoon sea salt per pint, a few black peppercorns and 1 dried bay leaf. Do not add anything else. The fish will release its own juices as it processes.
Clean the Jar Rims
- Because mackerel is naturally oily, wipe the jar rims. A paper towel lightly dampened with vinegar can help remove any fish oil from the rim.
- Place the lids on the jars and tighten the bands fingertip-tight. Do not overtighten them.
Prepare the Pressure Canner
- Place the rack inside the pressure canner. You can use a 16-quart pressure canner for this recipe.
- Add the amount of water recommended by the manufacturer of your specific pressure canner.
- Place the jars upright on the rack. Lock the canner lid into place, leaving the steam vent open.
Vent for 10 Minutes
- Heat the canner until a strong, continuous stream of steam comes from the open vent.
- Once you have steady steam, allow the canner to vent for a full: 10 minutes. Then close the vent or place the pressure regulator on the canner.
Bring to the Correct Pressure
- Allow the canner to reach the pressure required for your elevation.
- Only when the correct pressure has been reached should you begin the 100-minute processing time. See more details in the notes below.
Process for 100 Minutes
- Process the pint jars for: 100 minutes. Try to keep the pressure steady. Big changes in pressure can make liquid leak out of the jars and may affect proper processing.
Let the Pressure Come Down Naturally
- After the 100 minutes are complete, turn off the heat. Allow the canner to return to zero pressure on its own.Open it away from your face so the escaping steam moves away from you.
Cool the Jars
- Lift the jars straight up and place them several inches apart on a thick towel or cooling rack.Do not retighten the bands. Allow the jars to sit undisturbed for 12–24 hours.
What You Need
Notes
Slow-cook and freeze the fish if you want ready-to-eat portions. Freeze it raw if you want maximum flexibility later. Pressure can it if you want long-term pantry storage. Is the oven method shelf-stable? Current USDA/National Center for Home Food Preservation guidance does not recognize oven processing as a validated method for making low-acid foods such as fish shelf-stable. This is a traditional method that my family and I have personally used, but when sharing the recipe publicly I recommend refrigerating or freezing the oven version rather than storing it at room temperature. For pantry storage, use the pressure-canning method. The fish does not need added water.
Mackerel produces plenty of its own juices during cooking and pressure processing. Different jar sizes are fine for the oven version.
I have personally used jars from about 7 to 25 ounces in the same batch. This flexibility applies because that version will be refrigerated or frozen rather than treated as shelf-stable canned food. Pressure canning requires more precise jar sizing.
Use 16-ounce pint Mason jars for the tested mackerel process. Smaller jars still receive the full pint processing time; do not use jars larger than a pint. Why isn’t the olive oil added before pressure canning?
Added fat can change the way heat moves through canned food. Since the established raw-pack mackerel method uses no added liquid or oil, I leave the olive oil out during processing and add it after opening. Do not confuse a pressure canner with a water-bath canner.
Fish requires a true pressure canner designed for low-acid foods. A regular water-bath canner, stockpot or small pressure cooker is not the same equipment.
The information shown is an estimate provided by an online nutrition calculator.
©HealthyTasteOfLife. Content and photographs are copyright protected and need prior permission to use. Copying and/or pasting full recipes to other websites and any social media is strictly prohibited. Sharing and using the link of this recipe or article is both encouraged and appreciated!