

Fermented Mackerel Recipe + Dry Cure Method (Which Is Better?)
Fresh fish spoils fast, which is exactly why traditional cultures developed preservation methods long before refrigeration existed.
Growing up in Eastern Europe, preserved fish like seliotka / seledka (salt-cured fish) was something very familiar. Usually it was herring, but mackerel works beautifully too because of its rich, oily flesh.
Over the years, I experimented with two traditional preservation methods for mackerel:
- Wet brine fermentation / curing
- Dry curing with salt
After testing both several times, I noticed they behave quite differently.
I originally published this recipe using a wet-brine fermentation method. It worked, but after more testing I found that dry curing gives more consistent and reliable results with mackerel, especially for home cooks.
So in this post, I’m sharing both methods and explaining when each makes sense.
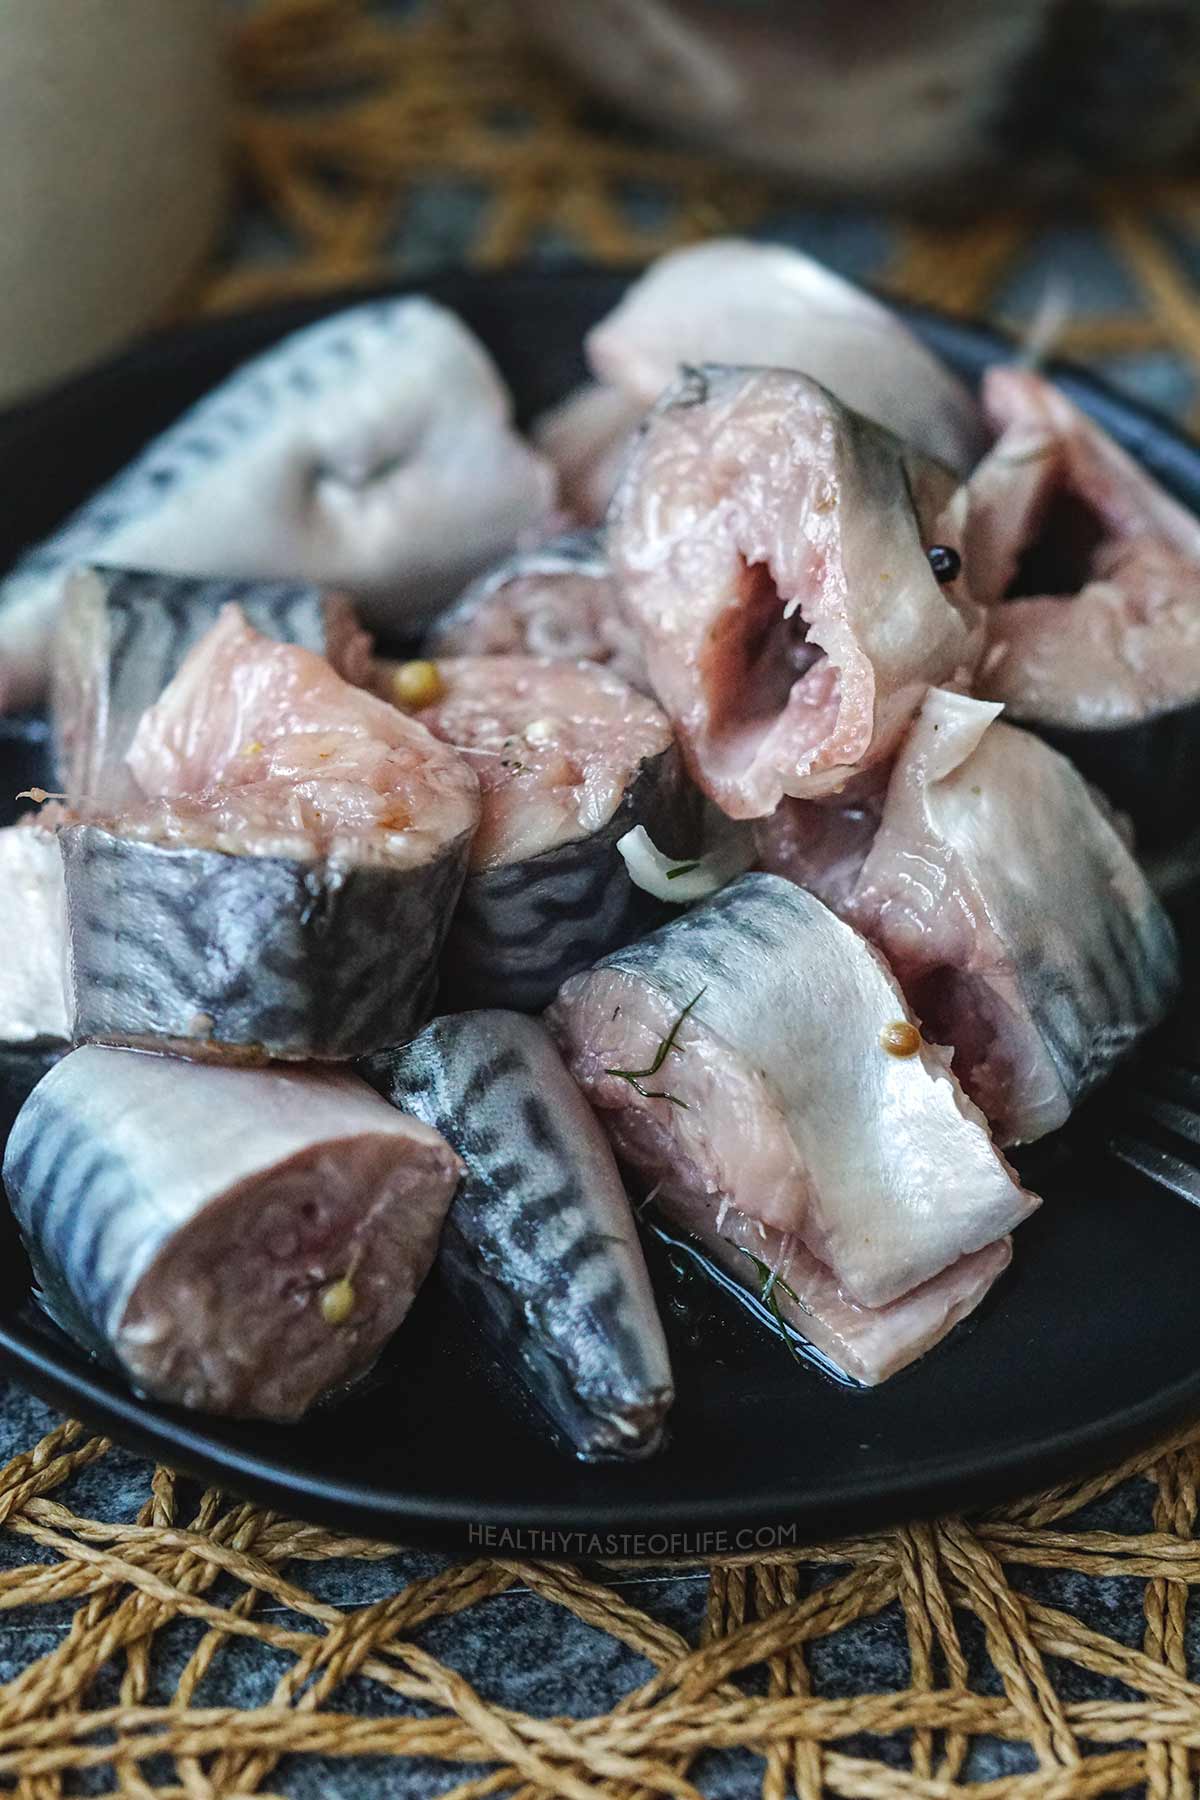
Another way I use to preserve fresh mackerel is this homemade canned mackerel recipe for long-term storage.
A Note About Fish Freshness
This matters more than anything else.
For both methods, I used very fresh Atlantic mackerel that my husband caught himself. He occasionally goes on mackerel fishing trips in New Hampshire, and the fish comes straight from the boat to our kitchen the same day.
That level of freshness makes a big difference. Because mackerel is a fatty fish, it is more delicate than lean fish and spoils faster. The oils oxidize quickly, and improper handling can increase the risk of off flavors, spoilage, or histamine formation.
As I often mention, quality of the food matters just as much as the preparation, especially with highly perishable foods like fish.
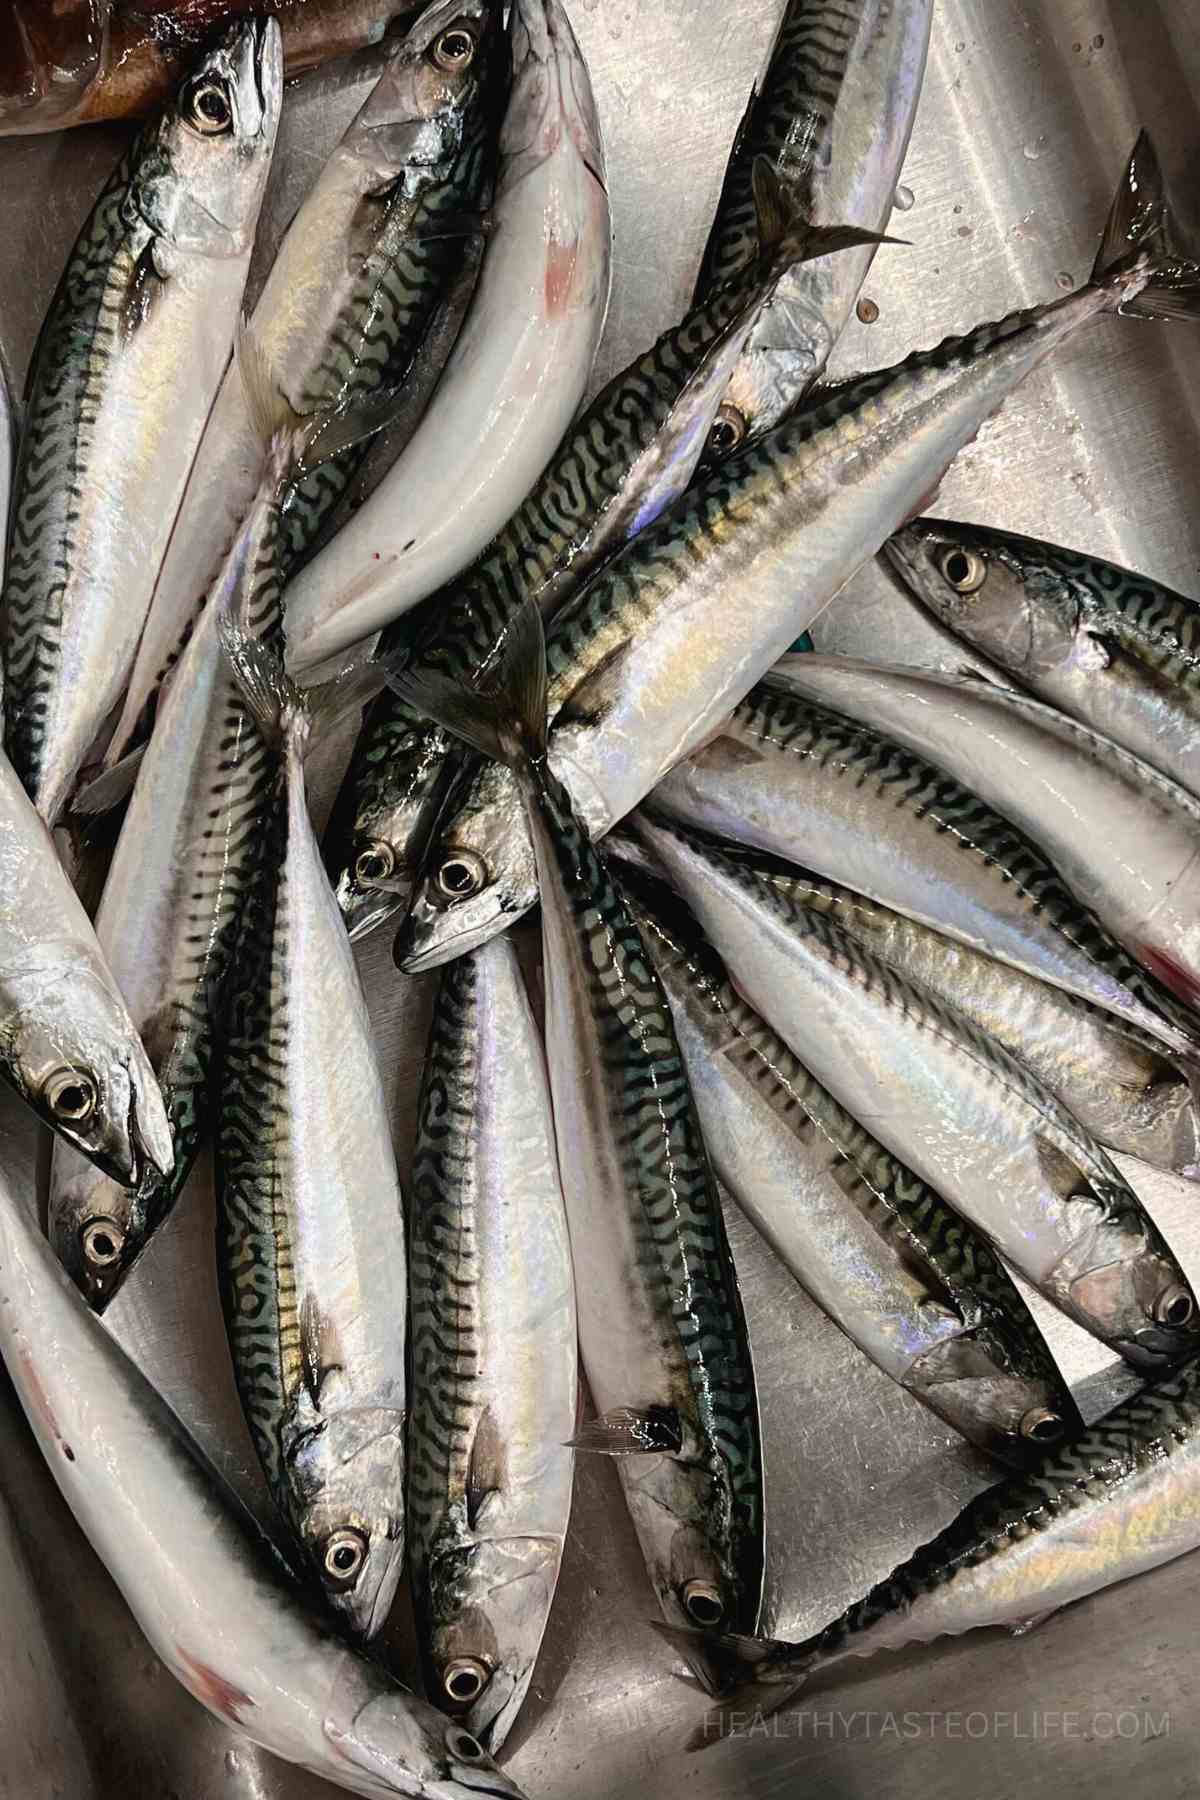
If using store-bought fish, I recommend only using fish that is:
- very fresh or properly frozen right after catch
- smells clean and ocean-like
- has firm flesh
- has clear eyes (if whole)
Avoid fish that smells strongly fishy, sour, metallic, or ammonia-like.
How To Clean And Prepare Mackerel For Curing
Before using either curing method, proper cleaning is essential for both flavor and food safety.
With mackerel, the parts that spoil fastest are usually: the surface slime and scales, the guts, the gills and the dark bloodline along the spine. Removing these thoroughly helps reduce strong fishy odors, oxidation, and spoilage.
Step 1: Remove The Scales
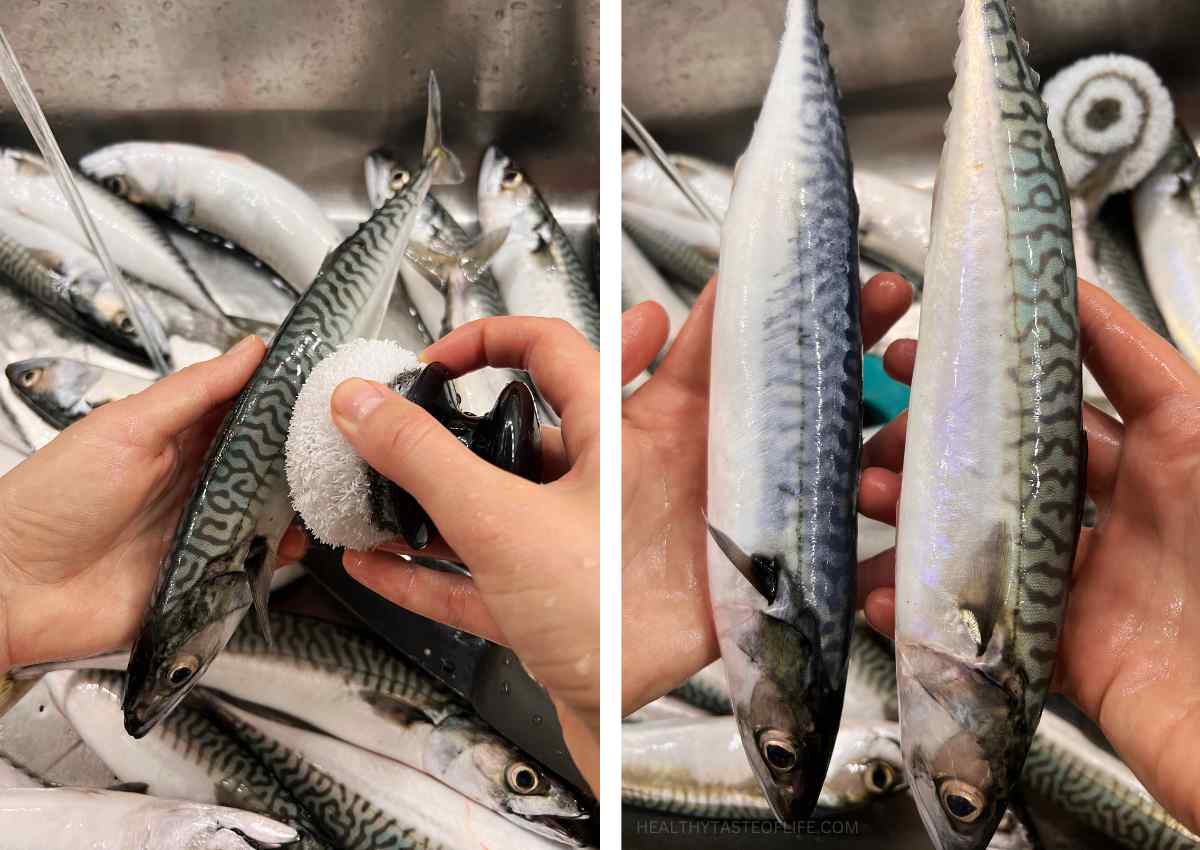
I like to start by scraping off the scales while the fish is still fully intact.
Use the back of a knife and scrape from tail toward the head. I used a harsh dish scrubber.
Even though Atlantic mackerel have very small scales, I still prefer removing them because it helps clean off surface slime better.
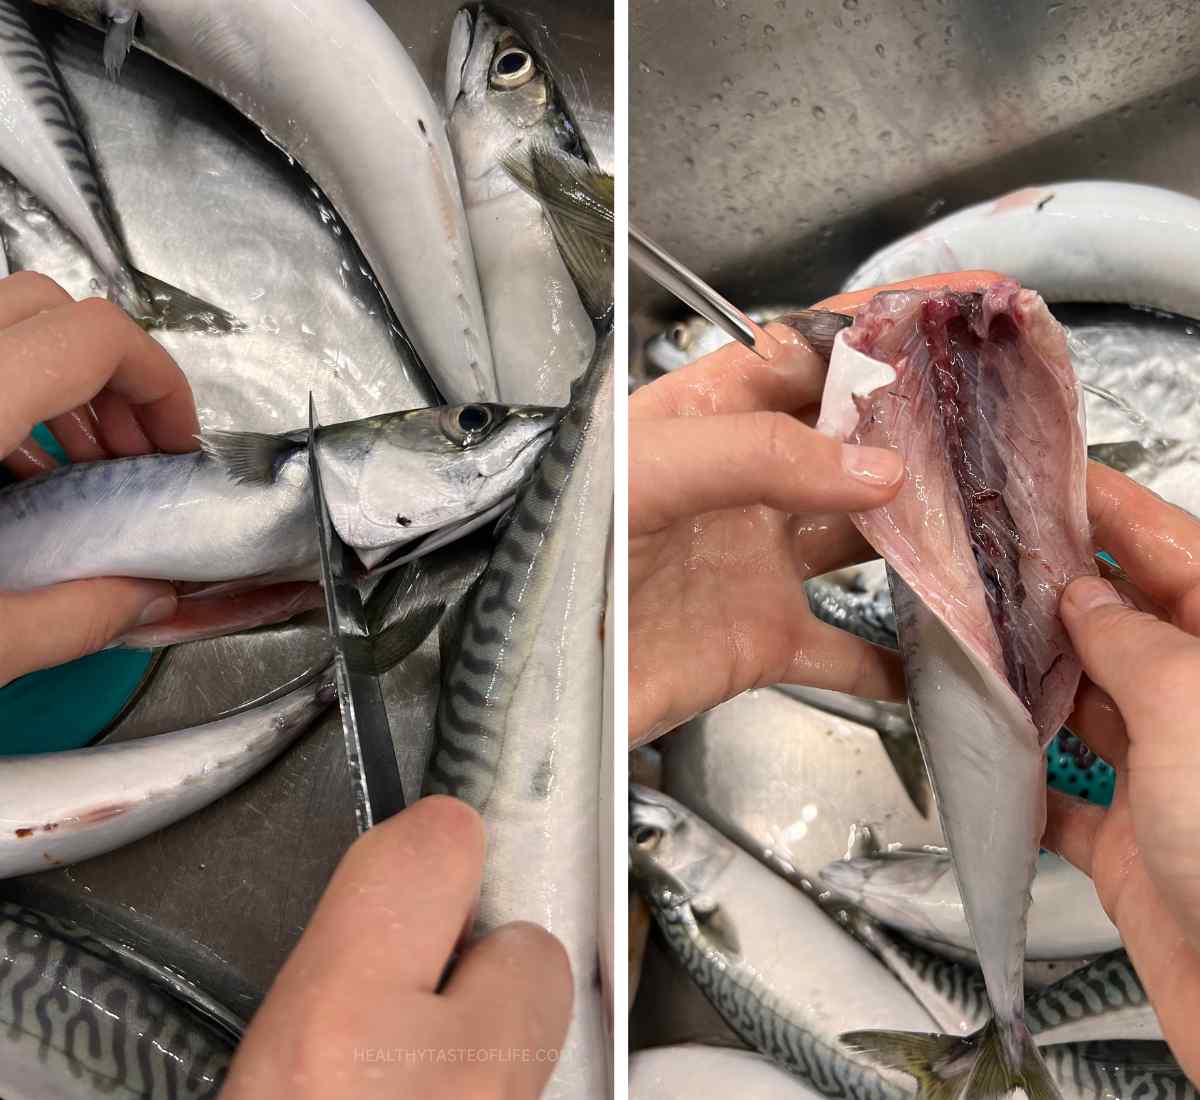
Step 2: Open The Belly And Clean The Inside Thoroughly
Using a sharp knife, make a cut along the belly from the tail toward the head. Remove all internal organs carefully. Try not to puncture the digestive tract while removing the guts.
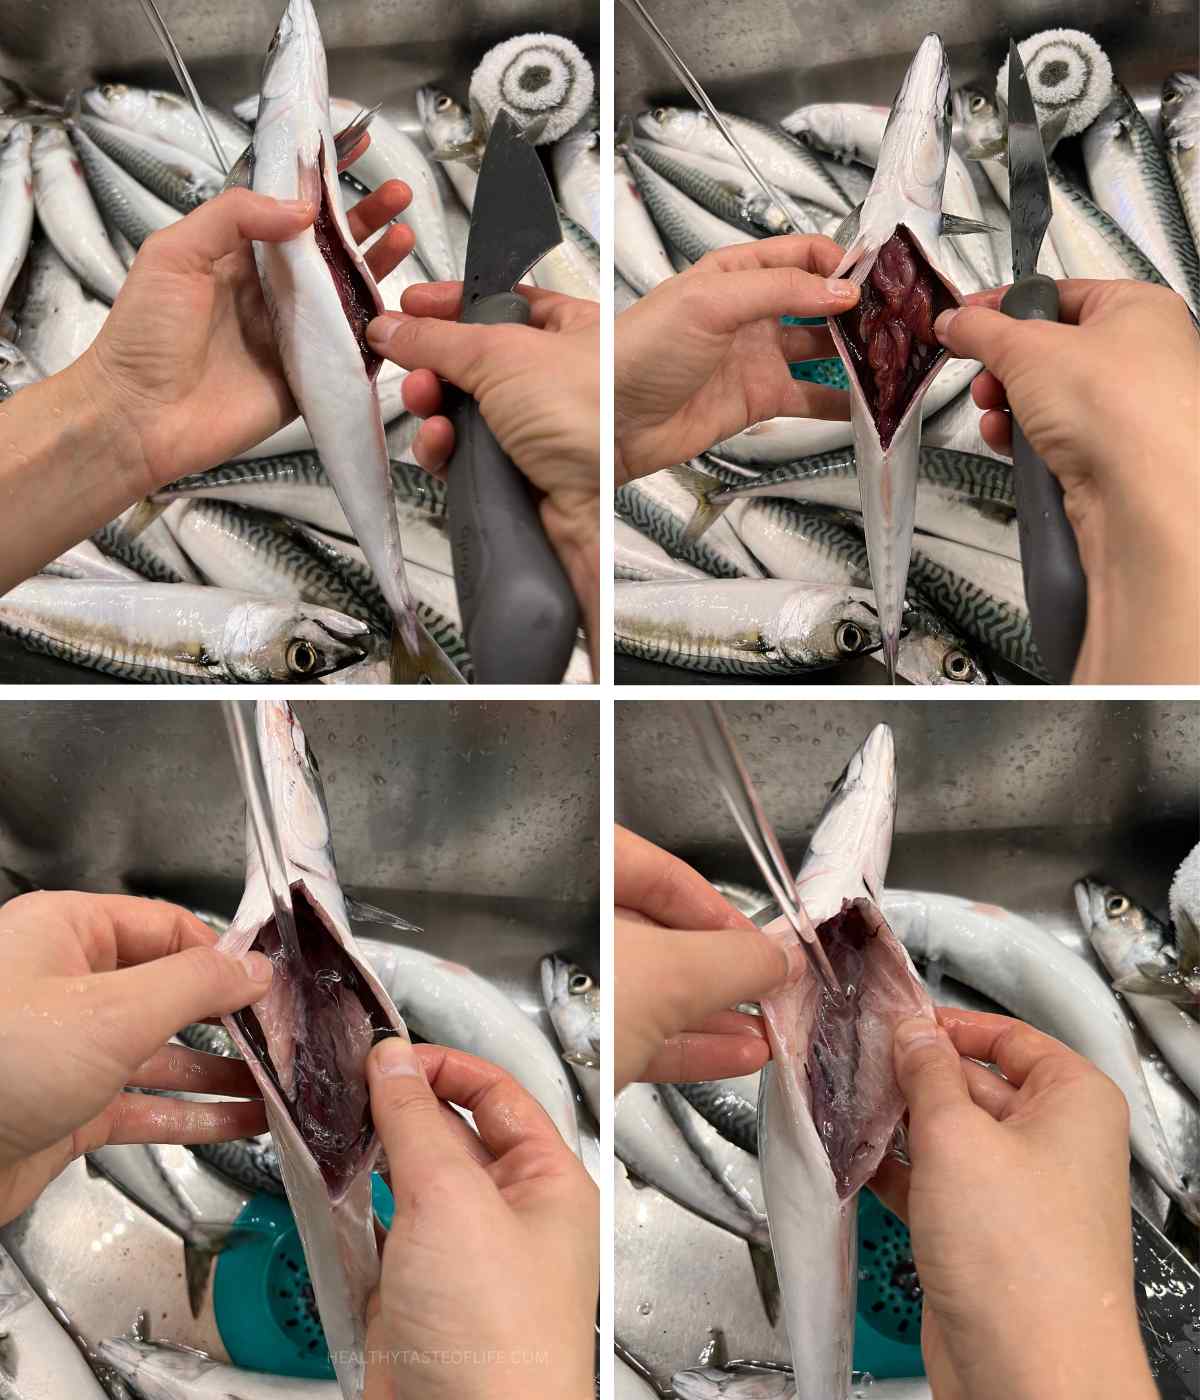
Once the guts are removed, scrape out everything left inside the cavity, including the membrane and dark bloodline near the backbone. That dark blood-rich tissue oxidizes quickly and is often responsible for stronger fishy or rancid flavors if left behind. Rinse briefly under very cold water.
Step 3: Remove the Head and Gills
Once the inside is fully cleaned, cut off the head. If the head stays on, make sure to remove the gills completely since they hold a lot of bacteria and spoil quickly. I personally prefer removing the head after cleaning because it gives me better control while gutting the fish.
Step 5: Pat Dry
Dry the fish well inside and out using paper towels. This matters especially for the dry cure method, since too much surface moisture can dilute the salt cure.
Add Flavor
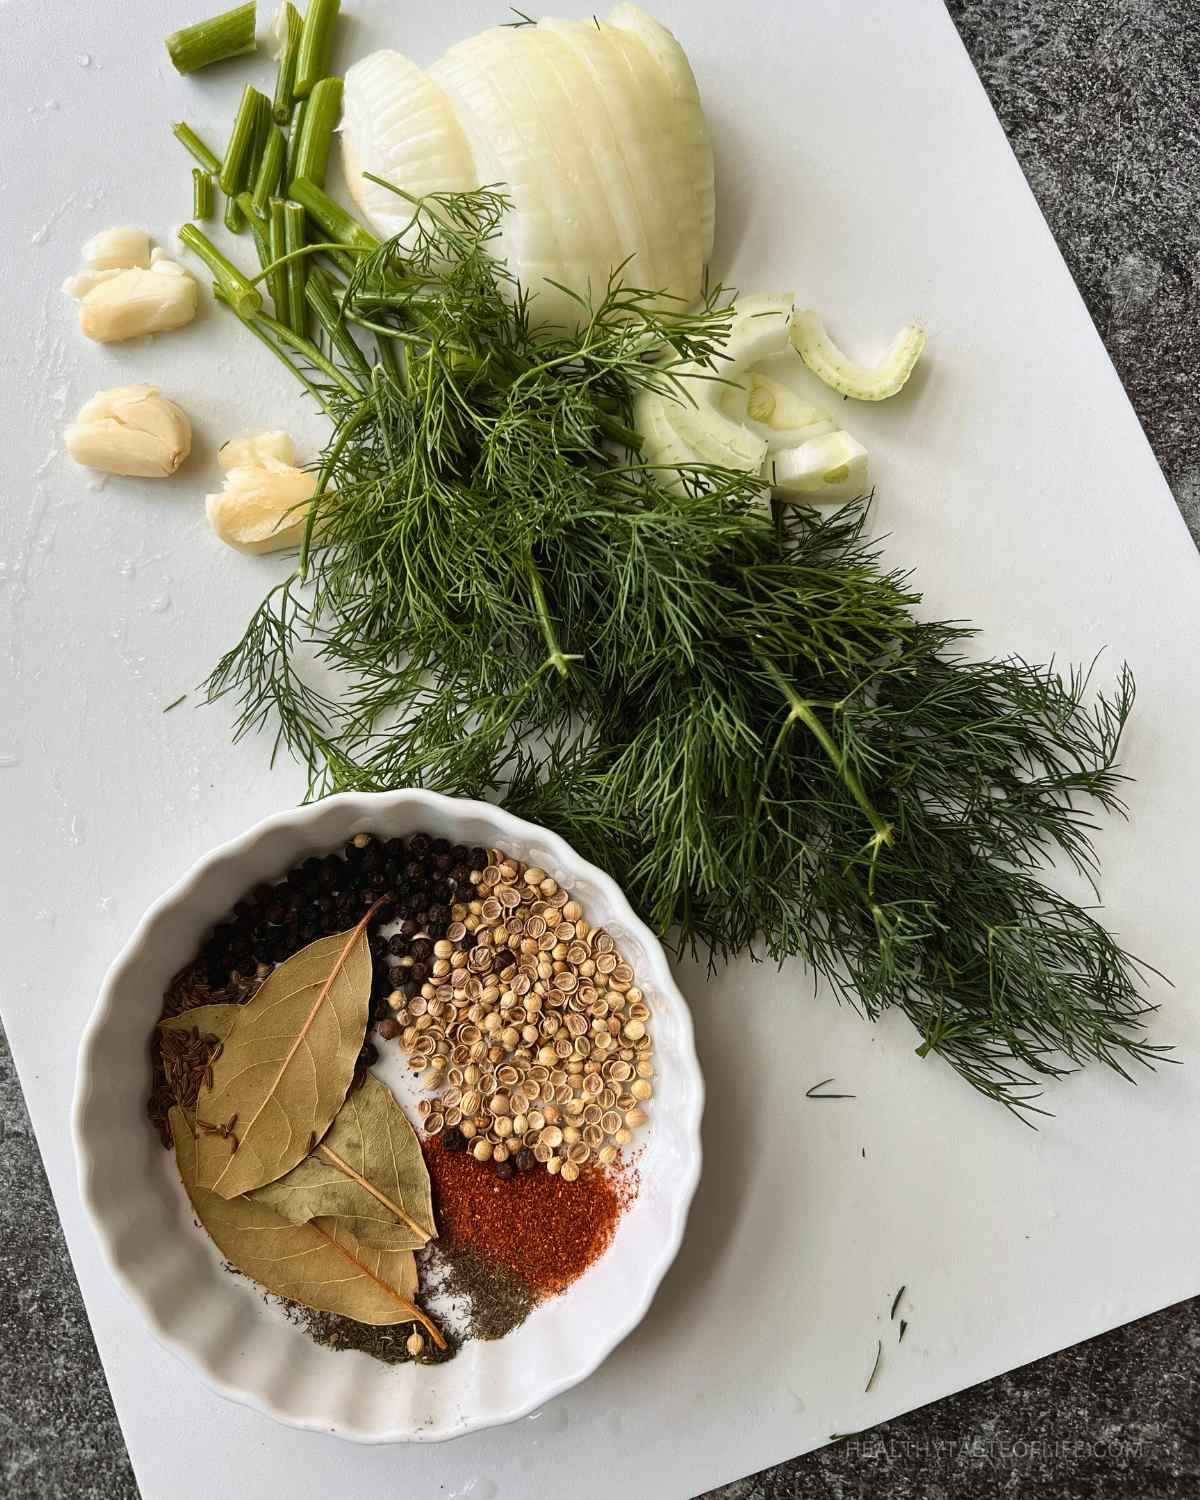
You can customize either method with aromatics and spices for extra flavor. Whole coriander seeds, black peppercorns, and bay leaves work especially well in both wet brine and dry cure because they infuse flavor without adding much moisture.
Fresh dill, sliced onion, or garlic are best added after curing or just before serving, although they can also be used in short cures for a stronger aromatic flavor.
Whole Fish, Slices, or Fillets?
There are a few ways to cure mackerel, and each gives slightly different results.
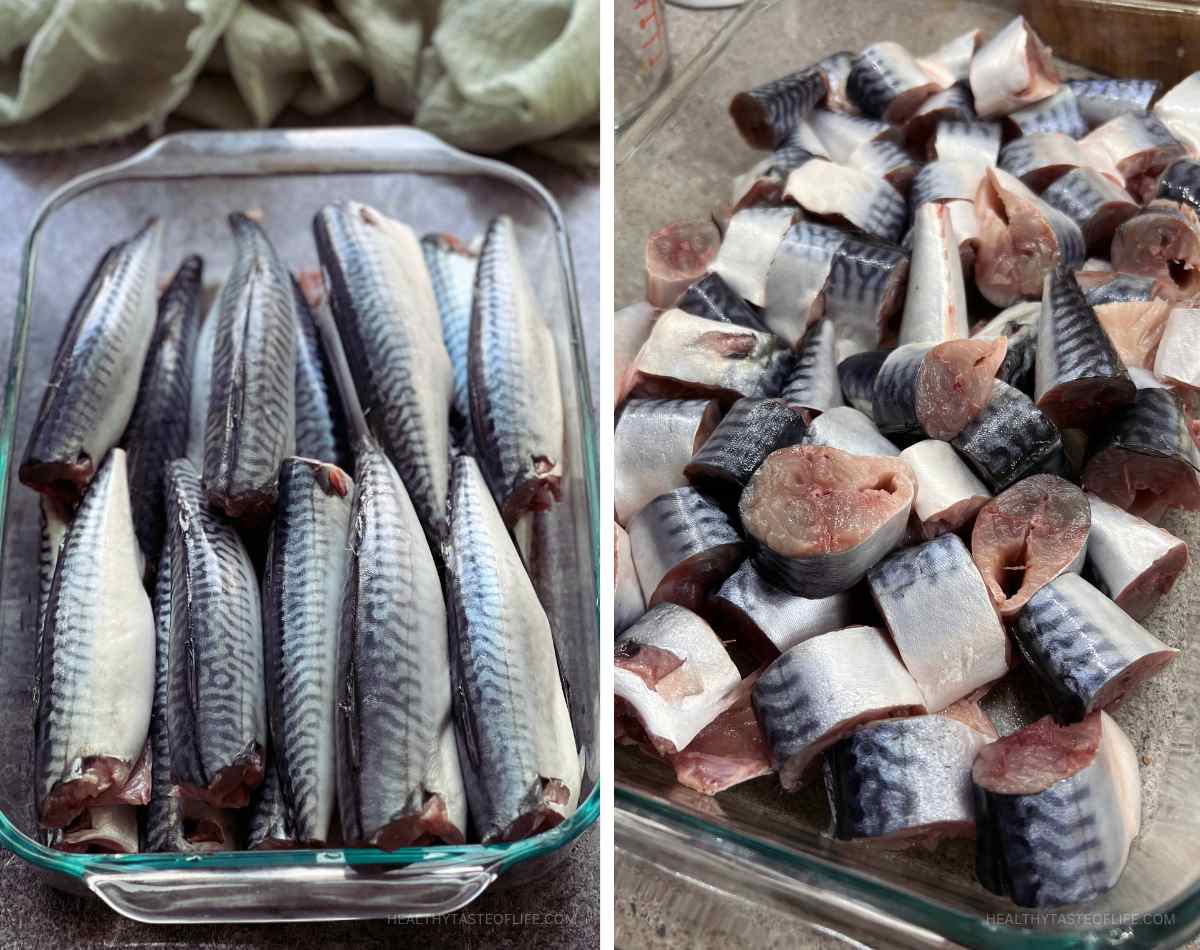
Some people prefer curing the fish whole first, then filleting and slicing after curing. This is probably the most traditional approach. After curing, the flesh becomes firmer and easier to fillet cleanly.
I often do it a little differently: I like to cut the cleaned fish crosswise into thick pieces, with the bones still intact, before curing.
Why I like this method:
- easier to fit into jars or smaller containers
- salt penetrates more evenly and faster
- easier portioning later
- the bones still help protect the flesh and retain moisture
Keeping the bones in during curing also helps the pieces hold their shape better, especially with softer fish like mackerel.
Both methods work well.
If you want a more traditional seledka-style texture, cure the fish whole first. If you prefer convenience and slightly faster curing, cutting into pieces beforehand works great too.
Two Ways To Preserve Mackerel
Method 1: Wet Brine (Fermented / Salt-Cured)
This is closer to traditional seledka-style curing. You clean the fish thoroughly, mix with seasonings, submerge it completely in an 8–10% cold salt brine, and refrigerate for 24–72 hours. Once cured, fillet, slice, and serve with onions and oil.
How it works
Salt:
- draws moisture out
- slows harmful bacterial growth
- changes texture
- allows enzymatic maturation
If salt is lower and conditions allow, some mild fermentation may also happen.
Flavor
Wet-brined mackerel develops:
- deeper marine flavor
- softer flesh
- slightly buttery texture
- sometimes tangy notes
When successful, it tastes very similar to traditional Eastern European cured fish.
Pros
- authentic seledka-style flavor
- softer texture
- buttery mouthfeel
Cons
With mackerel, even small differences in fish freshness, fridge temperature, or salt concentration can lead to mushiness or off smells.
Method 2: Dry Cure (My Preferred Method)
This became my favorite. Instead of curing the fish in water, you coat it directly in salt and spices. The salt pulls moisture out of the fish and creates its own concentrated curing liquid. I also noticed less oxidation and fewer “off” aromas.
Flavor
Dry-cured mackerel is:
- firmer (less mushiness)
- cleaner tasting
- less watery
- more concentrated in flavor
Pros
- easier to control
- firmer texture
- lower spoilage risk
- closer to classic barrel-cured fish
Cons
- slightly saltier (but once cured, you can rinse lightly)
- less tangy
- requires careful salting balance
Wet Brine vs Dry Cure
Which Method Is Safer?
From a food safety perspective, I consider dry cure safer and easier for home preparation.
Why? Because mackerel is highly perishable, oily and rich in histidine.
Certain bacteria can convert histidine into histamine, which may trigger headaches, flushing, itching, or digestive symptoms in sensitive people.
One important thing to understand: Histamine can build up even before obvious spoilage appears.
And people with histamine sensitivity often notice stronger reactions when gut health and digestive resilience are already compromised.
That’s why freshness, temperature and salt concentration matters a lot. For most people making this at home, dry cure is simply easier to get right.
Wet Brine vs Dry Cure
| Wet Brine | Dry Cure | |
|---|---|---|
| Texture | Softer | Firmer |
| Taste | More complex / buttery | Cleaner / concentrated |
| Spoilage Risk | Higher | Lower |
| Freshness Required | Extremely high | Very high |
| Ease | Moderate | Easier |
| Storage | Shorter | Slightly longer |
| Best For | Traditional seledka flavor | Most home cooks |
Which Method Should You Choose?
If this is your first time curing mackerel at home, I recommend starting with the dry cure method.
After testing both methods, I found it easier to control and more reliable, especially with fatty fish like mackerel. It consistently gave me a firmer texture, cleaner flavor, and fewer issues with mushiness or off smells.
That said, the wet brine method still has its place. If you grew up eating traditional Eastern European seledka and prefer that softer, buttery texture, you may enjoy that version more.
In the printable recipe below, I’m sharing the dry cure as the main method, with the wet brine variation included in the recipe notes so you can choose the approach that fits your preference.
FAQ
Yes, as long as it was frozen very fresh after being caught. In fact, properly frozen fish can sometimes be a better option than “fresh” fish that has been sitting at a store for several days. Once thawed, the fish should still smell clean and ocean-like, with firm flesh and no sour or ammonia-like odor.
Properly cured mackerel should smell: clean and marine, mildly salty, slightly buttery or pleasantly “aged”.
Discard the fish if you notice: ammonia smell, rotten egg smell, sharp sour odor, slimy surface, excessive mushiness. When in doubt, it’s best to throw it out.
Usually one or more of these happened: the fish wasn’t fresh enough, the fridge temperature was too warm, salt concentration was too low, part of the fish was exposed to air, or curing time was too long.
Wet brine is more risky with mackerel than dry curing, especially when the fish is cut into pieces.
That depends on personal preference. Wet brine gives a softer, more buttery texture and tastes closer to traditional seledka. Dry cure produces a firmer texture, cleaner flavor, and slightly more concentrated taste.
I personally prefer the dry cure because I find it more reliable and easier to control at home.
No, sugar is optional. I only use a small amount to slightly balance the saltiness and round out the flavor. You can reduce the amount or skip it completely if preferred.
Yes. Some people prefer curing the fish whole first, then filleting and slicing after curing. This is a more traditional approach and helps protect the flesh. I prefer cutting the fish crosswise into pieces before curing because it fits better in containers and cures more evenly. Both methods work well.
Storage depends on the curing method and how fresh the fish was to begin with. Dry cure: best within 3–5 days (up to 7 days if very fresh and stored properly). Wet brine: best within 2–4 days
Store refrigerated in an airtight glass container. Keeping the fish covered with a little oil can help preserve texture.
Traditionally, cured mackerel is served with: sliced onions, olive oil, fresh dill or parsley, lemon juice or vinegar, boiled potatoes, rye bread or sourdough bread.
I also like using it in salads, open-faced sandwiches, or as part of an appetizer platter.
If you enjoy fat-rich fish, you can also use cured mackerel in high-protein fish salads for a quick nutrient-dense meal.
If you prefer cooked mackerel instead of raw-cured fish, this canned mackerel in jars is the method I use for longer storage.

Dry Cured Mackerel (Seledka Style) With Wet Brine Option
Ingredients
Dry Cure (Recommended)
- 2 whole fresh Atlantic mackerel - about 2.2 lb / 1 kg total
- 2-2.5 tbsp sea salt
- ⅓ tsp black peppercorns - lightly crushed
- 2 bay leaves - crushed
- ½ tsp whole coriander seeds - optional
- 1 tbsp sugar - optional
For Serving
- sliced onion
- olive oil
- fresh dill
- lemon juice or vinegar - optional
Instructions
Remove the scales
- Using the back of a knife scrape off the scales from tail toward the head.
Clean the fish
- Open the belly and remove all internal organs. Scrape out the dark bloodline along the backbone.
- Rinse briefly under cold water.
- Cut off the head / remove the gills if still attached.
- Pat dry with paper towels.
Cut into pieces
- Cut the cleaned fish crosswise into thick pieces, keeping the bones intact. You can also cure the fish whole if preferred.
Prepare the cure
- Mix the salt, sugar (if using), crushed bay leaves, peppercorns, and coriander seeds.
Cure the fish
- Rub the cure mixture over all fish pieces, coating them evenly on all sides.
- Arrange tightly in a glass or ceramic container.
- Cover and refrigerate for 2–4 days, depending on how cured and salty you like it.
- Flip or rearrange the pieces once daily.
- As the salt pulls moisture out, the fish will gradually create its own concentrated brine.
Serve
- Once cured, remove the pieces and lightly rinse if they taste too salty.
- Serve with sliced onions, fresh dill, and a drizzle of oil. Add lemon juice or a splash of vinegar if desired.
Notes
Why I Prefer Dry Cure
After testing both methods multiple times, I found dry curing works better for mackerel. Compared to wet brine, it gives: firmer texture, cleaner flavor, less mushiness, has lower spoilage risk and it’s easier to control. Because mackerel is a fatty fish, it spoils faster than lean fish and benefits from a stronger, more controlled cure.Wet Brine Alternative
If you prefer a softer, more traditional seledka-like texture, try wet brining instead. Mix:- 1 liter filtered water
- 3.5-4 tbsp sea salt (~60g)
- 1 bay leaf
- 1 tsp peppercorns
- optional coriander seeds
- 24–48 hours for pieces
- maybe up to 72 h max if very fresh and fridge is cold
Wet brine: 2–4 days
Nutrition
The information shown is an estimate provided by an online nutrition calculator.
More Fermented Recipes

©HealthyTasteOfLife. Content and photographs are copyright protected and need prior permission to use. Copying and/or pasting full recipes to other websites and any social media is strictly prohibited. Sharing and using the link of this recipe is both encouraged and appreciated!




This dry salt method is what I was looking for, just like my mother used to make it at home.
Does it keep longer than a week?
Not usually. Since this recipe uses a relatively light cure, I recommend eating it within 3–5 days (wet brine) or 5–7 days (dry cure) for best quality.
If the fish was extremely fresh and stored very cold, dry-cured mackerel may last up to 7–10 days, but because mackerel is a fatty fish, it can develop off flavors quickly from oxidation.