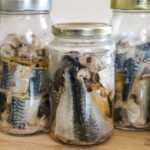
Homemade Mackerel in Jars (Oven-Cooked or Pressure Canned)
This mackerel in jars recipe makes tender, flavorful fish cooked in its own natural juices with sea salt, bay leaf and black pepper. Use the slow oven method when you want freezer mackerel for later, or follow the full pressure canned mackerel method for safe, long-term pantry storage. It is a practical way to preserve fresh mackerel, especially when working with freshly caught fish.
Servings 12 about 4–5 oz cooked mackerel
Equipment
- For the oven method:
- For pressure canning:
Ingredients
For the Oven-Cooked Mackerel
- 10 -12 medium fresh mackerel cleaned
- ½ teaspoon sea salt or to taste
- 1 tablespoon vinegar or to taste
- ½ tablespoon olive oil or to taste
- Whole black peppercorns a few per jar
- 1 dried bay leaf per jar
For Pressure-Canned Mackerel
- 10 –12 medium fresh mackerel cleaned
- Sea salt optional, up to 1/2 teaspoon per pint jar
- A few whole black peppercorns per jar optional
- 1 small dried bay leaf per jar optional
Instructions
Prepare the Mackerel
- Remove the heads, tails, fins and internal organs from the mackerel. Clean the cavity thoroughly and rinse away any remaining blood.
- Cut the fish crosswise into pieces about 1 ½ to 2 inches long, adjusting the size so the pieces fit comfortably into the jars.
- Keep the cleaned fish cold while you work through the rest of the batch. From here, follow either the oven method or the pressure-canning method.
Method 1: Slow Oven-Cooked Mackerel in Jars
- This is the original way I prepare this recipe. The fish is seasoned before packing and slowly cooks in its own juices. I use this version when I want ready-to-eat mackerel that can be refrigerated for a few days or frozen in convenient portions.
If your only goal is to preserve fresh mackerel for later cooking, you can simply clean, portion and freeze the fish raw instead. Cooking it first is useful when you want all the work done ahead of time so you can thaw a jar and eat the fish without cooking it again.
Season the Fish
- Arrange the cut mackerel pieces in a single layer on a large platter or tray.
- Sprinkle with: sea salt, vinegar, and olive oil to taste. This is how I usually prepare the mackerel rather than measuring the vinegar, oil and salt separately into every jar.
Pack the Jars
- Pack the seasoned pieces vertically into the jars. Leave approximately 1 inch of space at the top. These 16 Oz Glass Food Jars with Metal Lug Lids are perfect for this.
- Add a few whole peppercorns and 1 bay leaf to each jar.
- Do not add water or broth. The mackerel releases plenty of its own natural juices while cooking.
Use Whatever Jar Size Fits
For this oven version, I often use several jar sizes in the same batch depending on what I have available and which jars best fit the fish. I have used jars ranging from approximately 7 ounces to 25 ounces. Smaller jars will naturally heat more quickly than large, densely packed jars. Because this version is treated as cooked fish rather than shelf-stable canned fish, the jars do not all need to be the same size for canning purposes. If you plan to freeze the fish in the same jars, make sure they are freezer-safe.
Start With a Cold Oven
- Do not preheat the oven. Place the filled jars upright on a heavy baking sheet or roasting pan, leaving some space between them.
- Cover the jars loosely. Do not tightly seal the jars before cooking.
- Put the tray of jars into the cold oven, then turn the oven to: 250°F (121°C). Start counting the cooking time when you turn the oven on.
Starting in a cold oven allows the glass and fish to heat gradually rather than exposing cold jars immediately to high heat.
Slow Cook for 3 Hours
- Cook for approximately 3 hours at 250°F.
- As the mackerel cooks, it will release its own juices. During the later part of cooking, you should see liquid collecting and gently bubbling around the fish.
Cool and Store
- After cooking, remove the tray carefully and allow the jars to cool briefly.
- Do not leave the cooked fish at room temperature for many hours. Refrigerate within 2 hours for up to 3–4 days. Or for a large batch, freezing is much more practical (freeze for about 3 months.) Thaw one portion overnight in the refrigerator when needed.
The advantage of freezing the fish after cooking is convenience: it is already seasoned, tender and ready to eat after thawing.
Method 2: Pressure-Canned Mackerel for Pantry Storage
- If your main goal is to preserve fresh mackerel for long-term shelf storage, pressure canning is the best method. To keep this version close to the tested fish-canning method, do not coat the fish with vinegar or olive oil before pressure canning.
Prepare the Fish
- Clean and cut the mackerel exactly as described above. You can arrange the pieces on the platter while you work, but do not coat them with vinegar or oil. Salt is optional.
Use Pint Mason Jars
- For pressure canned mackerel, use standard: 16-ounce pint Mason jars (tested pressure-canning).
Do not use the larger jars from the oven method for this pressure-canning process. Smaller jars may be used, but they still need the full processing time specified for pints. Do not shorten the processing time because the jar is smaller.
Pack the Mackerel
- Pack the raw mackerel pieces vertically into the pint jars. Leave a full 1 inch of headspace.
- If desired, add: up to ½ teaspoon sea salt per pint, a few black peppercorns and 1 dried bay leaf. Do not add anything else. The fish will release its own juices as it processes.
Clean the Jar Rims
- Because mackerel is naturally oily, wipe the jar rims. A paper towel lightly dampened with vinegar can help remove any fish oil from the rim.
- Place the lids on the jars and tighten the bands fingertip-tight. Do not overtighten them.
Prepare the Pressure Canner
- Place the rack inside the pressure canner. You can use a 16-quart pressure canner for this recipe.
- Add the amount of water recommended by the manufacturer of your specific pressure canner.
- Place the jars upright on the rack. Lock the canner lid into place, leaving the steam vent open.
Because fish has a long processing time, make sure there is enough water in the canner to complete the process without running dry.
Vent for 10 Minutes
- Heat the canner until a strong, continuous stream of steam comes from the open vent.
- Once you have steady steam, allow the canner to vent for a full: 10 minutes. Then close the vent or place the pressure regulator on the canner.
Bring to the Correct Pressure
- Allow the canner to reach the pressure required for your elevation.
- Only when the correct pressure has been reached should you begin the 100-minute processing time. See more details in the notes below.
Process for 100 Minutes
- Process the pint jars for: 100 minutes. Try to keep the pressure steady. Big changes in pressure can make liquid leak out of the jars and may affect proper processing.
If the pressure drops below the required level during processing, bring the canner back to the correct pressure and restart the full processing time.
Let the Pressure Come Down Naturally
- After the 100 minutes are complete, turn off the heat. Allow the canner to return to zero pressure on its own.Open it away from your face so the escaping steam moves away from you.
Do not: Once the canner has completely depressurized, remove the regulator or open the vent according to your manufacturer's instructions. Wait about 10 minutes before opening the lid.
Cool the Jars
- Lift the jars straight up and place them several inches apart on a thick towel or cooling rack.Do not retighten the bands. Allow the jars to sit undisturbed for 12–24 hours.
Once completely cool: For best quality, use your homemade canned mackerel within about 1 year.
Notes
The oven method and pressure-canning method serve different purposes.
Slow-cook and freeze the fish if you want ready-to-eat portions. Freeze it raw if you want maximum flexibility later. Pressure can it if you want long-term pantry storage. Is the oven method shelf-stable? Current USDA/National Center for Home Food Preservation guidance does not recognize oven processing as a validated method for making low-acid foods such as fish shelf-stable. This is a traditional method that my family and I have personally used, but when sharing the recipe publicly I recommend refrigerating or freezing the oven version rather than storing it at room temperature. For pantry storage, use the pressure-canning method. The fish does not need added water.
Mackerel produces plenty of its own juices during cooking and pressure processing. Different jar sizes are fine for the oven version.
I have personally used jars from about 7 to 25 ounces in the same batch. This flexibility applies because that version will be refrigerated or frozen rather than treated as shelf-stable canned food. Pressure canning requires more precise jar sizing.
Use 16-ounce pint Mason jars for the tested mackerel process. Smaller jars still receive the full pint processing time; do not use jars larger than a pint. Why isn't the olive oil added before pressure canning?
Added fat can change the way heat moves through canned food. Since the established raw-pack mackerel method uses no added liquid or oil, I leave the olive oil out during processing and add it after opening. Do not confuse a pressure canner with a water-bath canner.
Fish requires a true pressure canner designed for low-acid foods. A regular water-bath canner, stockpot or small pressure cooker is not the same equipment.
Slow-cook and freeze the fish if you want ready-to-eat portions. Freeze it raw if you want maximum flexibility later. Pressure can it if you want long-term pantry storage. Is the oven method shelf-stable? Current USDA/National Center for Home Food Preservation guidance does not recognize oven processing as a validated method for making low-acid foods such as fish shelf-stable. This is a traditional method that my family and I have personally used, but when sharing the recipe publicly I recommend refrigerating or freezing the oven version rather than storing it at room temperature. For pantry storage, use the pressure-canning method. The fish does not need added water.
Mackerel produces plenty of its own juices during cooking and pressure processing. Different jar sizes are fine for the oven version.
I have personally used jars from about 7 to 25 ounces in the same batch. This flexibility applies because that version will be refrigerated or frozen rather than treated as shelf-stable canned food. Pressure canning requires more precise jar sizing.
Use 16-ounce pint Mason jars for the tested mackerel process. Smaller jars still receive the full pint processing time; do not use jars larger than a pint. Why isn't the olive oil added before pressure canning?
Added fat can change the way heat moves through canned food. Since the established raw-pack mackerel method uses no added liquid or oil, I leave the olive oil out during processing and add it after opening. Do not confuse a pressure canner with a water-bath canner.
Fish requires a true pressure canner designed for low-acid foods. A regular water-bath canner, stockpot or small pressure cooker is not the same equipment.
