Gluten Free Sourdough Starter (Build, Maintain, Troubleshooting)
A simple gluten-free sourdough starter built with brown rice flour, filtered water, and a gluten-free culture. Includes feeding ratio, ideal temperature, and fixes for not bubbling, hooch, and watery starter - troubleshooting. Also make sure to see the how-to video.
Servings 2 cups (480 g)
Calories 120kcal
Ingredients
- brown rice flour organic (see blog post fore more info)
- filtered water room / lukewarm temperature
- gluten free sourdough culture you can use any brand, see notes below
Instructions
Day 1: Activate
- In a 2qt jar combine 1 tablespoon of brown rice flour and 1 tablespoon of filtered lukewarm water, and add the packet of sourdough culture, stir well to incorporate (pancake-batter thick).You might need to add another 1-2 tsp of water, if it feels too thick to mix. Cover loosely with a cloth secured with a rubber band and let it sit at room temperature (75-80°F is ideal) for 24 hours. Cover the jar with a towel if your kitchen is really sunny during the day.
Day 2: First Feed
- Feed the starter with 2 more Tbsp of flour and 2 Tbsp of water, stir. Mix to the same batter consistency. Ferment 18–24 h.
Day 3: Keep Going
- After 24 hours, if there's no bubbles yet (a cold kitchen could be the cause) but still feed 4 Tbsp flour + 4 Tbsp water (even if bubbles are minimal). Ferment ~24 h.
Day 4: Activity Starts
- After only 18 hours you could see really tiny bubbles and feel a mildly acidic smell (it’s a sign the starter is hungry), in this case, feed it again with 1/2 cup flour + 1/2 cup water. As the starter is getting hungrier and growing, you'll notice that the time between feedings will shorten too. Start checking every ~12 h; as activity speeds up, feed a bit more often.
Day 5: Build Strength
- This time after only 14 hours you could notice more bubbles and more activity (fermentation). Feed 1 cup flour + 1 cup water. Look for a puffed, bubbly surface.
Day 6: If Hooch Appears
- After 12-14 hours, the starter developed more bubbles abut it also had some liquid accumulated on top plus a strong acidic smell. This usually means the starter is stressed and it needs more food and fed more often. I couldn’t wake up in the middle of the night to feed it. In this situation discarding will revive the starter: first get rid of the liquid, and then discard (move to another jar) most of the starter and leave only about 3-4 Tbsps. Feed it with 2 Tbsp flour + 2 Tbsp of water. Keep warm.
Day 7: Shorter Intervals
- Just like at the beginning after about 12-18 hours it started to develop small bubbles. Feed ¼ cup flour + ¼ cup water.If activity surges again later the same day, feed ½ cup + ½ cup (about 6–8 h apart). A turned-off oven (just warm, not hot) works well as a cozy spot.
Day 8: Scale Up
- When very active, discard half (about 1 cup was left), then feed 1 cup flour + 1 cup water (aiming for a 1:1:1 ratio by volume). Next feeding ideally would be after 4-5 hours.
Day 9: Ready Check
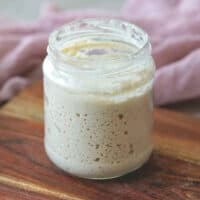
- After 8 hours: the next feeding was supposed to be during the night and I didn’t bother waking up, and by the morning it started to show signs of deflating again. Less activity, but still: a lot of bubbles and no sign of liquid on top.If it rises fast and begins to deflate between feeds, discard to ~1½ cups, then feed 1½ cups flour + 1½ cups water.Same Day: After only 4-5 hours the starter doubled in size, it looked puffed up and very bubbly.Ready to bake when it doubles to triples within 4–5 h, shows a domed top with tight, even bubbles, and then just begins to fall. Use at peak.
Ongoing Care
- Maintain about 1:1:1 (starter:flour:water) by volume or by weight: 50 g starter + 50 g brown rice flour + 50 g water (100% hydration).; discard before feeding to keep amounts manageable.
Video
If the video is not showing, please disable your ad-blocker to see it.
Notes
Rapid fixes (use anywhere in the process):
- Not bubbling / not rising: Warm to 75–80°F, discard to 2–4 Tbsp, then feed 1:1:1; wait for a full rise-and-fall before the next feed.
- Use lukewarm filtered water ~85–90°F (29–32°C) when sluggish
- Runny/watery: Discard most; feed 1:1:1 and keep warmer to rebuild structure.
- Alcohol/cheesy smell: Feed more frequently; discard if you ever see pink/orange streaks or fuzzy mold.
- The time between feedings: should be 12 to 24 hours not longer for the first 2-4 days and between 4 to 8 hours after.
Storing
- If you’re continuing to use and feed the starter daily, just keep it in its original jar. If you decide it is time to take a break for 3-4 days, transfer it to a sealable jar, mix the starter to a slightly stiffer consistency and keep it in a few degrees colder environment. The reduced hydration will slow fermentation activity.
- If you’re planning to bake once a week, store in the refrigerator. Feed it (once or twice, it depends how quickly it gets active) the day before you will bake (or at least 5 hours in advance).
- For long-term sourdough starter storage (2 week and longer), see blog post.
Don't Throw The Discarded Sourdough Starter
Each time you discard (you will need to do that quite often) gather in a separate jar and keep it the fridge up to 2-3 weeks. Use it in recipes like pancakes, tortillas, crackers, English muffins etc.Nutrition
Calories: 120kcal
