Gluten-Free Sourdough Bread For Thin Slices And Toast (No Yeast, No Gums)
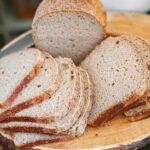
This gluten-free sourdough bread is easy to make, beginner-friendly, and perfect for thin slices and toast. Made with simple whole-food ingredients, no commercial yeast, no xanthan gum, and no store-bought flour blends, this loaf has a cohesive, flexible crumb that slices beautifully without crumbling. Great for toast, open-faced sandwiches, and everyday use.
Servings 1 loaf (~14 slices)
Calories 125kcal
Ingredients
Wet Ingredients
- 1½ cups water
- 4 tbsp flax seeds ground (I used golden color)
- 2½ tbsp psyllium husk
- 1 egg
- 1 tbsp apple cider vinegar
- 2 -3 tbsp avocado oil or other neutral oil
- 1 tbsp honey optional
Other + Dry Ingredients
- 1 cup active gluten-free sourdough starter 100% hydration, sorghum-based
- 1 cup rice flour
- 1 cup buckwheat flour
- ½ cup arrowroot flour
- 1-1½ tsp sea salt
Instructions
Prepare the loaf pan
- Preheat oven to 400°F (200°C).
- Line an 8 x 4.5 inch loaf pan with parchment paper or use a non-stick ceramic loaf pan. A 9 x 5 inch pan also works, though the loaf will be slightly shorter.
- In a large bowl, combine: water, ground flax seeds, psyllium husk, egg, apple cider vinegar, oil, honey (if using). Mix until smooth and homogeneous.
- Let sit for 1–2 minutes so the psyllium and flax begin absorbing moisture.
Add the starter and dry ingredients
- Add: the active sourdough starter, mix it a bit and then add the rest: rice flour, buckwheat flour, arrowroot flour and salt.
- Mix using a spatula or your hand until fully combined. You can also use a dough mixer to save manual effort.
For best results, use a very active sourdough starter that has at least doubled in volume and looks bubbly throughout. A weak or underfed starter may lead to: poor rise, dense crumb, gummy texture, less sourdough flavor.
The dough should resemble a very thick wet bread dough, not pourable, but soft and a bit sticky.
Ferment the dough
- Transfer dough into the prepared loaf pan. Smooth the top with a wet spatula.
- Cover to prevent drying and let ferment at room temperature for 4–5 hours, depending on kitchen temperature, until risen and airy.
The loaf is ready to bake when: the surface looks puffed and the dough feels lighter and less dense.Don’t wait for it to double like wheat bread, gluten-free sourdough usually rises less.
Bake covered
- Cover loosely with foil. Bake for 20-25 minutes at 400°F.
Spray the inside of the foil with water before covering. This helps create steam, improves oven spring, and reduces cracking.
Bake uncovered
- Reduce oven temperature to 370°F (~185°C). Remove foil.
- Bake for another 35-40 minutes, or until the loaf is firm and the crust is slightly golden.
Cool completely
- Remove from pan, cover with a towel, this traps steam and creates a softer crust.I let it cool slowly and completely till next day.
For the cleanest thin slices, slice the next day. I usually slice this loaf into ¼ inch slices, which works especially well for toast and open-faced sandwiches.
Notes
Texture
This is not a fluffy white sandwich loaf. Expect a crumb that is: cohesive, flexible, slightly chewy, moist but not wet, moderately dense without feeling heavy. The biggest advantage is that it slices thin without crumbling, making it excellent for toast and open-faced sandwiches.Storage
- Store covered at room temperature for 1–2 days.
- Refrigerate up to 5 days.
- For longer storage, slice and freeze.
- Toast slices directly from frozen if desired.
Substitutions
- Arrowroot may be replaced with tapioca starch (texture may vary)
- Honey can be omitted
- Avocado oil can be replaced with olive oil or melted butter/ghee
- If you have a rice-based starter, use that instead, and replace the rice flour with sorghum flour in the recipe.
Nutrition
Serving: 1slice | Calories: 125kcal | Carbohydrates: 18g | Protein: 3g | Fat: 4.5g | Fiber: 3g | Sugar: 1.5g
