Teff & Buckwheat Sourdough Bread | Gluten Free Pumpernickel Bread Recipe
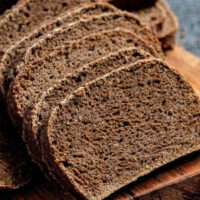
This teff and buckwheat sourdough bread has similar flavor and texture of a pumpernickel bread making it the most flavorful vegan gluten free sourdough sandwich bread that you can possible make. It’s a hearty vegan, gluten free loaf made with whole grain flours like buckwheat flour, teff flour, seeds and a rice flour based gluten free sourdough starter.
Servings 20 slices
Calories 115kcal
Ingredients
For Sourdough Starter Activation
- 1 cup gluten free sourdough starter (previously made and refrigerated)
- 1/3 cup brown rice flour
- 1/4 cup filtered water (add 1 to 2 tbsp more if it's too thick)
For The Dough:
- 1½ cup buckwheat flour
- 2/3 cup teff flour
- 1/2 cup flax meal (ground golden flax seeds)
- 2 tbsp sunflower seeds (ground like flour)
- 2 tbsp pumpkin seeds (ground like flour)
- 2 tbsp psyllium husk not powder
- 2 tbsp caraway seeds (ground like flour)
- 1 tbsp coriander seeds (ground like flour)
- 2 tbsp maple sugar or coconut sugar
- 1½ tbsp pink Himalayan salt or 1.5 tsp sea salt
- 2½ cups filtered water (+2 or 3 tbsp more if it's too thick)
- 2 tbsp cacao powder (optional - for a more dark color) or carob powder
Instructions
- Prepare all the seeds and grind them with an electric coffee grinder.
Step 1. Activate The Gluten Free Sourdough Starter:
- If you just bought your dehydrated gluten free sourdough starter, then read the instructions on how to activate in the booklet that comes with it. If you don't have a starter, read how to make your own in this post.Once the starter is active (is bubbling regularly within a day of feeding) take the amount of starter you need (1 cup) and place it in a large bowl. The rest feed it and place it (back) in the fridge.
- Then to the gluten free starter add 1/3 cup of brown rice flour and 1/4 cup of water. Mix well. This step will activate the cold dormant starter that you just took out of the fridge.
- If your starter is thin and watery, use less water. Let the mixture sit in a warm (not hot) place for 3-4 hours until is light and bubbly. If it's cold in your house - then it might take 5-6 hours.
Step 2. Form The Dough:
- Once the starter is ready and active (you can see when a starter has peaked because it will have a dome-shape on top and will have air pockets inside) add the water and psyllium husk. Mix to combine. The psyllium will expand in the water, while you sift the rest of flours.
- Then to the same bowl add the flours (through a sieve). Mix everything to combine. The dough should look like a very thick pancake batter or like a brownie batter. No kneading is required.
Bread Proofing:
- Prepare the baking pan by lining it with parchment paper, it will prevent sticking. I’m using an extendable baking tin. It has no bottom so it’s easy to remove while baking. It extends in and out easily.
- Scrape the dough into the pan and smooth it out. Sprinkle with some caraway seeds on top.
- Cover with a plastic wrap or a towel to seal moisture and let it rise in a warm place approximately 4-5 hours (it might take an hour or two longer during winter). It depends on how warm is your kitchen. If your place is cold it might need longer than that.
Step 4. Bake The Bread:
- Preheat oven at 425 degrees F (220 C). Once ready to bake, remove the wrap, cover with an aluminum foil to seal moisture (without touching it), turn the temperature down to 380 F (200 C) and bake for 30 minutes.
- Then remove the foil. At this time you can also remove the baking tin (for an even baking on all sides) and bake for another 40-50 minutes until it’s not soft to the touch anymore.
- Allow to cool completely before handling or slicing! The longer the better. I usually slice it the next day and freeze it.
Video
If the video is not showing, you might need to disable your add blocker.
Notes
Tips For Making Gluten Free Pumpernickel Bread
- To measure the flours I scoop the flour into the measuring cup then tap the cup once and then I use the back of a knife to level off the top. Do not dip the measuring cup into the flour, you'll get more than you need.
- Sifting the flours will clear out any lumps and bring more air into the dough.
- The finished batter before baking should have the consistency of a thick pancake batter, I found the best results to be achieved when it looks like a thick oatmeal porridge. But be careful if it's too thick it will not rise much. If it's too thin it will not bake evenly in the middle, the texture will be more gummy.
- To store for longer periods of time (use your freezer), slice the entire bread and place the slices in a plastic bag in the freezer for up to 4 months.
- To defrost just throw some slices in your toaster whenever you want a sandwich.
- Or if you anticipate to eat the bread within 3-4 days, store it at room temperature in a sealed container.
Nutrition
Serving: 1slice | Calories: 115kcal | Carbohydrates: 19g | Protein: 3.6g | Fat: 2.7g | Sodium: 125.5mg | Potassium: 123mg | Fiber: 4.3g | Sugar: 1g | Vitamin A: 0.1IU | Vitamin C: 0.3mg | Calcium: 2.2mg | Iron: 6.1mg